
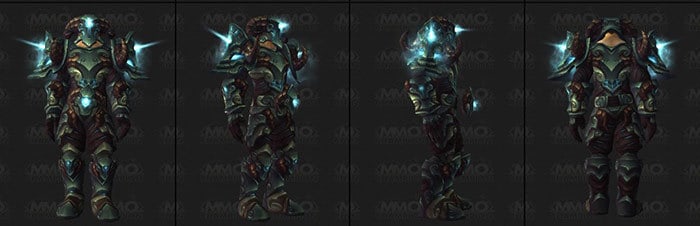
I’m a pretty lucky girl. Only a few days after I’ve got my commission request for the Wizard from Intel and Newegg.com both of these companies were that impressed with my previous work that I even got a further project. The request was to create something cool, something glowing and something armor like from the current content of World of Warcraft. After some emails with my costumer we both agreed that an armor from the new Tier 16 armor sets would look great, especially one of the Deathknights. The only problem however was: I wanted to build it in a sexy and appealing way, which I haven’t had a reference for. In addition the goal was to transport the previous Wizard costume AND the upcoming Deathknight costume in one and the same suitcase.
So… challenge accepted!
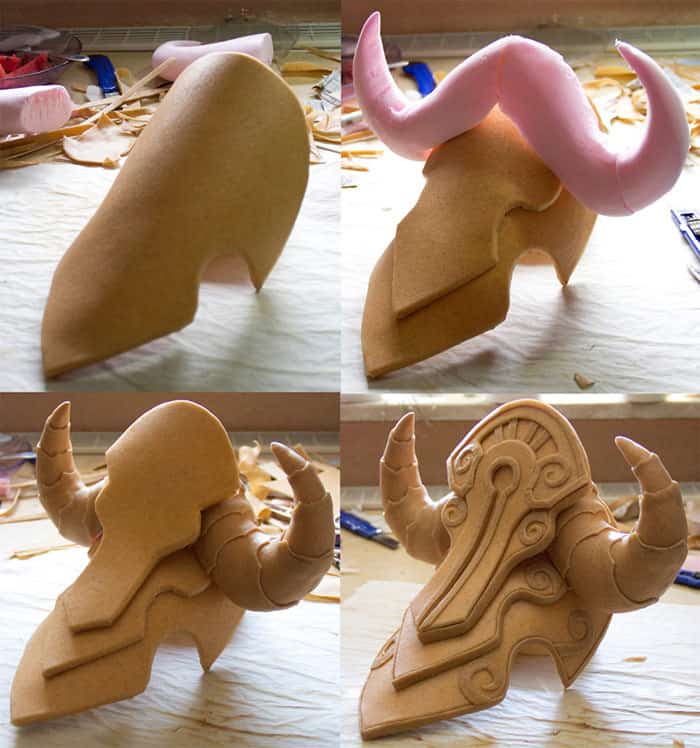
But let us start with the beginning and my almost non usable reference: The communication with my customer was just this: I’m not able to tell you how the final costume will look like since I don’t have any reference I can show you, but just trust me. I promise you’ll get a cool costume at the end. And well, luckily they trusted me! So I’ve began with crafting and like in so many of my projects with the hardest part: The pauldrons. In fact it was anything but easy to create them. The first difficulty was their complexity in comparison to my limited palette of available materials. If I would have the choice, I would clearly sculpt them out of clay, mold and cast them. In reality however the materials for that step are not only very expensive, but the work with them takes also a lot of time. But I had only three weeks to finish this costume – well… or let me say 1.5 weeks since I was crazy enough to start with a second project parallel to this commission. But this is a story I still have to tell you another time.
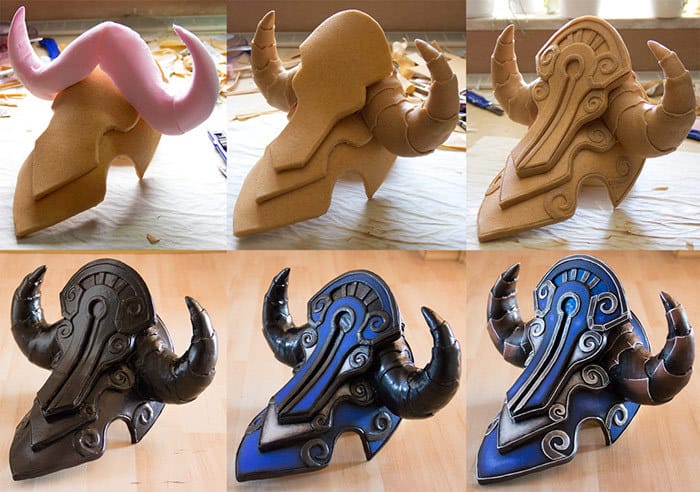
But back to the topic! After experimenting a bit with different constructions I decided to create the thick base pieces of the pauldron with several layers of craft foam inside of a Worbla sandwich. So instead of working with only one sheet of craft foam I glued three layers together and covered these pieces on both sides with the thermoplastic cookie dough. For the horns I tried to find a solution with pink insulation foam which I’ve carved and sanded into the right shape and then covered it with Worbla. The final details after that were just child’s play.
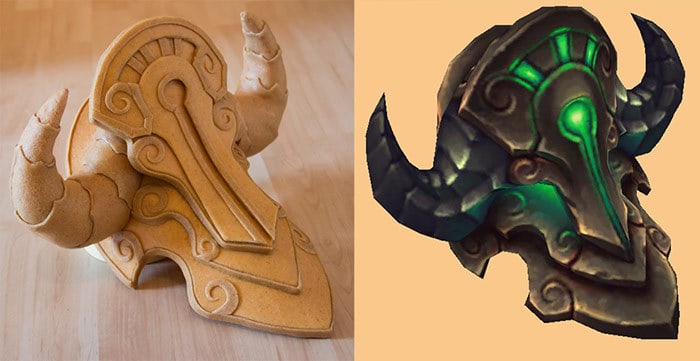
After a look at my reference I was pretty satisfied with my work at the end. Yeah, it was not perfect, but the result was durable, solid and didn’t have some crazy material costs for modeling clay, silicone and resin. It was already pretty lightweight and I was sure that this thing would survive the trip inside a suitcase from Germany to California.
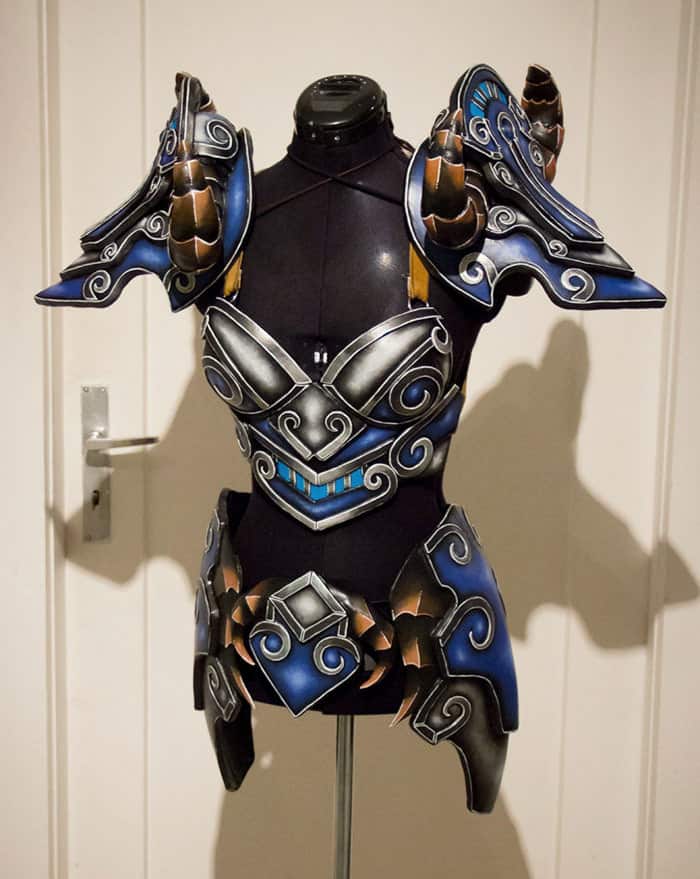
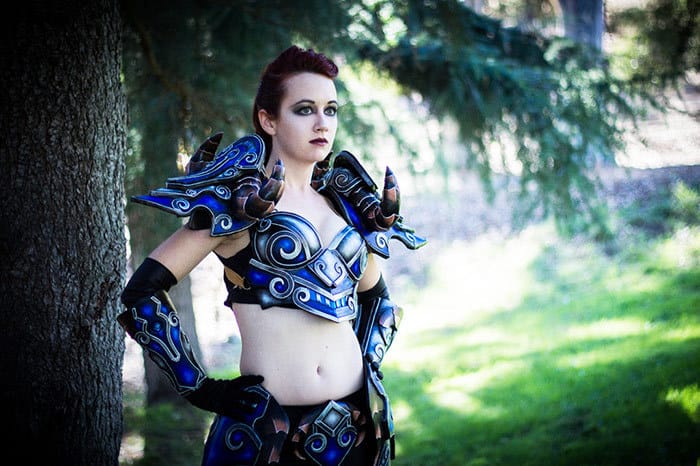
When it was time for the breastplate my own fantasy and imagination was necessary. The goal was to create something cool and sexy but also with at least a small connection the the original reference of the Deathknight Tier 16 armor. The result was… – well, if you take a closer look at it – a smiling boob-face!
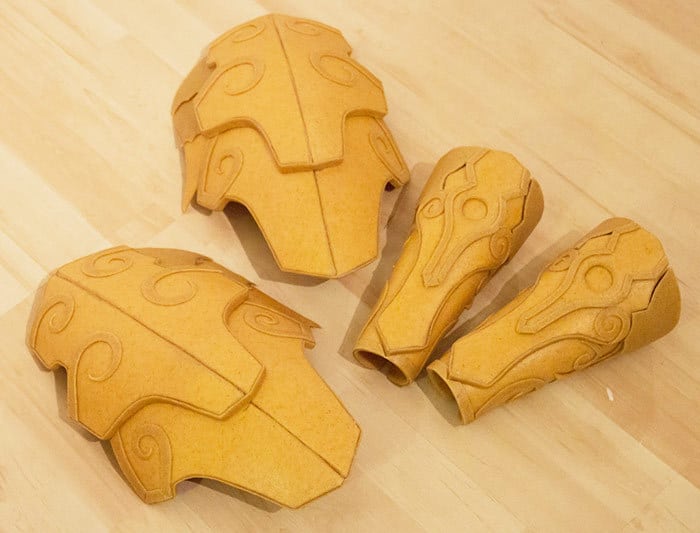
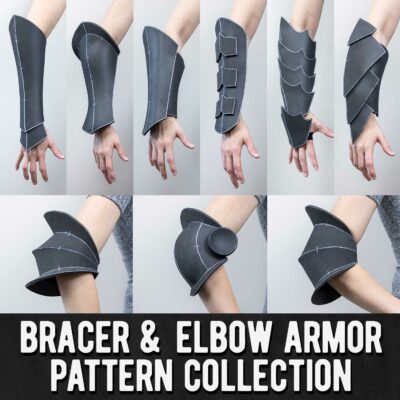
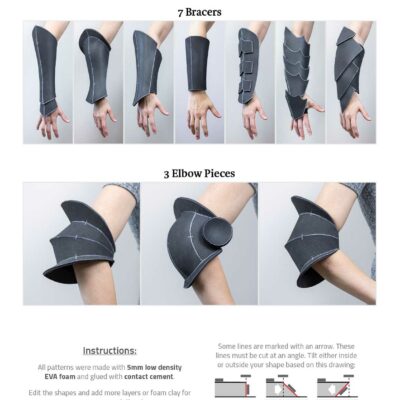
The same level of design was also necessary for the hip parts and the bracers. My reference didn’t show me that much detail and so the sculpt was very simple but still pretty massive. The base of these pieces were sandwich pieces with at least two sheets of craft foam inside. The final paint look however should be able to give these pieces the shine and quality I’ve had in mind since the beginning of the project.
Since the Deathknight was just one of two commission for two girls at Blizzcon, I tried to create both costumes in a matching design. So I decided to adjust the colors and repeat the combination of silver and blue I already used for the Wizard. Like always the paint was completely applied by hand with brushes and acrylics like I’ve explained in my painting book.
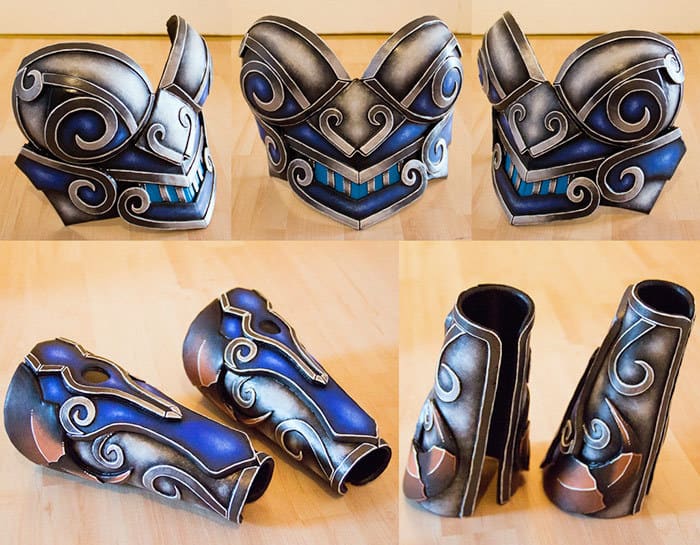
The colors for the paint job were pretty simple: Black as a basic paint with blue, silver and brown on the top. Additional lights were added with pure white or a mix of these colors.
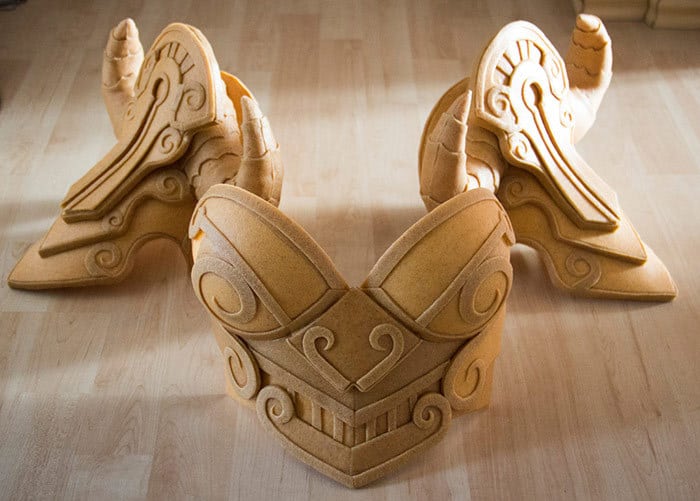
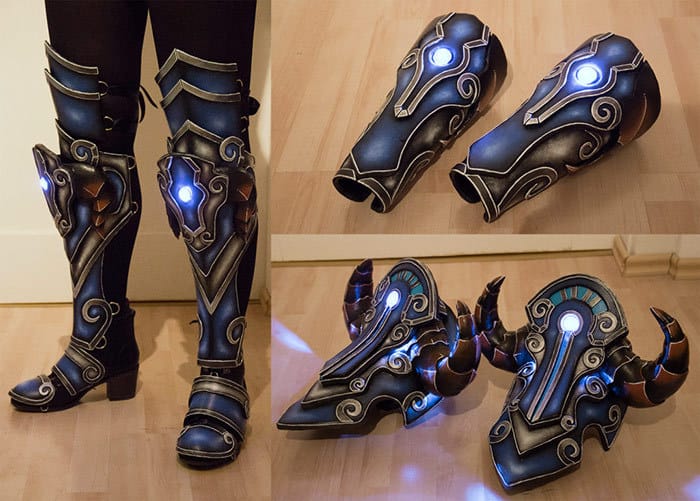
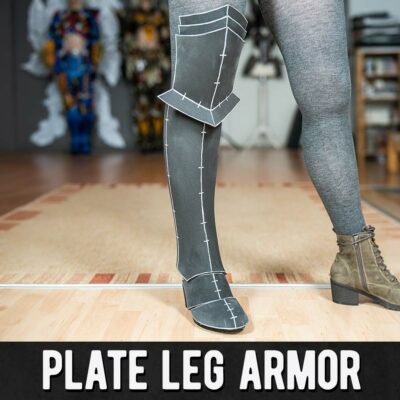
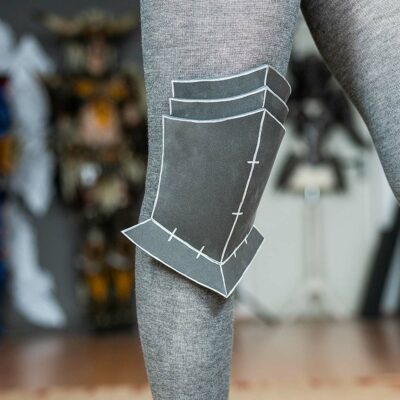
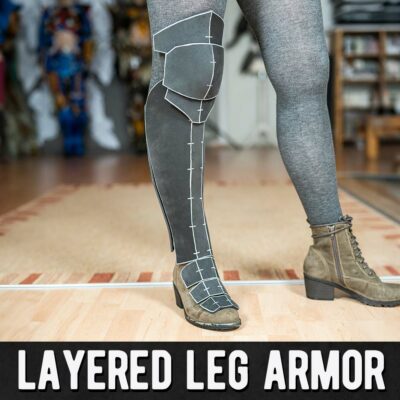
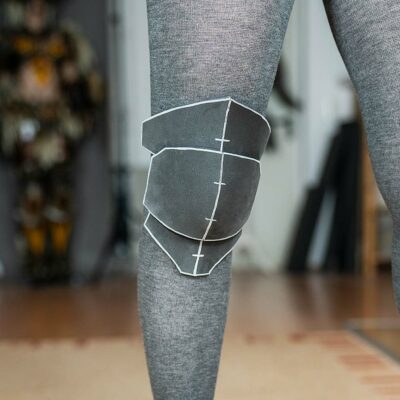
As you can see even the pretty big and massive shin armor pieces had a very simple base. Once I created the pattern for this part, I had just to build up everything else. To create the necessary thickness I used at least two layers of craft foam inside of every layer. The core of the horns was carved out of EVA foam with an dremel and then covered with several layers of EVA foam. In total it took around four hours to built one shin armor.
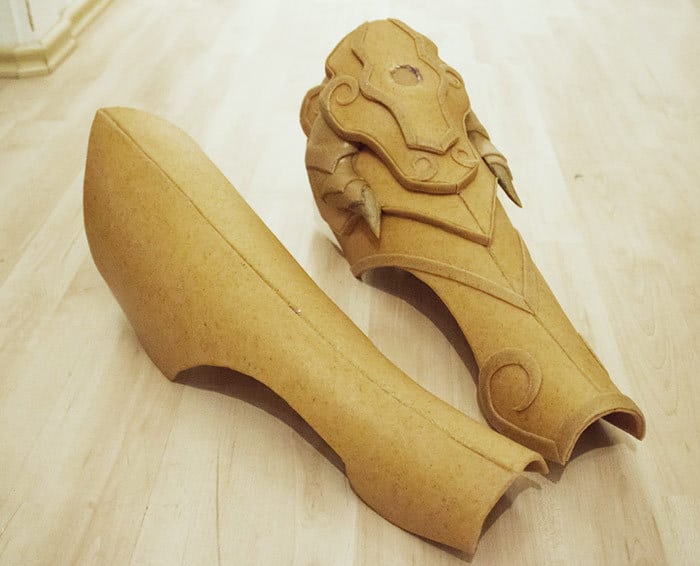
The coming paint job cost me around 10 hours for each piece. But especially the priming with wood glue takes some time. But since Worbla has a rough surface, this step it not only necessary, but is also also one of the most important points to get a clean, shiny costume at the end.
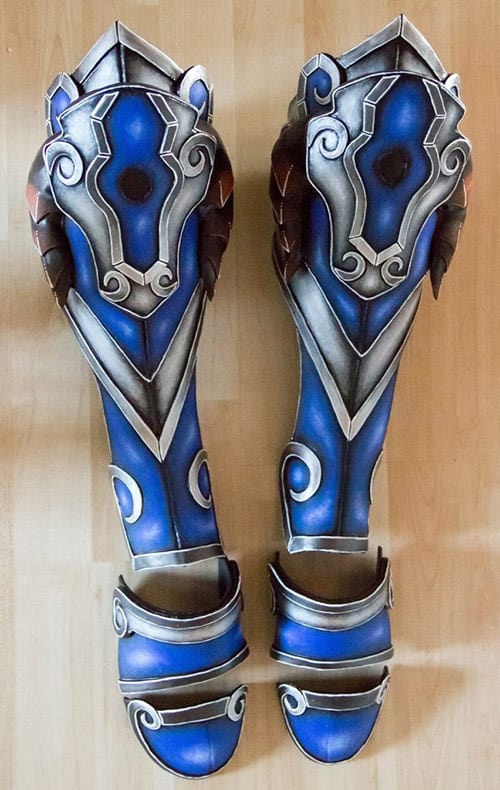
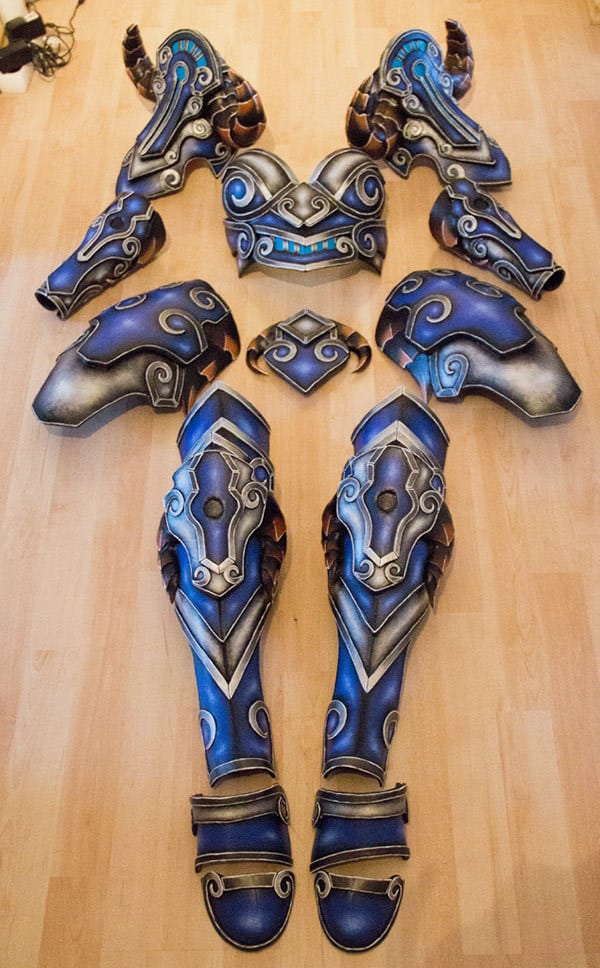
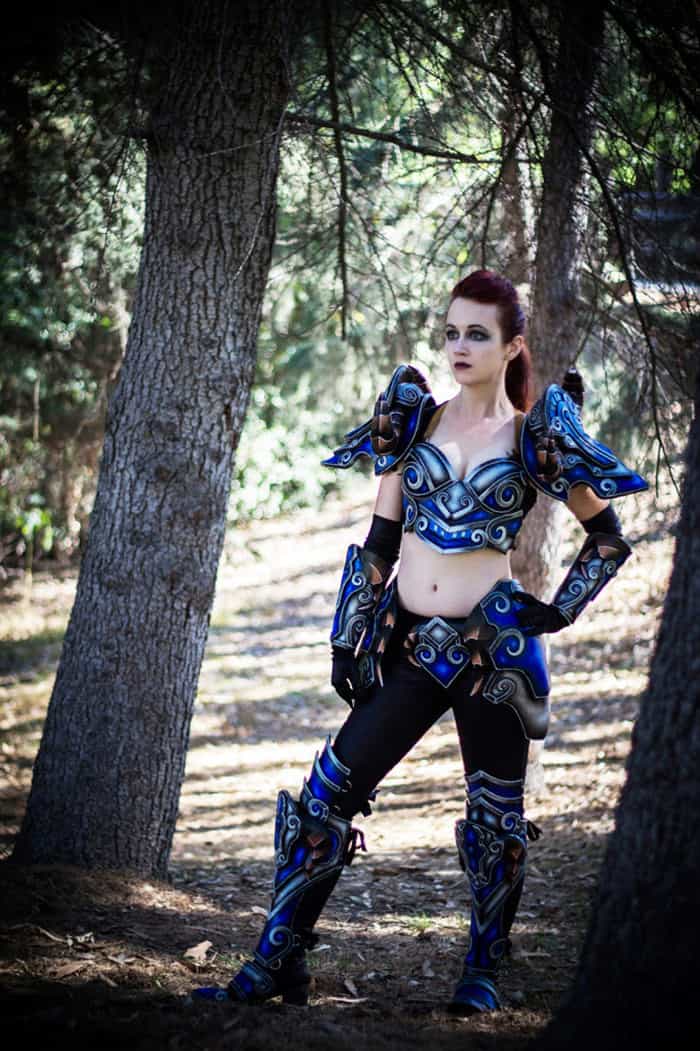
The final armor then was pretty small and simple compared to the original reference and may be a bit disappointing. The reasons for these design choices were however pretty clear: It was necessary to transport both costumes, the Deathknight and the Wizard plus a staff, in only one suitcase and so the size of the costume was very limited. In addition both of my models had to wear these costumes for two full days at Blizzcon 2013 and it was important to create them two comfortable, not too heavy costumes which allowed them enough flexibility. For me it was important everybody on my costumers side were satisfied with the final result and I just didn’t want to let them “suffer” more in their costumes then necessary without compromising the detailed look.
So the armor turned out pretty small, but it still took a lot of space in my suitcase!
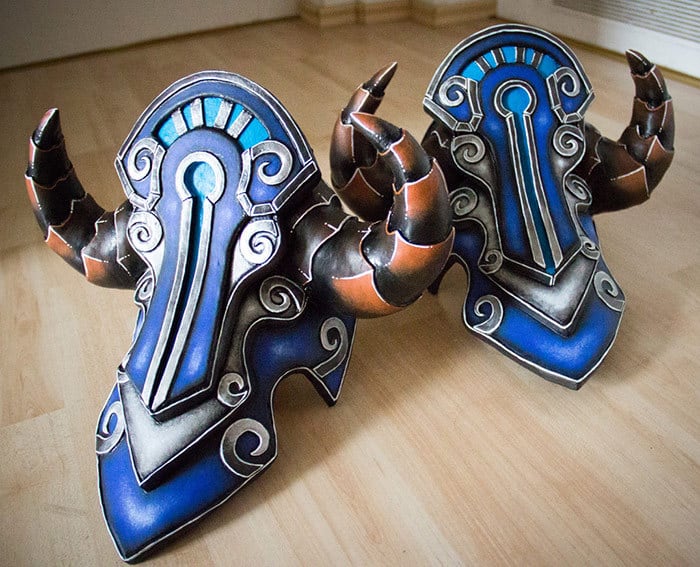
The last details that were missing were just a few cool lights. I didn’t installed that much since my reference didn’t allowed me more effects and time ran out pretty fast, but the costume still got a pretty cool look at the end. If you want to see how I managed to build and install these lights, just check out my LED video tutorial on Youtube!
Well, and then the costume was done! Pretty much in the last minutes before I had to pack my suitcases I soldered the final circuit. Then it was time to pack all costumes, hope not to forget something and just run to the airport! A side note: Originally I planned three weeks for this project which is my average time for a full armor set. At the end however I got a wonderful cosplay idea from my good friend Yaya Han and decided to finish this new project AND the Deathknight in only three weeks. So basically I had only 1.5 weeks for this commission and it was clearly one of the most crazy weeks in my life!
When we arrived in Los Angeles some hours later, it was time for the fitting. In fact I built both costumes just with a few measurements and photos as reference. Any costume designer knows how crazy this is! Usually when I’m working on my own projects I do fitting tests the whole time and basically just sit there in my underwear in my workshop since it doesn’t make any sense to put clothes on and off the whole day. This time however I was able to do it with just one fitting after the costumes were already done!
So… I drove to Newegg’s headquarter, met the lovely girls I created the costumes for, for the first time and just HOPED that everything would work how I planned. Or at least fit how I had it in mind. Some adjustments with the heat gun and some hours later however we really managed it. Jennifer and Joanne were dressed up and looked just awesome! I was incredible proud and tried to hide the nervosity I had before the whole time. Then however the stress and the pressure I collected over the weeks just fell off and I just smiled. Minutes later I already got my first interview about the project, ha ha!

By loading the video, you agree to YouTube's privacy policy.
Learn more
And then also followed the first little photo-shoot!
Then it was time for the big finale: Blizzcon! It was just a huge awesome event, for me and also for my customer. Jennifer and Joanne really enjoyed their new outfits and were the highlight at their booth. I have no idea how many countless people took photos of them or with them, but they got a lot of attention since their booth was super crowded the whole time. Also my customer was super excited and just loved the costumes I build for Newegg.com. And well, what’s better then a happy customer?
Again, thanks a lot to Newegg.com and Intel for these amazing commissions, the great time I’ve spent with them at Blizzcon 2013 and awesome opportunities they made possible for me. They were the reason why I canceled my job and do this wonderful art full time now. But you can read more about that in my upcoming post!


0 Comments