
One of my crazy summer projects in 2014 was Dark Valkyrie Diana from League of Legends. I’ll admit, I barely played the game before and would not ever dare to call myself a true fan. But I much fell in love with the design of the character. Her vibrant color combination of purple, blue, teal and gold was just stunning and the overall look of her was something very unique. After digging around a bit more, researching her story and finally playing her in League – yes, I’ve started playing after picking her up – I couldn’t resist anymore. Cosplay time!
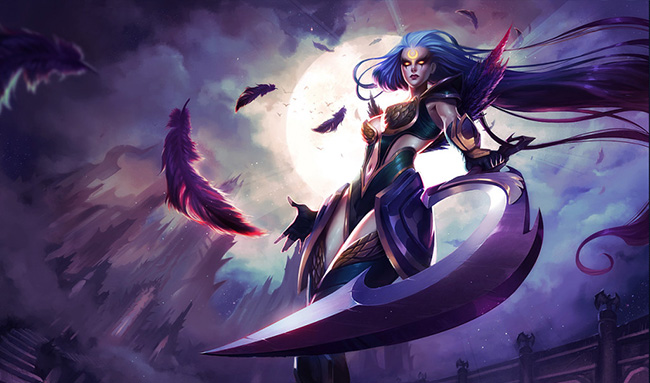
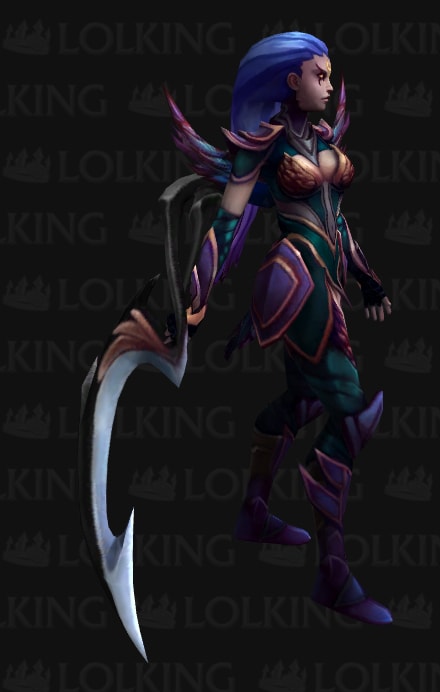
When it comes to starting a new project, searching for good reference material is one of the most important parts. Diana actually had several designs with different color schemes, artworks and 3D models, old and new versions and all the different variations that drive cosplayers crazy. I decided to just combine different references to a result I liked the most: Dark Valkyrie Diana with her old helmet, the colors from the new 3D model and details from the original splash art.
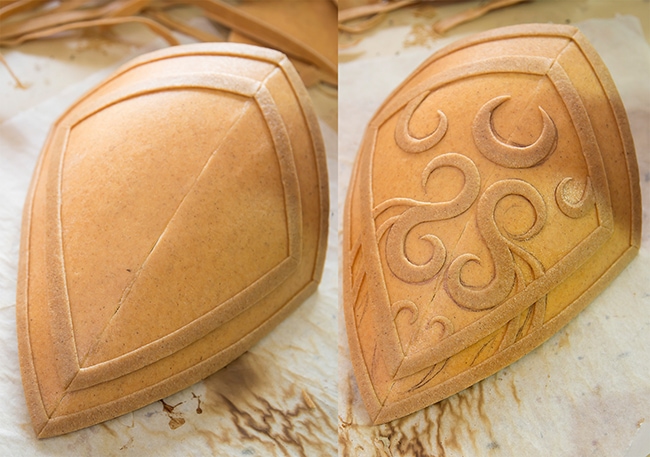
As a cosplayer I’m an artist. And as an artist, I often like to give my costumes an own personal touch instead of just copy pasting everything into reality. So I experimented a bit and asked my followers on my Facebook page for their opinion. They all were a great help, honest and very inspiring and I’m glad they were able to “punch” me into the right direction. So after I originally wanted to make everything full of ornaments, I noticed pretty quickly that Diana actually required a more clean design. I still edited a bit here and there, added a few details, but tried to stay as true as possible to the original design. The armor material was like always Worbla. If you want to know how to work with it, just check out one of my tutorials on Youtube or look into my shop to find my books on armor and prop making.

By loading the video, you agree to YouTube's privacy policy.
Learn more
In addition shortly after I announced my costume, Riot Games contacted me and asked if I could record my entire progress for them to make a cool step by step video tutorial for Diana. So if you want, just watch the video and follow my explanations here in this post. Hope you’ll like the video!
By loading the video, you agree to YouTube's privacy policy.
Learn more
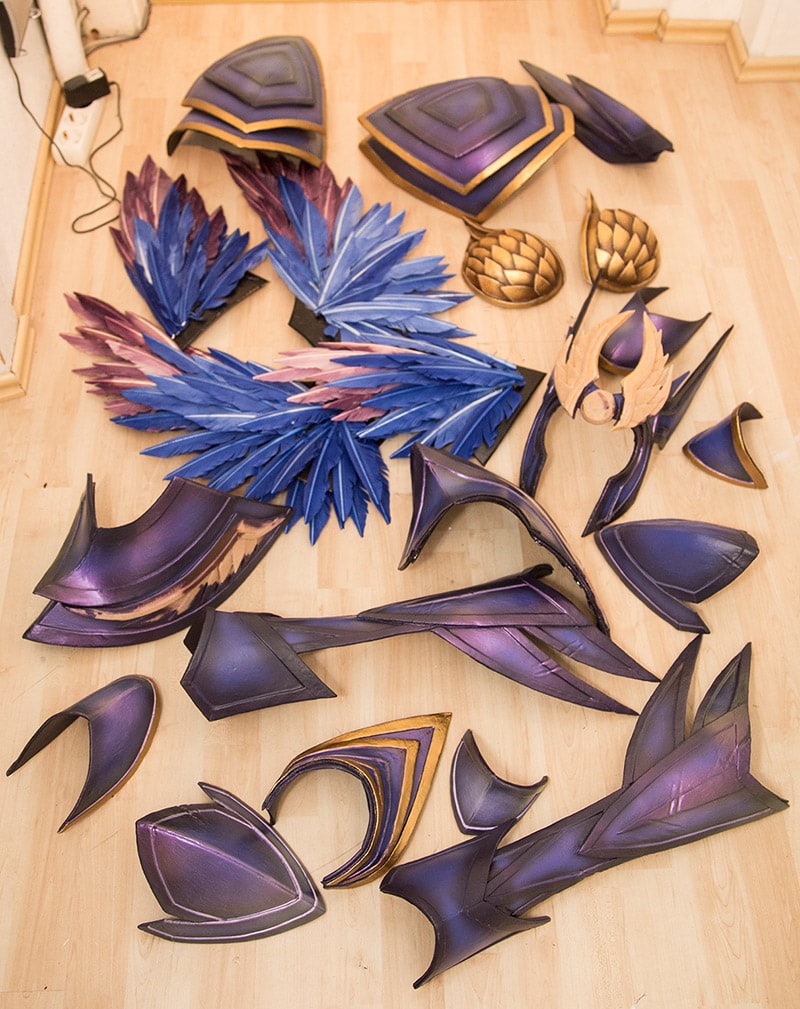
So only a few days later pretty much the whole build of the armor was done. Like most of my costumes lately I had far too little time for everything. Consuming energy drinks I worked day and night and barely slept. I surely could have just started earlier or set a later date to debut it, but this would be just boring, right? So, I grabbed some sheets of Worbla, swung both of my hot air guns (dual wielding!) and just stopped sleeping!
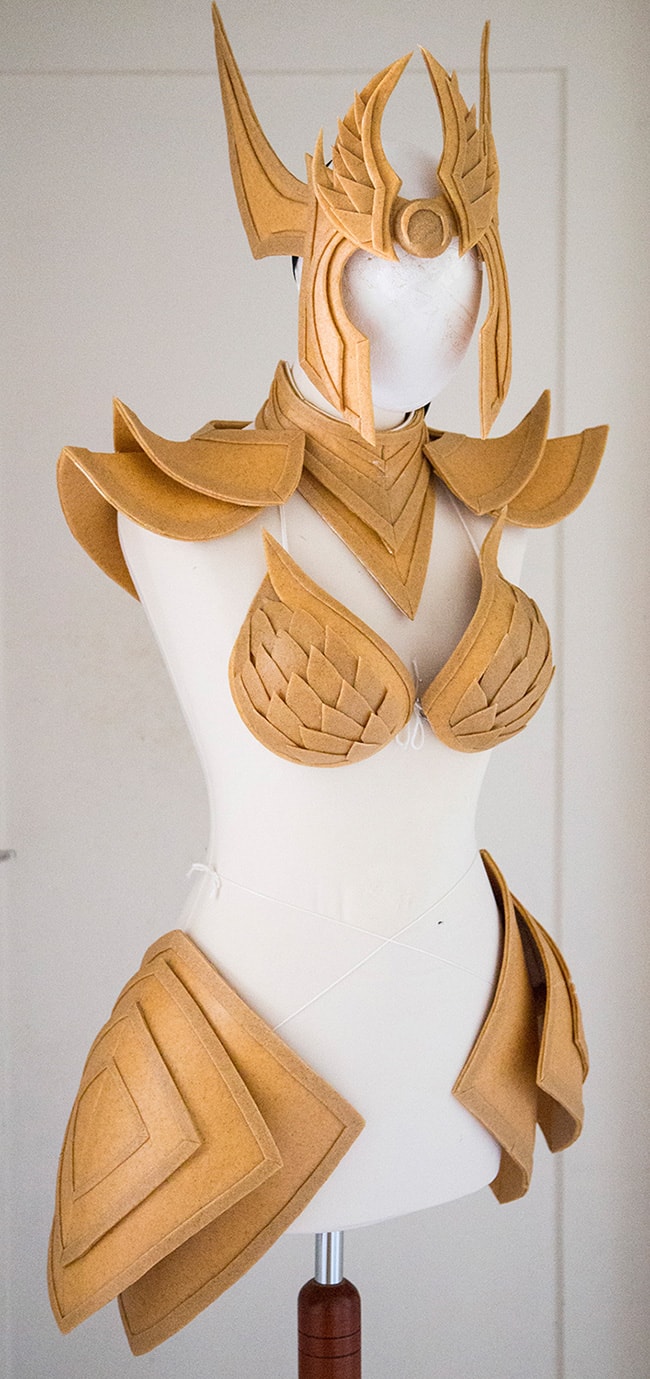
And well, there were quite a few armor parts that waited for a paint job afterwards…

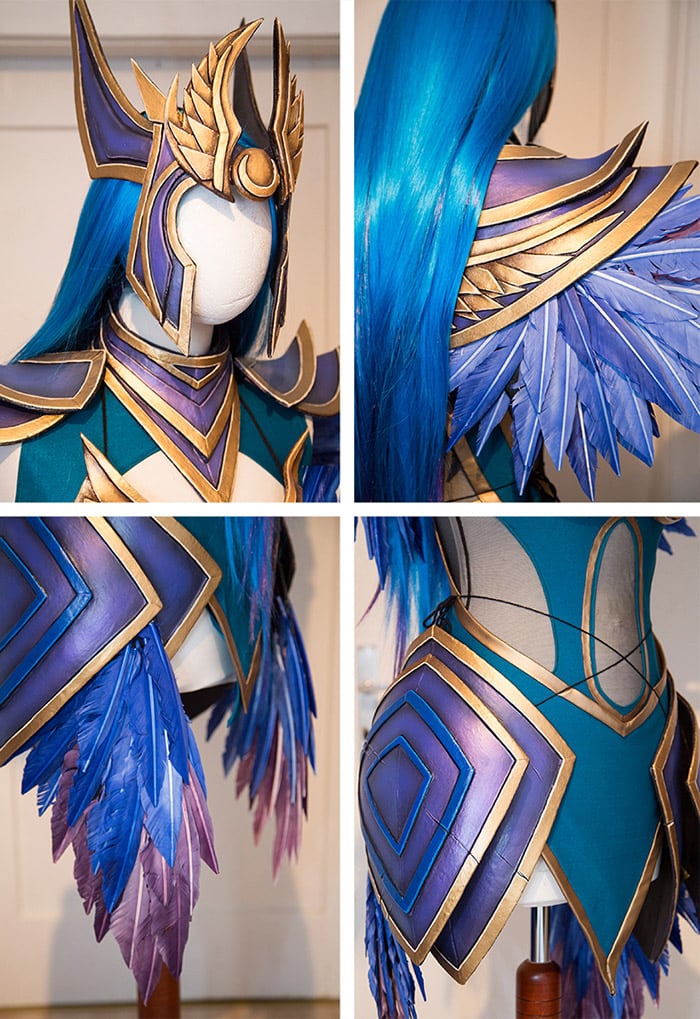
We usually paint my armor with acrylics by hand. This time however I started so late that even with the amazing support of Benni it wouldn’t be enough to get everything done in time. So to speed up the work, instead by hand we added all color gradients by airbrush and spray paint. I was quite lucky: I found an amazing spray paint, that applied with two different colors, made a stunning, metallic looking effect. For the last step we added a golden trim with acrylics, as well as highlights and shadows with black and white acrylics.
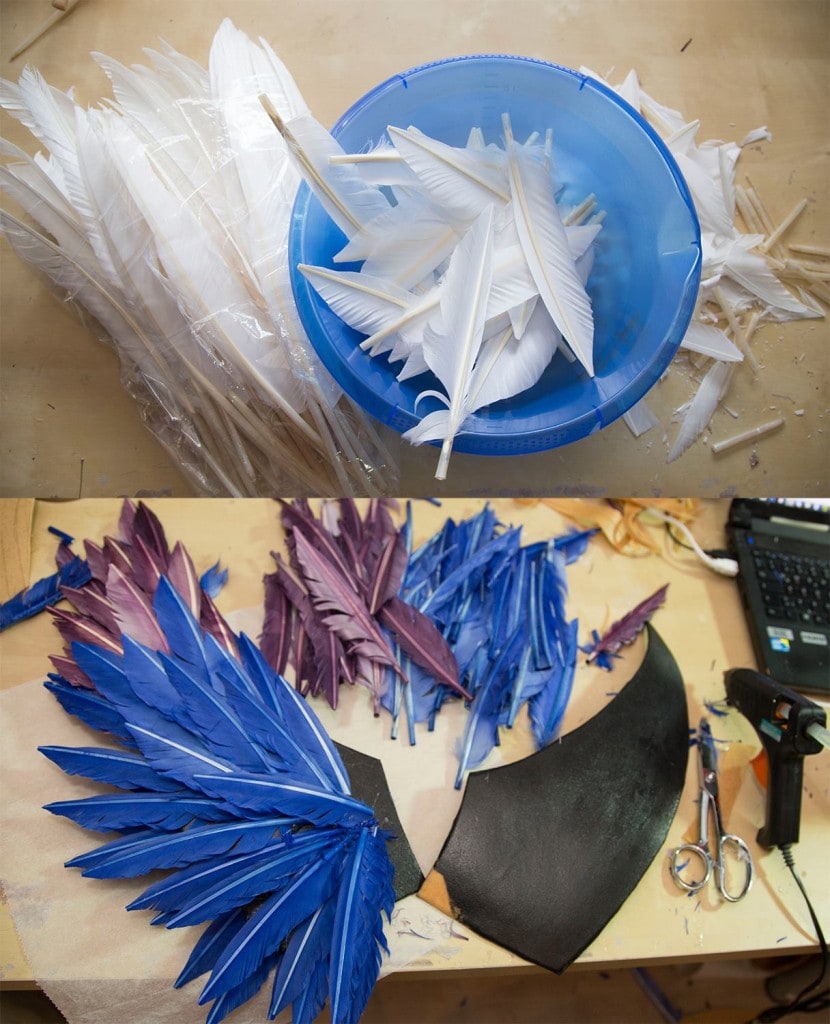
If you also wonder how I made the wings: They are all real goose feathers, dyed with fabric dye, trimmed and glued on a sandwich piece of Worbla.
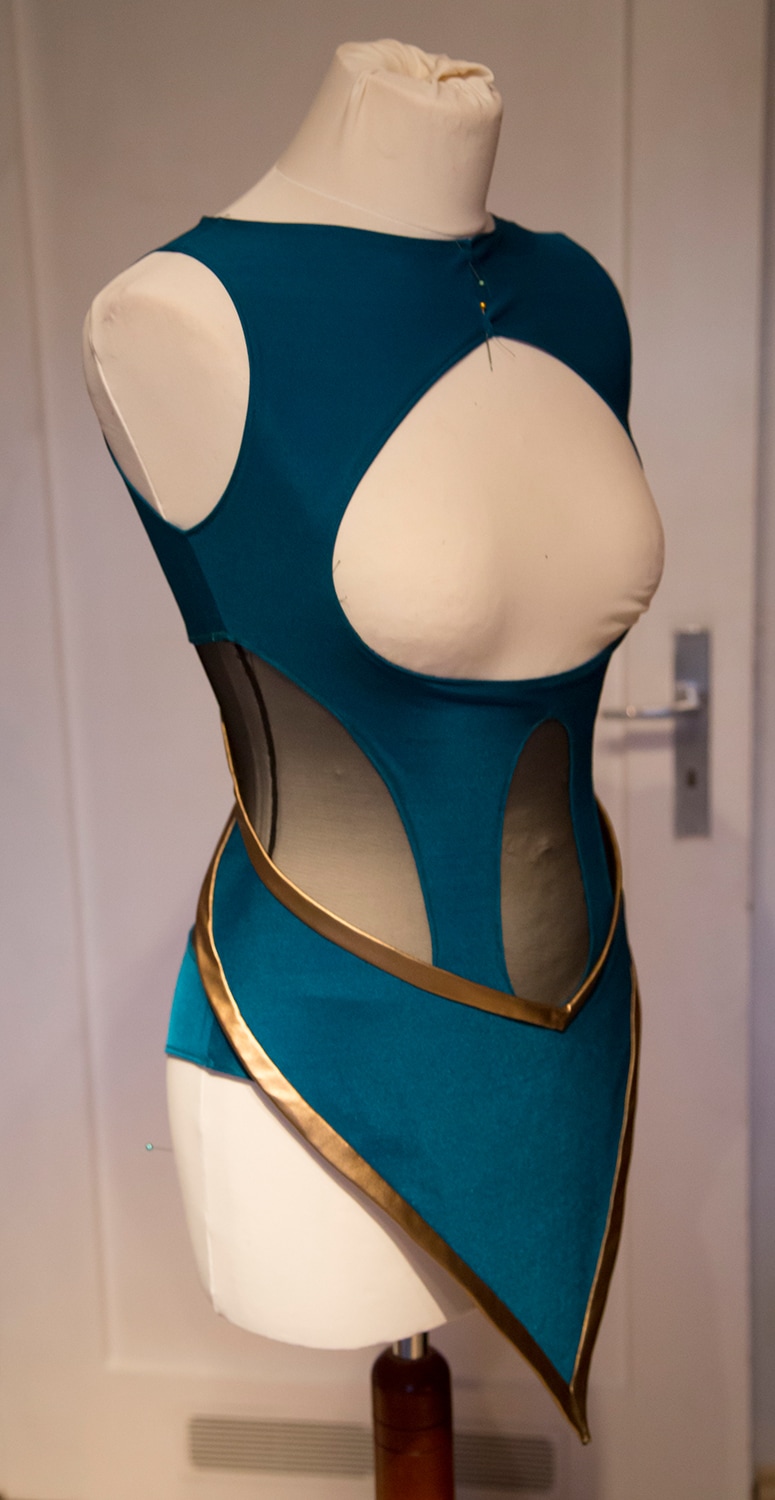
Once I was done with the armor, I finally started with the fabric part. I would say I barely have any skills in sewing whatsoever, so this part is always pretty hard for me. When requested I can build you the craziest armor you can imagine, but I would totally fail hard in making a school uniform!
So this thing here was at least made out of stretchy fabric based on a body suit pattern. I have no idea how to make real fabric patterns, so I mostly just grab something exciting, transfer the outlines to fabric and change everything until it suits the costume. The boob window however looked pretty weird, I admit!
The golden trim I added was made out of a golden spandex fabric. I never made trim out of slippery fabric and the inner side of the bodysuit looks awful, but I’m pretty proud how the outside looked after I was done, ha ha!
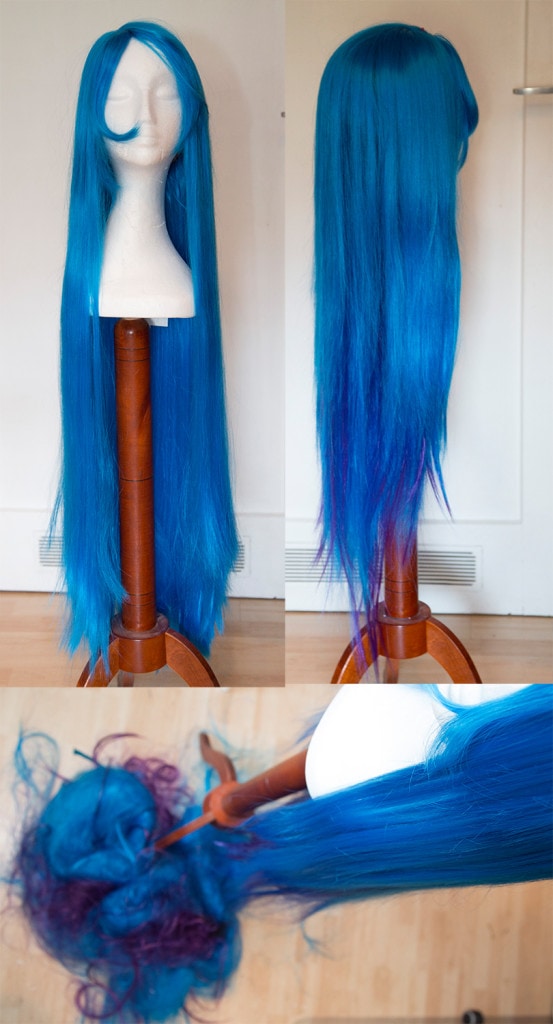
The wig was a pretty rushed job as well, but I did the best with the little time I had. With a high quality wig from mycostumes.de as a base I just added bangs from a cheap ebay wig in purple. Since I even didn’t had enough time to sew the bangs into the wig properly, I just grabbed my hot glue and hoped this would be enough to combine both hair colors. Since the original wig had a straight cut, I tried to get rid of some hair for a more natural look. I actually had to cut so much hair out, that it would be enough for at least one further wig! The base wig had really A LOT of hair!
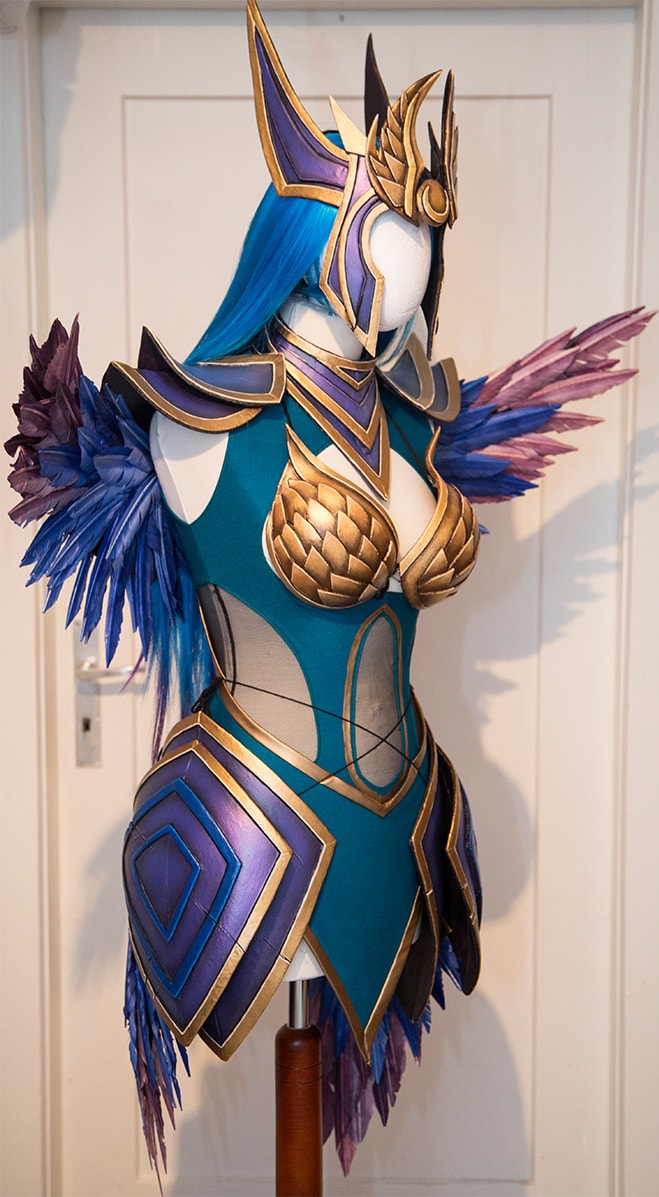
Well, and this is how the final result looked. All the belts, buckles and straps were still not added, so I attached the costume with some strings to my dressform. At the beginning of this project I was pretty worried about the final look of the costume, because I’m used to building armor with a higher level of details. I was scared that Diana would end up looking boring and unfinished, but the combination of her colors as well as the shape of her design made her even more outstanding. Once I brought everything together, I totally fell lovewith the costume and all worries were gone. This project was almost done and I could not wait to put it on the very first time!
At first however Diana still needed to get her blade! The curve in her blade gave me some headaches. I’ve usually build straight swords and staffs and never built something of this size with such a special shape. And that was not even the only problem: Living in Germany I finally wanted to visit San Diego Comic Con. I’ve already heard so much about it before and Diana surely had to come with me. So how should I manage to squish her blade including all armor parts into one suitcase? ONE suitcase? I had to separate the blade into three parts and there was no time for experiments. So I just hoped my first try would work out!
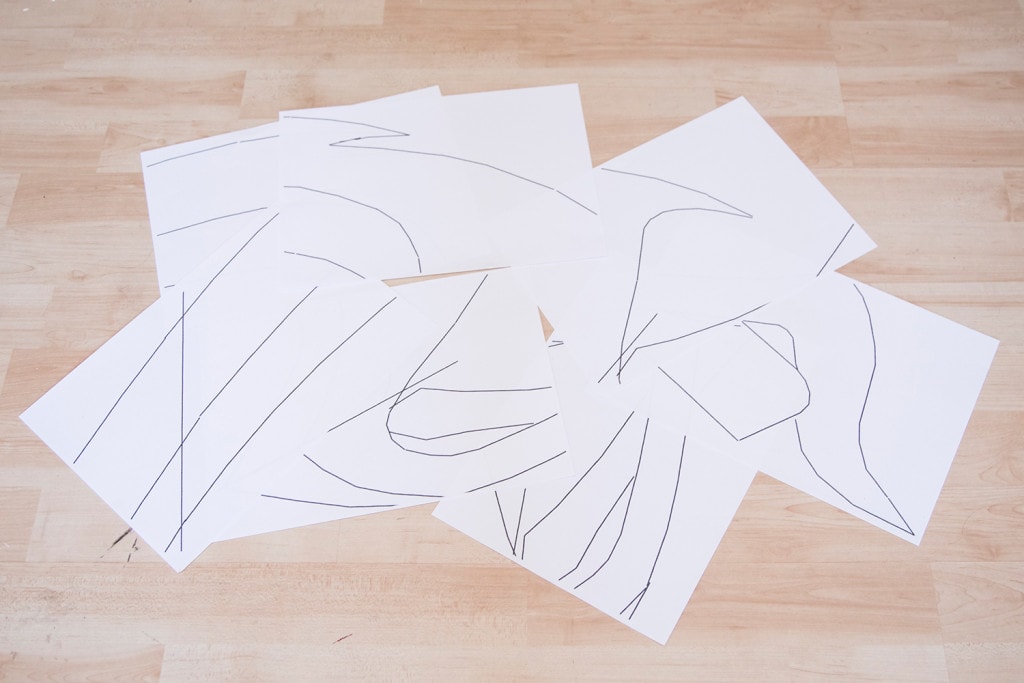
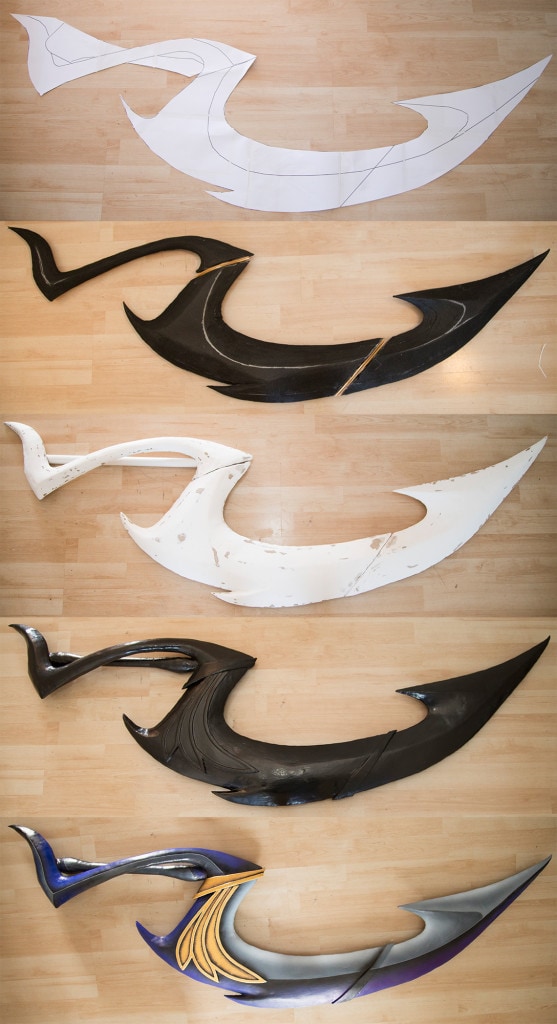
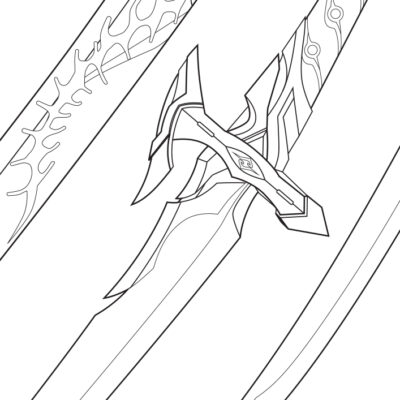
When I start with a new prop for a character I usually take a screenshot, follow the outlines of the 3D model or artwork and just print the whole drawing out in its original size. Since the blade is quite huge, it had to tape several pages together. After cutting out the paper prop I got the pattern for the final weapon.
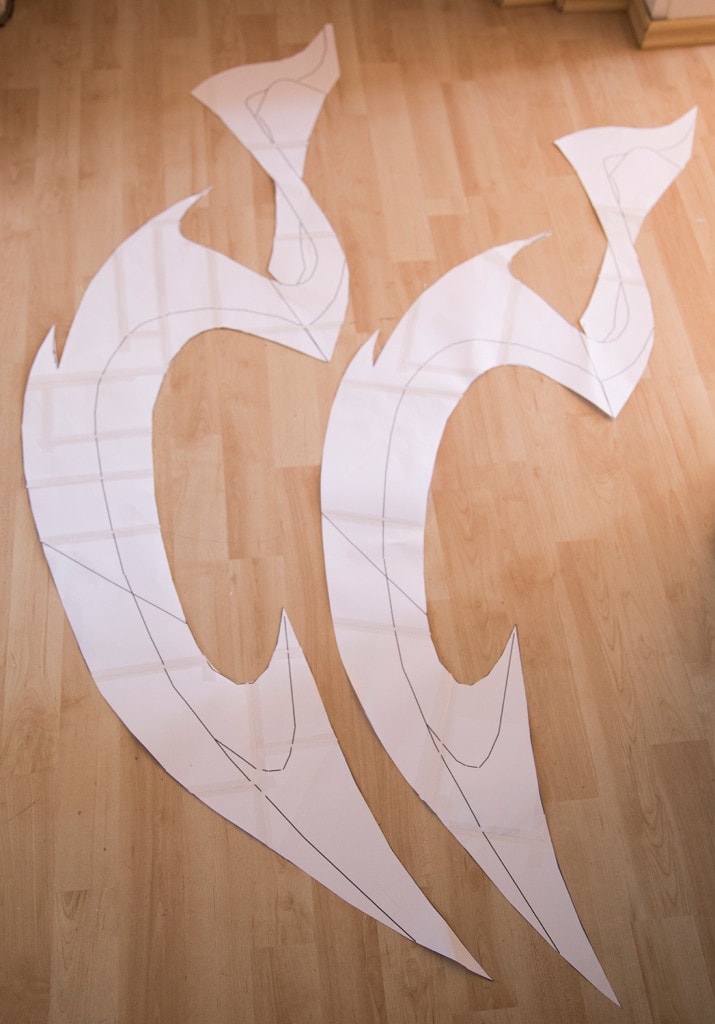
It’s sometimes not that easy tough. While the blade looked awesome in Diana’s hands, the enormous size seemed to be weird once I held the taped paper prop in my hand. The reason was simple: I’m not Diana. No matter how good my cosplay would be once this costume is done, I would never have the size, the body shape or the proportions of Diana. Just because she is a fictional character and I’m a real human.
So I’ve printed everything out again, but this time a litte bit smaller, and finally everything looked good! The difference was only a few centimeter, but it changed a lot once I took the paper again in my hands and looked into the mirror. Crafting could begin!
So, as a base I used EVA foam. It’s easy to cut, cheap and you don’t need many tools to work with it. To seperate the blade, I then glued PVC pipes in different thicknesses inside. A smaller and a slightly bigger one, that I could just let glide in. That way I got three more or less equal sized pieces that would easily fit into my suitcase.
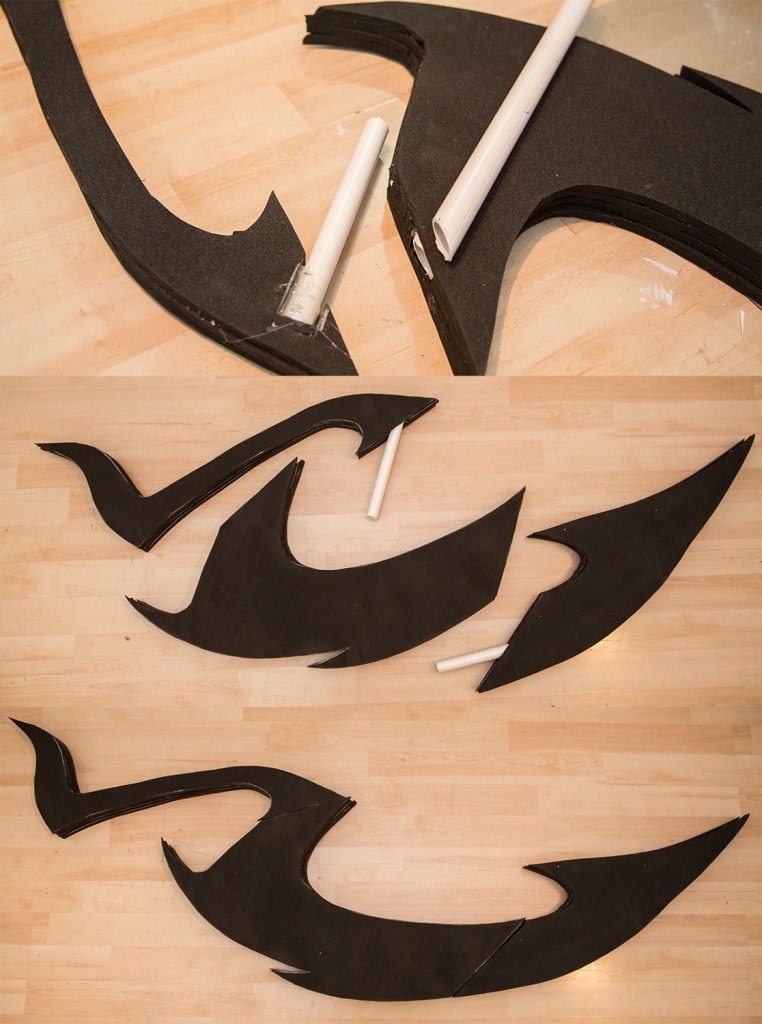
After I carved and dremel’d the blade and the grip into the right shape, I covered the whole build with Worbla. This material made the prop really solid and strong and I didn’t had to worry about what happens when the staff at the airport plays football with my luggage. To hold all three parts together, I added magnets on both side of the joints and also added another layer of Worba around the blade. I’m pretty sure this method works also only with magnets, but this would require very clean edges I just didn’t had the time for.
Covering EVA foam with Worbla actually resulted in some bumps on the surface. They weren’t that big, but they drove me crazy! To get rid of them I’ve applied several layers of gesso and sanded everything nice and smooth with an orbital sander. The very last step was then a paint job with air brush and acrylics applied by Benni.
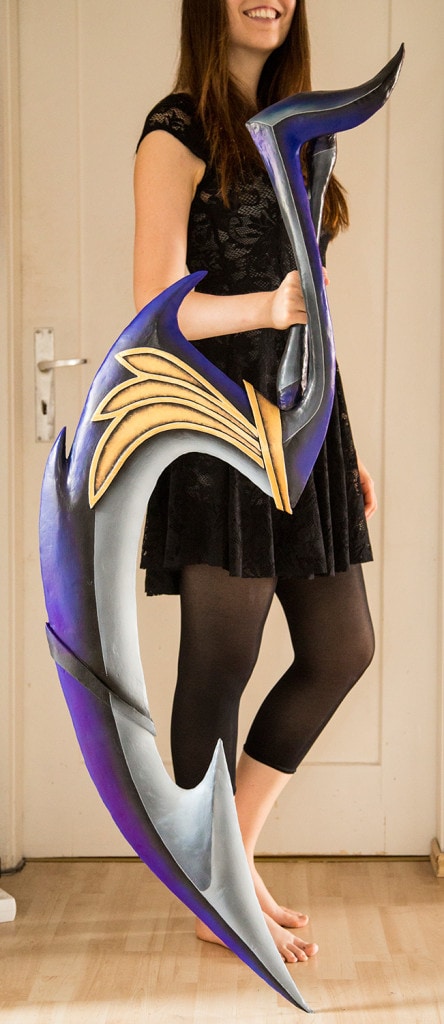
Well, and that was the final blade! I was quite happy that I finished this thing in time and finally could squish everything inside my suitcase. I literally worked until the very last minute before my flight at my costume. I even had to finish the attachments later then at the hotel in San Diego, but the costume was done done at SDCC! What an adventure, but Diana was worth it!
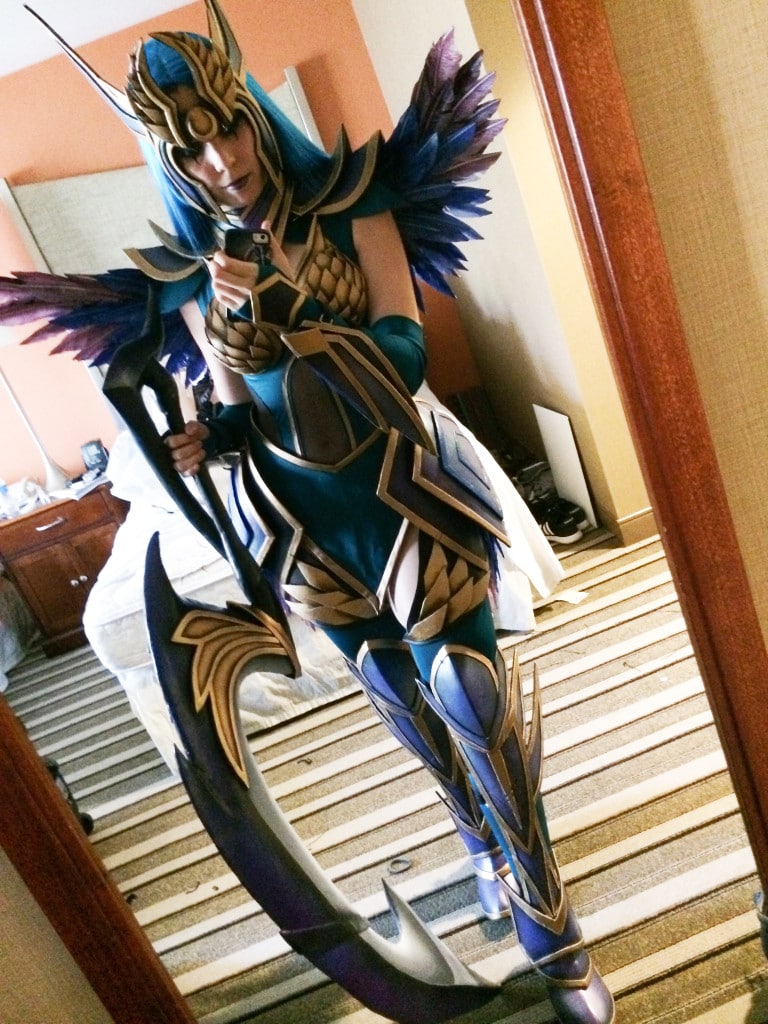
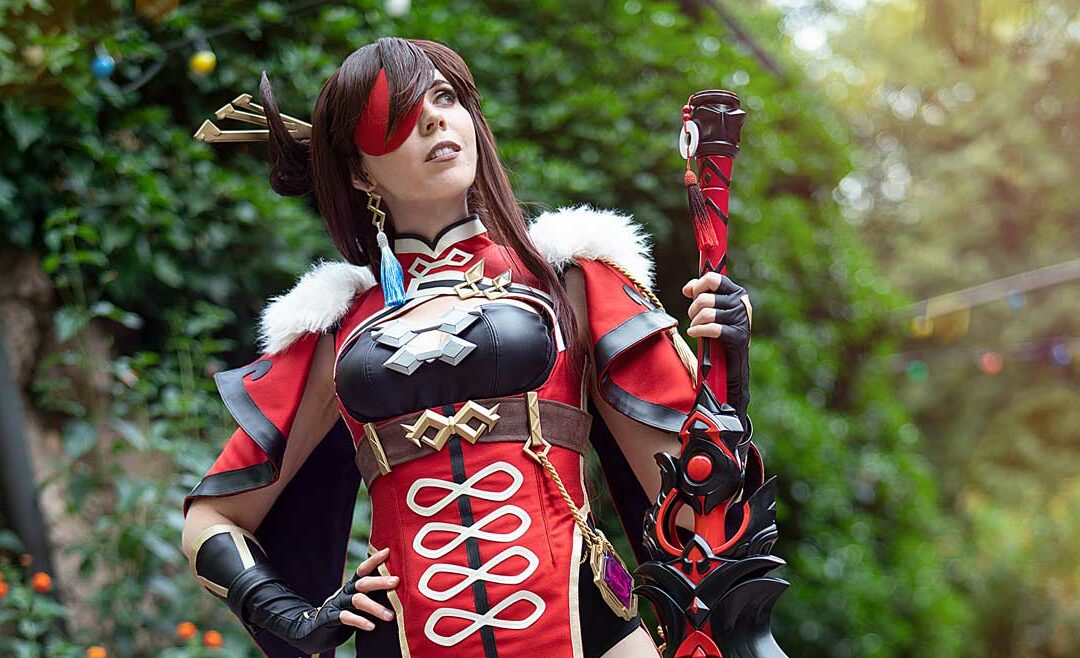
Dark Valkyrie Diana done in just a week. This is clearly the biggest project I ever did finished in such a short time and it was a huge challenge for me even if I am pretty fast. I surely messed up a few things, but it was great feeling to finally put on the costume for the very first time and take a look into the mirror.
You can surely guess, how excited I was, ha ha!
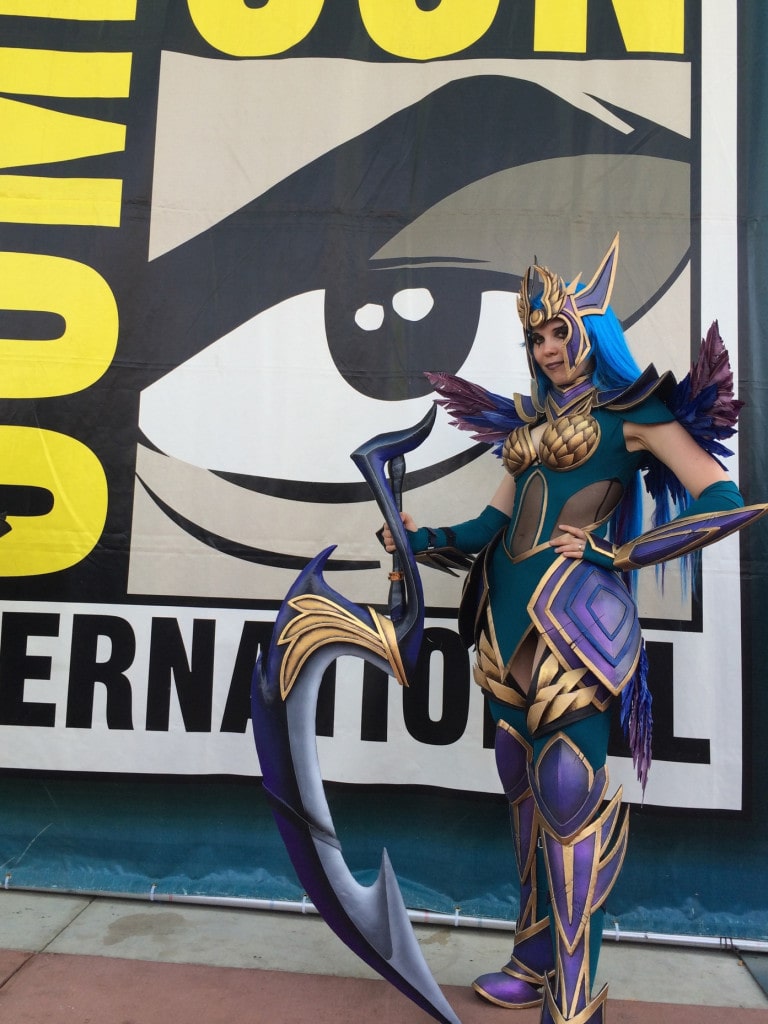
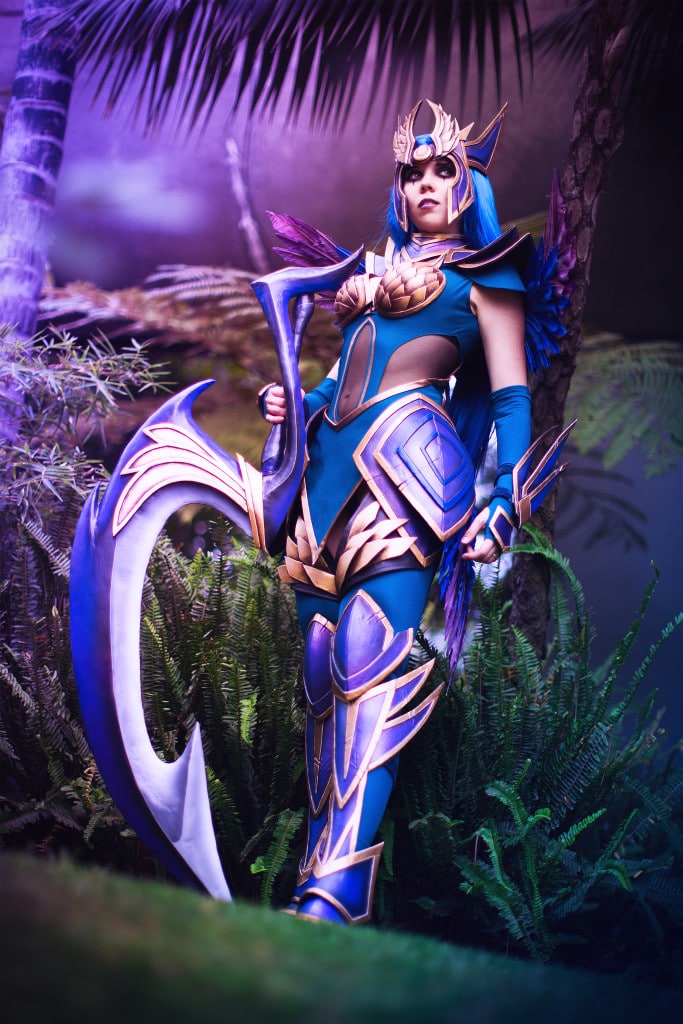
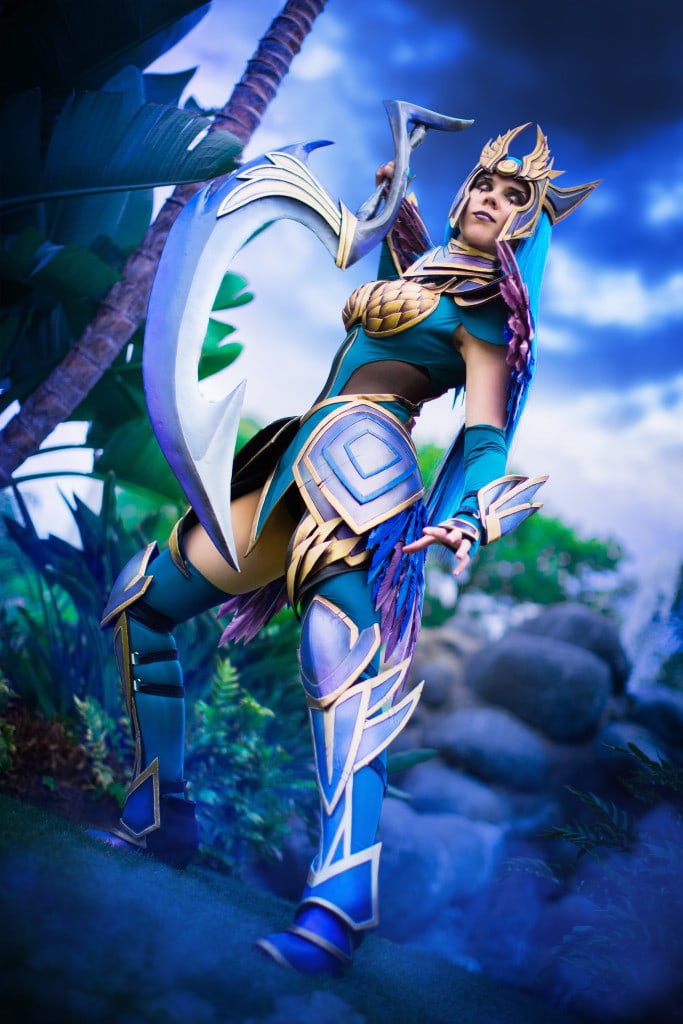
SDCC was crazy, busy and really crowded. I knew that I wouldn’t have time for a proper shoot because of my convention schedule, so I was pretty desperate to find a shooting location directly at the convention. And the convention area clearly didn’t looked like the jungle I was searched for. Luckily we found a tiny green area in front of one of the bigger hotels close to the convention. Benni and I jumped on the grass, I go into my poses and we did some shots. So after editing the photos which would match to the splash are the result was… kind of blue purple, ha ha!


Hello .. Good evening!
I really liked the costumes you customize, I would like to know if you order them to be made?
Tks,
Tathiana Miranda