
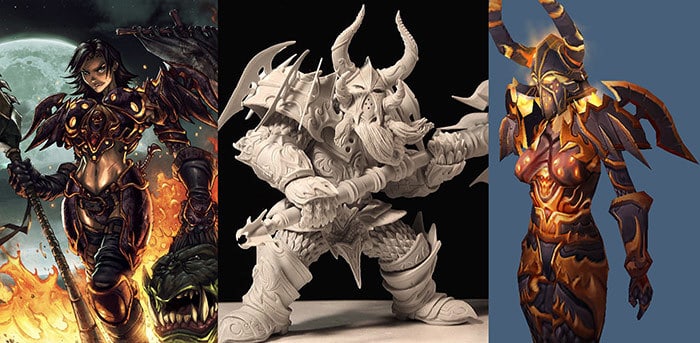
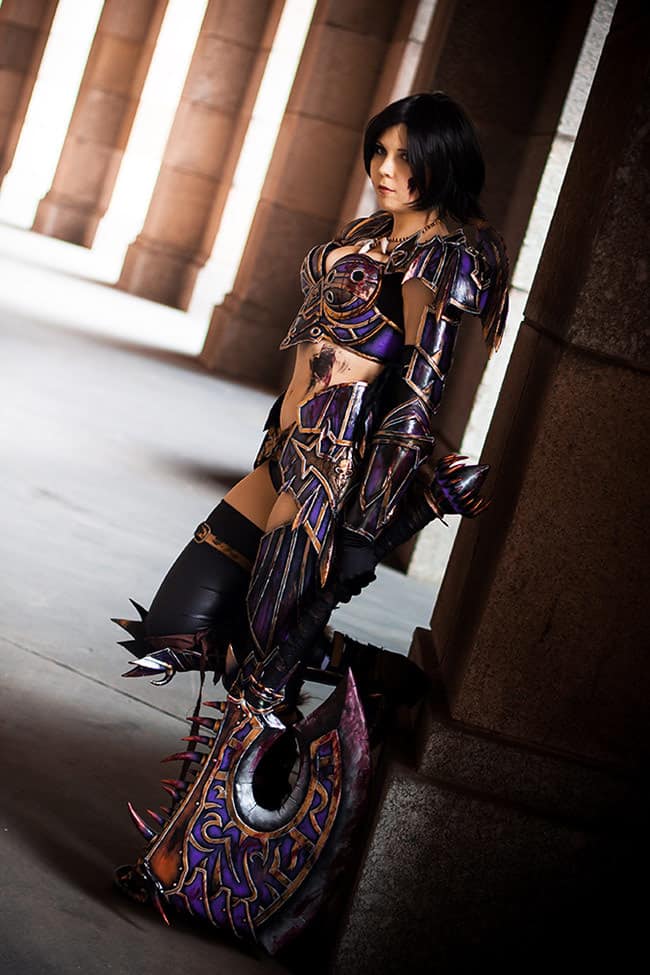
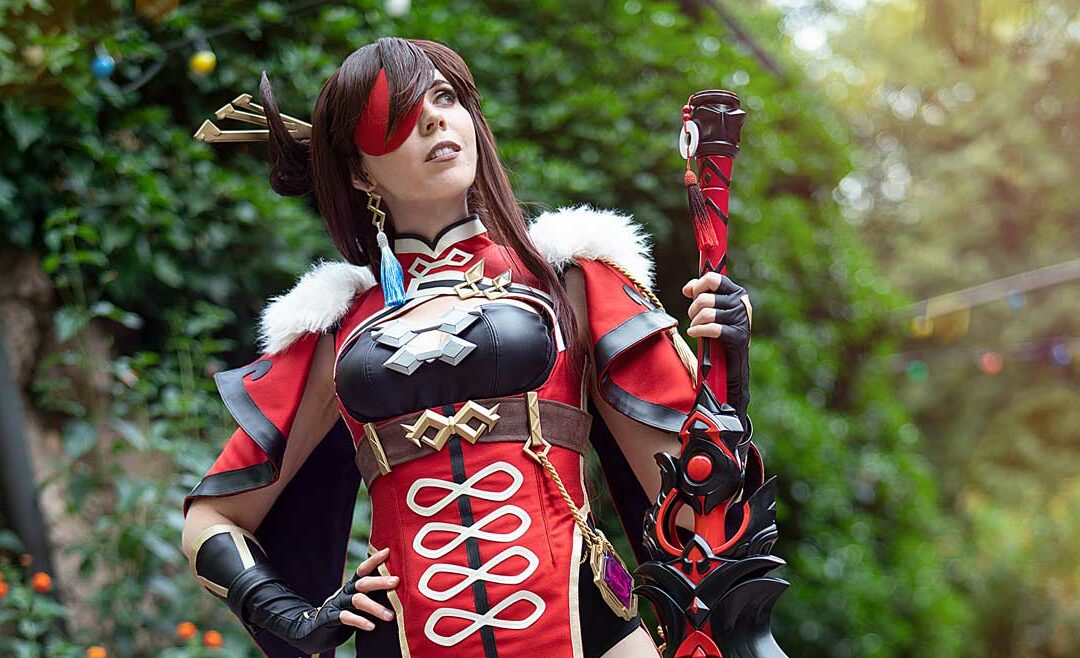
As a huge fan of armor costumes and World of Warcraft it was time again for a spiky, protective and a way too time consuming project: The Warrior Tier 5 or Blademisstress Lyss. Since the image didn’t show the full body, I decided to create a mix out of the WoW TCG artwork, a figurine and the orginal armor model from World of Warcraft. In addition I’ve added some personal elements and details to give this costume an own touch.
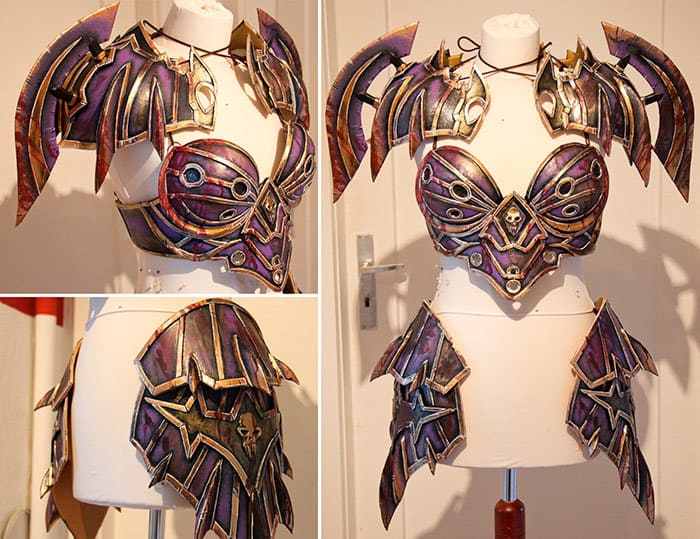
Like most of the time I started with the easiest part for me: The breastplate. You’ll find a video tutorial for this step on my Youtube channel. As you can see, I just built a basic breastplate and added some more layers and details here and there. My reference was not really clear, so I already added my own design in the very first armor part. Material for the whole armor is Worbla .
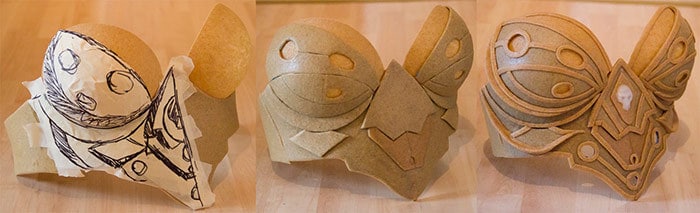
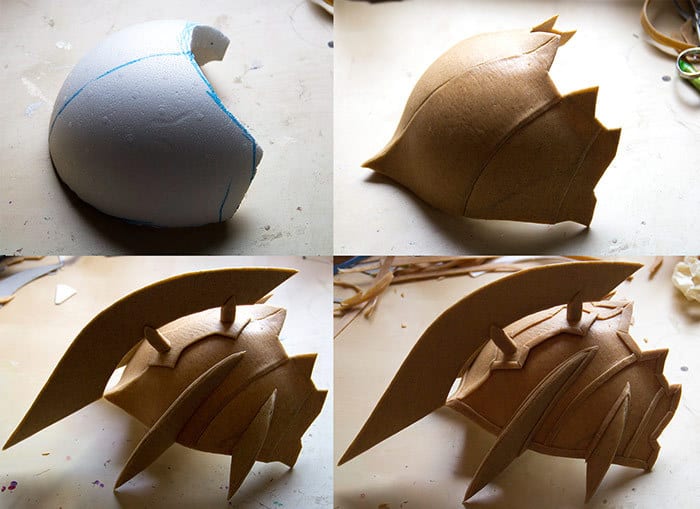
The pauldrons were done also pretty fast. They don’t really have a complicated shape and so it was enough just to use a styrofoam globe as a base and cover this piece then with some Worbla parts. At this point I also already fell in love with this spiky and dangerous look of my references.
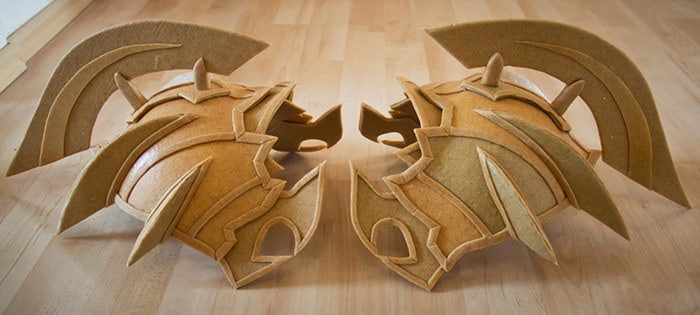
Well, like always the real challenge is to build everything symmetrical. I don’t cast my props and everything is completely handmade. So it was pretty important to copy all patterns exactly and to compare both parts again and again during the creation process. The result was not a 100% perfect at the end, but despite of that I was really satisfied with both pieces.
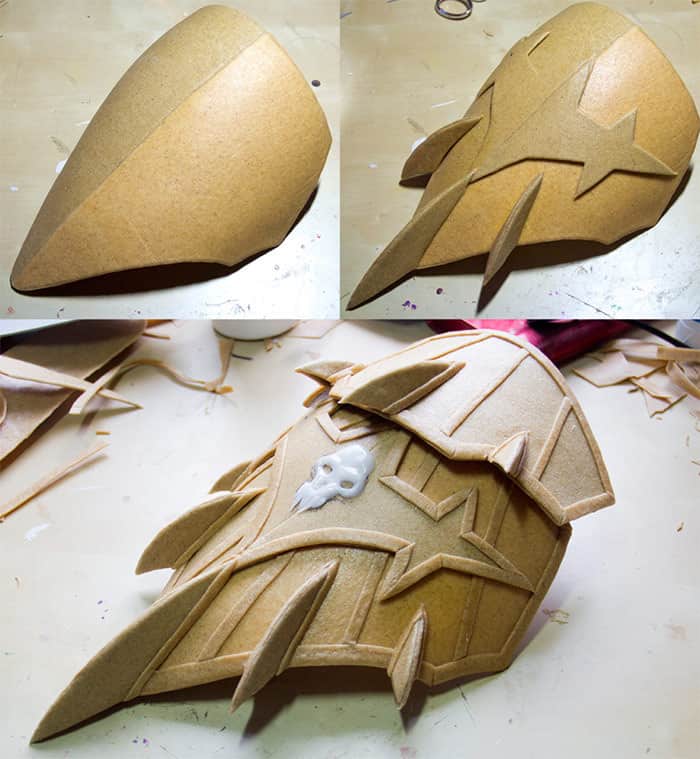
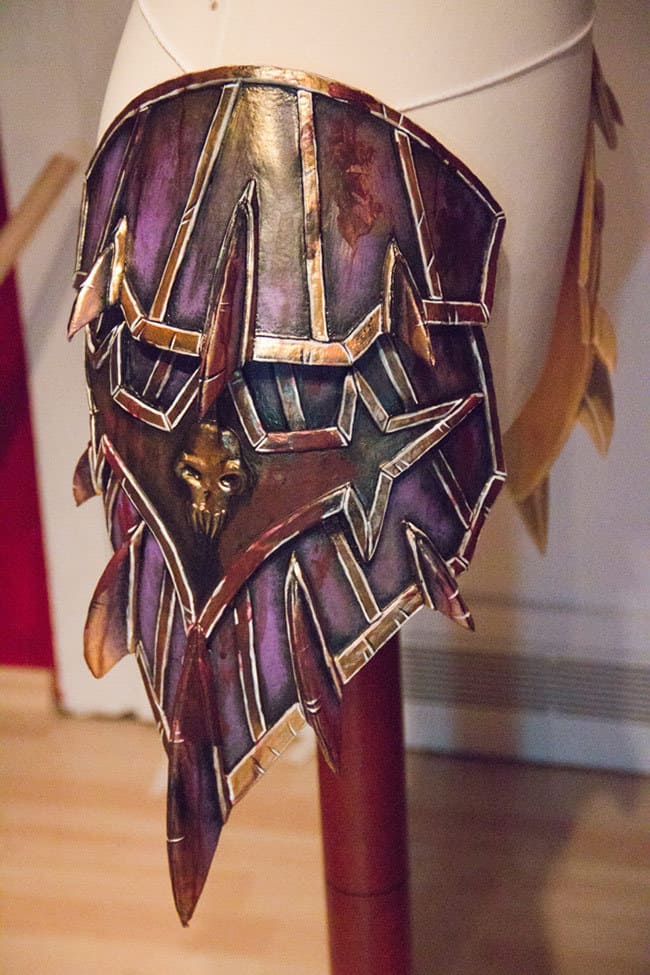
Also the hip parts had a pretty basic form. However the really hard part was to create a design, that fits to the armor. I didn’t really like the different looks in my references and so I tried to mix everything up I bit. I’ve added a skull out of Friendly Plastic, some spikes and I tried to create a design which fits to the rest of the costume.
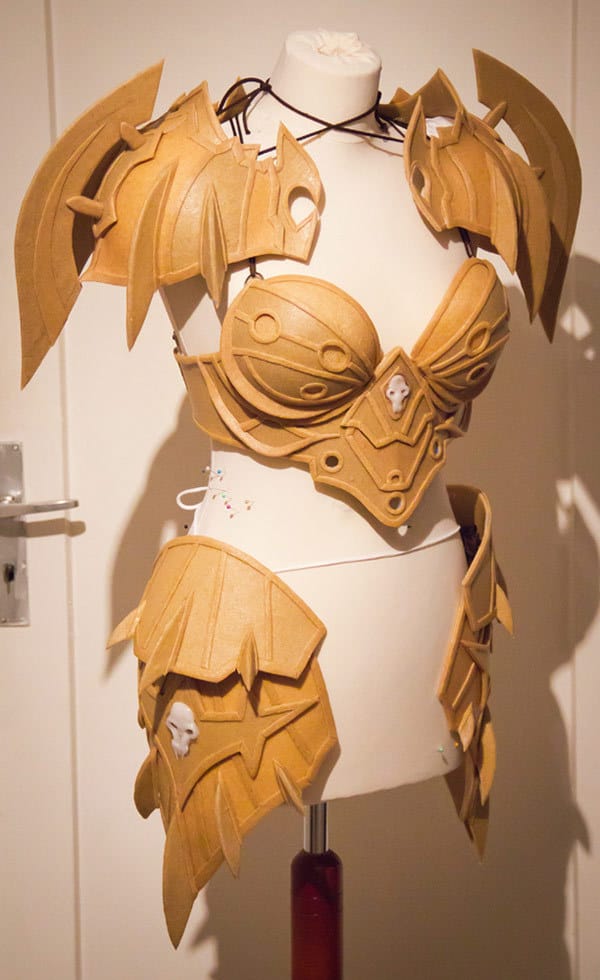
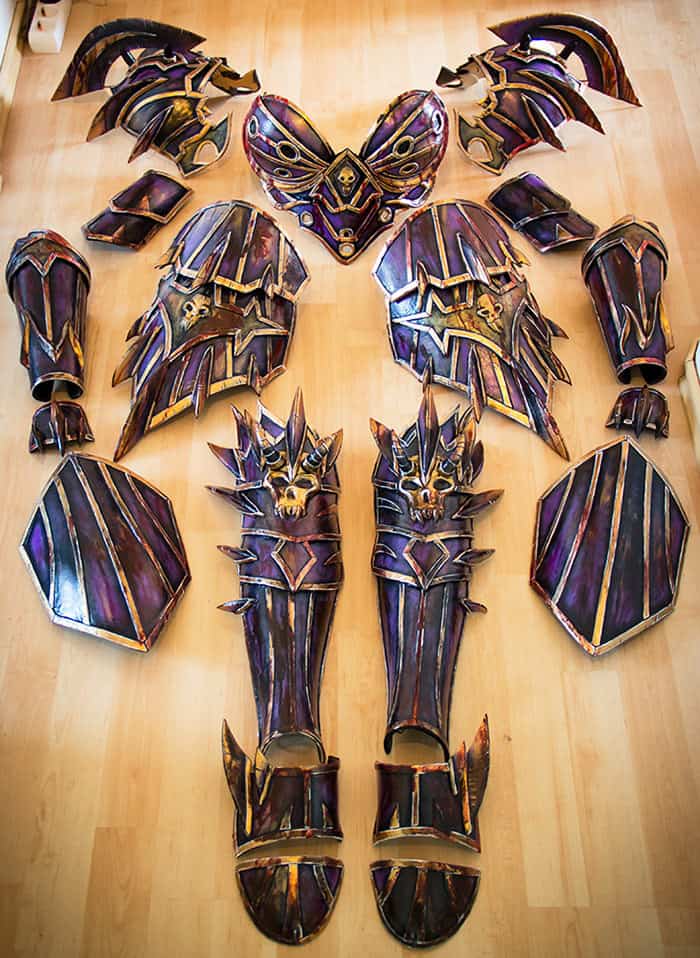
From the beginning I’ve tried to set the focus of the costume to the pauldron/breastplate and the hips and I was always worried about a possible imbalance between these sections. Luckely the final setup fit together pretty well and it was finally time for the paint job.
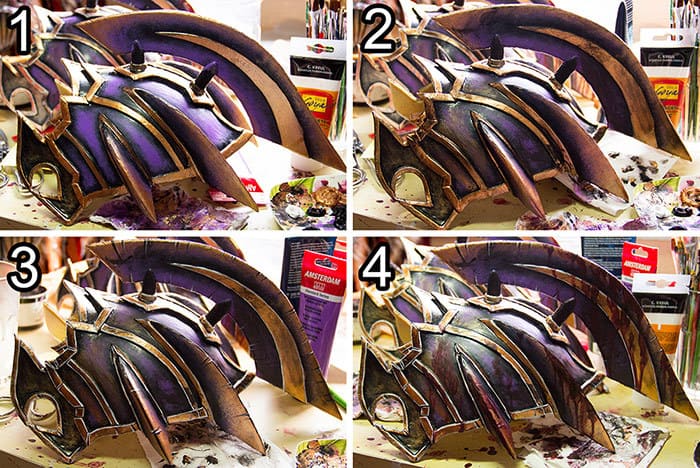
In the past a lot of the painting was done by my husband (he even made a painting tutorial for me!). But this time it was up to me to wield the brush and finally to learn my own painting techniques. Following the instructions of Benni, I applied at first a basic paint and startet then with the weathering. For this step I just added dirt with black acrylics and blood with red ones. I was never a fan of the painting progress since it takes so long, but this step was really a lot of fun!
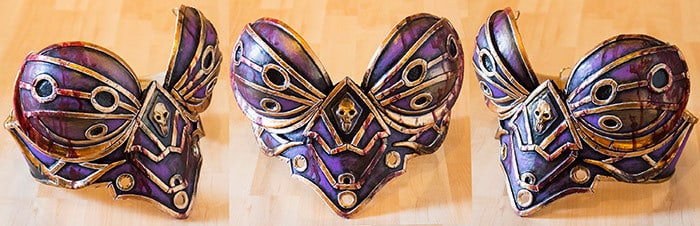
The final result turned out pretty purple. It maybe looks a little bit weird, but I think the combination of purple, bronze, black and red fits pretty well. In addition this project was the very first time that I’ve worked completely without any assistance of my husband, who usually completes my paint job at the end. My version though was much more rough and was more withered, but I guess this fits for a battle experienced warrior.
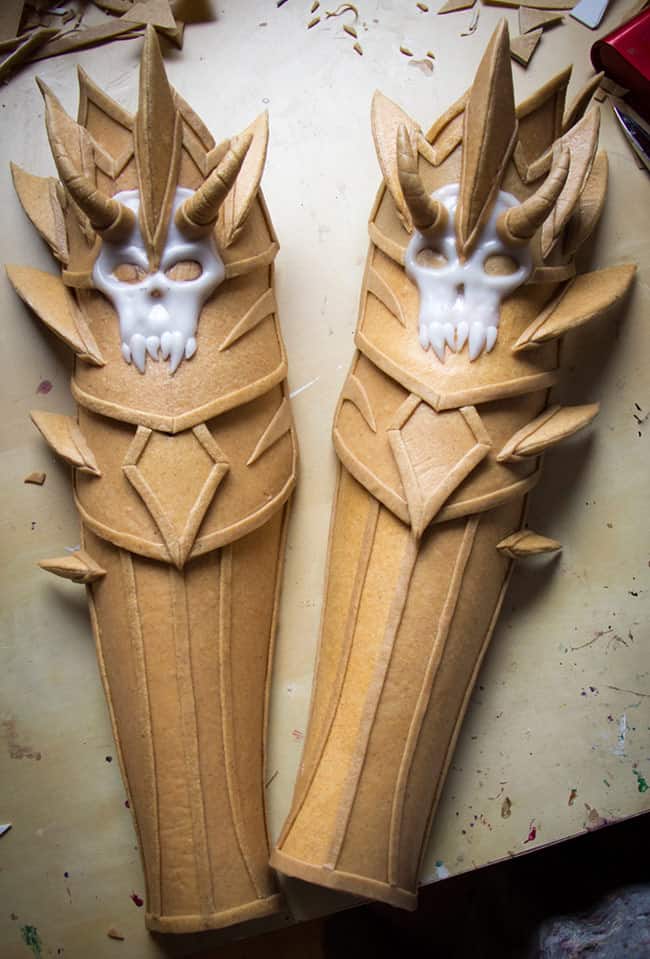
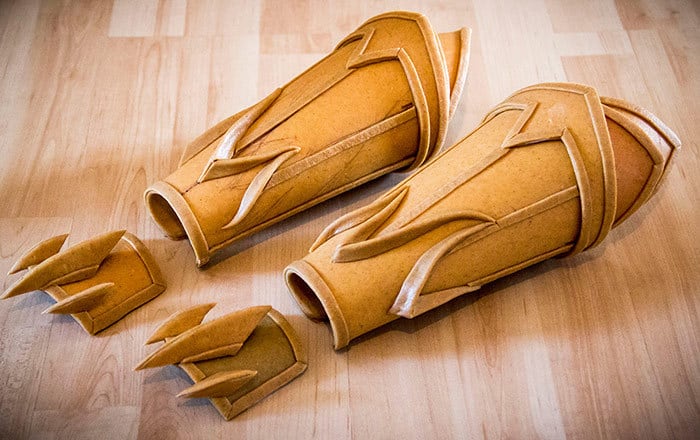
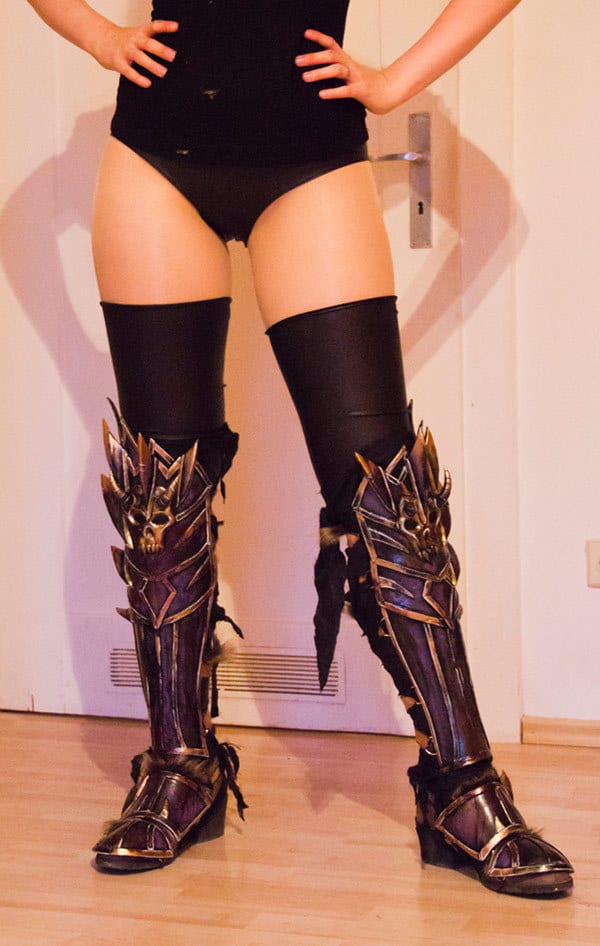
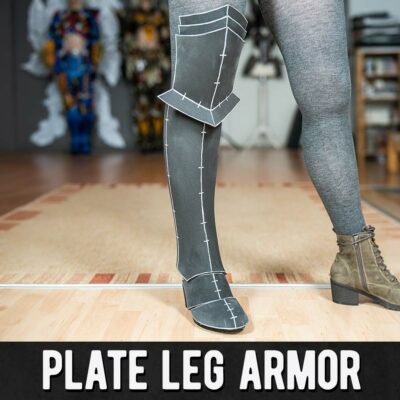
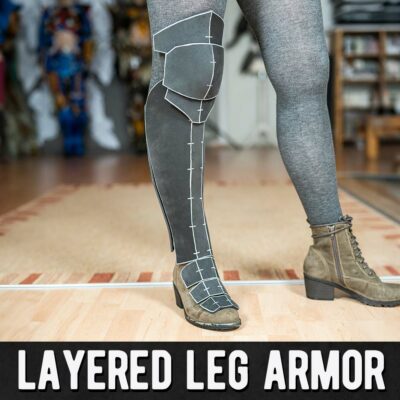
After finishing the main part of the costume I also created the last pieces: Shin armor, bracers and shoe armor. In the past I completed the whole Worbla armor at first, but since it’s pretty boring to paint all pieces at the end for days and even weeks, I’ve build one piece, painted it and then build the next one. Because of the huge difference between my references especially the shin armor was a challenge. After much changing the final result was completely designed by me, but I really enjoyed it to follow just my own ideas for a change. In addition the shin armor was one of the first moments I’ve started with my live streams. There you also see for example the making of these pieces.
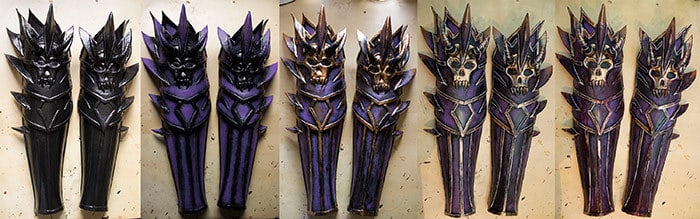
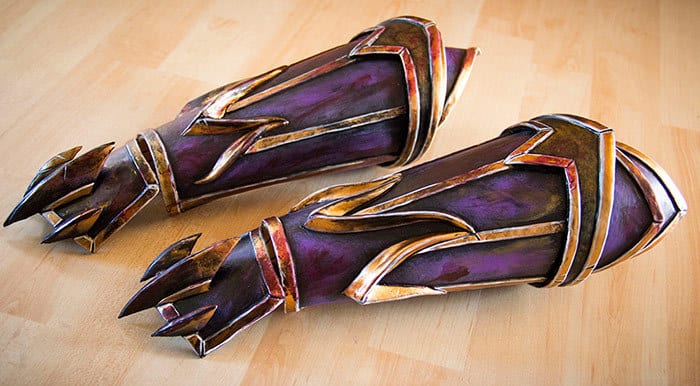
Well… and here you see a pretty good reason why this costume took around 300 hours to get ready: The painting! I’m a not a really experienced painter, but everything just had to be perfect! So… it took hours upon hours to paint everything black, to apply the purple/bronze layer, to add the dirt, to add dark lines, to add white highlights and finally to cover everything with a blood and dirt. In total it took around 20 hours to finish ONE shin armor!
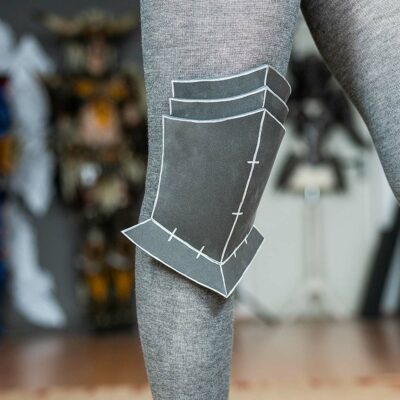
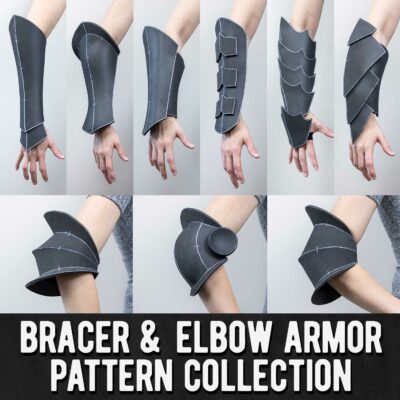
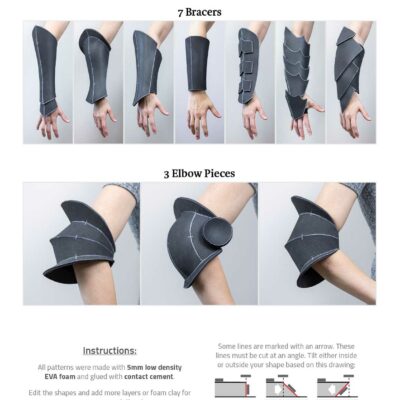
The bracers were also a little bit special for me. Usually I prefer small, tight bracers. This time however I wanted to create the armor as huge and bulky as possible and so the bracers became pretty massive.
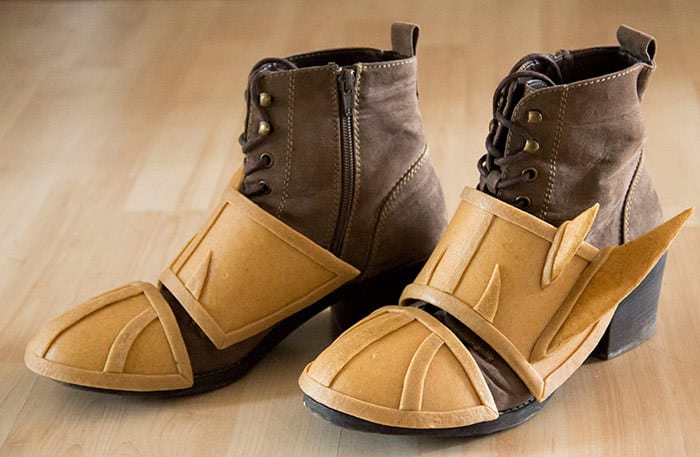
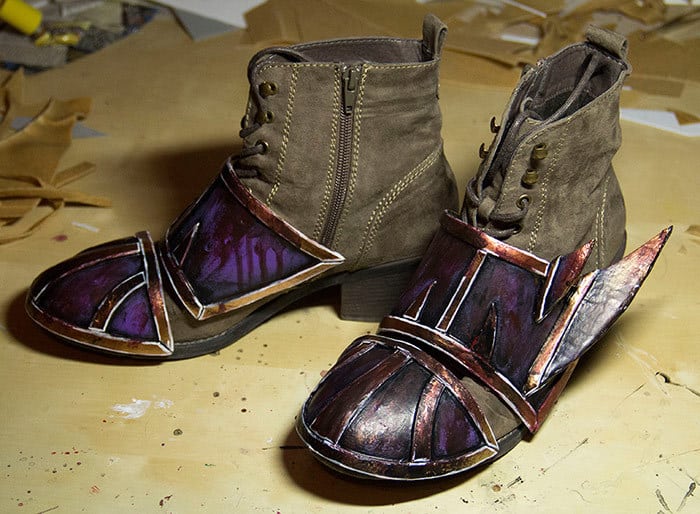
The shoe armor however was pretty simple. I just copied the patterns of my Barbarian costume, added some details here and there and used even the same shoes as a base. The shoe armor is also fixed in a way, which allows it easly to attach and to remove them again. I use my shoes usually for more then only one costume and so I try never to “destroy” them for only one project. They are also still great shoes when I have only my summer sandals with me and the clouds decide to rain a bit!
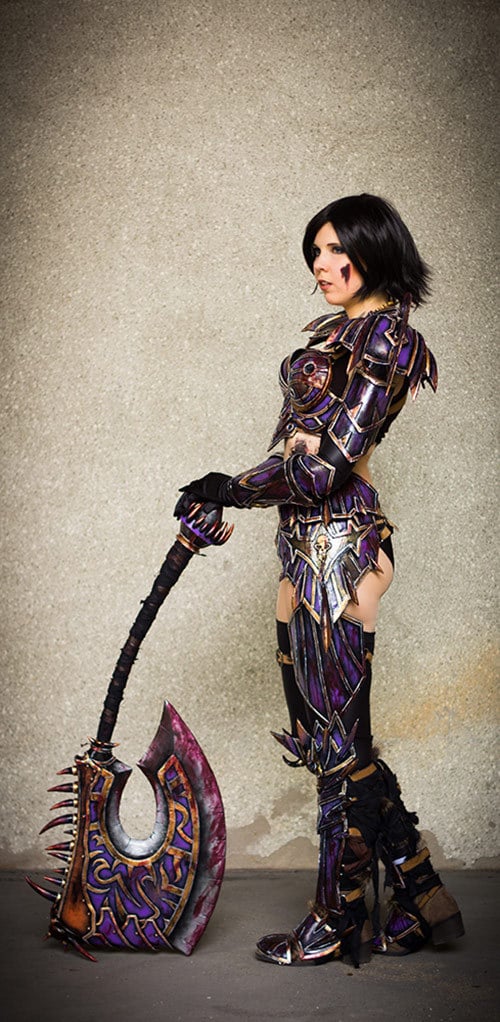
Well, and then came the final fitting. As one of many women I’m not really satisfied with my body and was already pretty worried, that the revealing design of the costume and my bad body shape would not fit together, but after the first fitting test all worries were gone. Yeah, I was super happy and now it was time for the biggest part of the costume: The weapon!
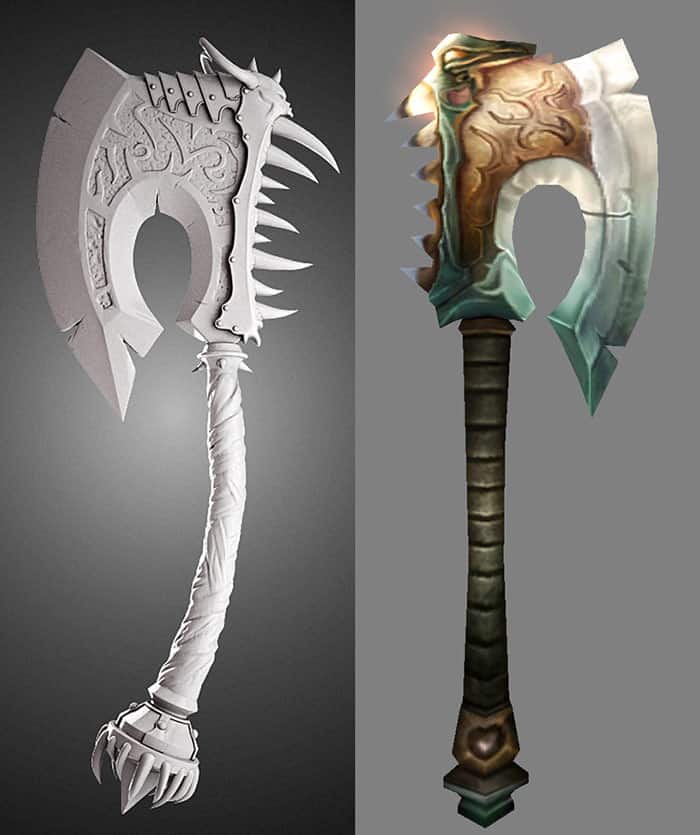
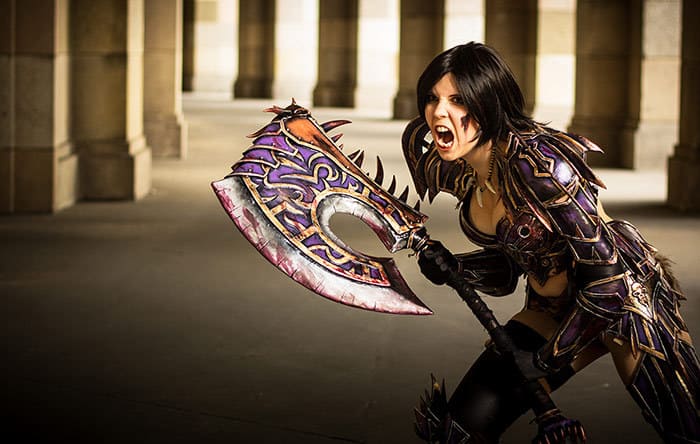
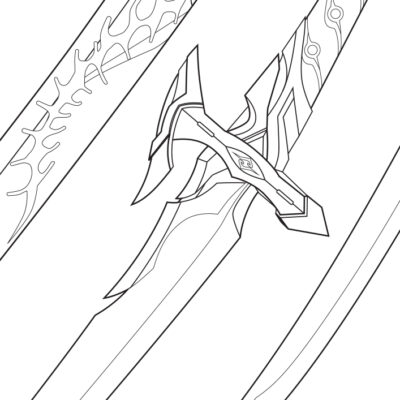
Following the refernce of the WoW TCG artwork I’ve chosen Gorehowl as my weapon. Its design in the artwork and also in the modelviewer were not really… tempting. I googled for more artworks, fanarts, figurines and 3D models and finally found the work of BrunoTor. He designed Gorehowl once for a figurine of Grom Hellscream and so this version was even official. And: It had the amount of details which just forced me to fell in love with this axe!
After watching many tutorials and discovering so many great foam armor costumes, I really wanted to work with EVA foam and so I’ve used it for a good, lightwight base for my axe. Some experiments later however I was not really satisfied with the durabily of it. I always spend days and even weeks with a prop and so I also want it to be durable. To protect the core I’ve changed my plans and covered the base at the end with Wonderflex. Since it works also greatly with Worbla, it was a great sticky material for the following detail work.
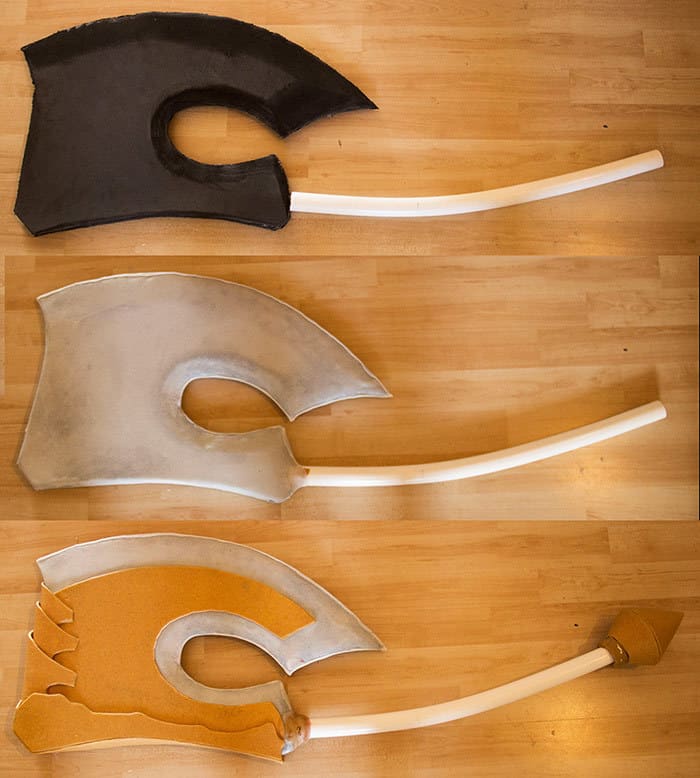
I just bent my PVC piepe later with some heat at the right point and then started adding one sandwich layer after the other on my prop. To create some more balance I filled the end piece with tons of Worbla. It didn’t really help that much, but at least I was able to carry my axe without any problems later.
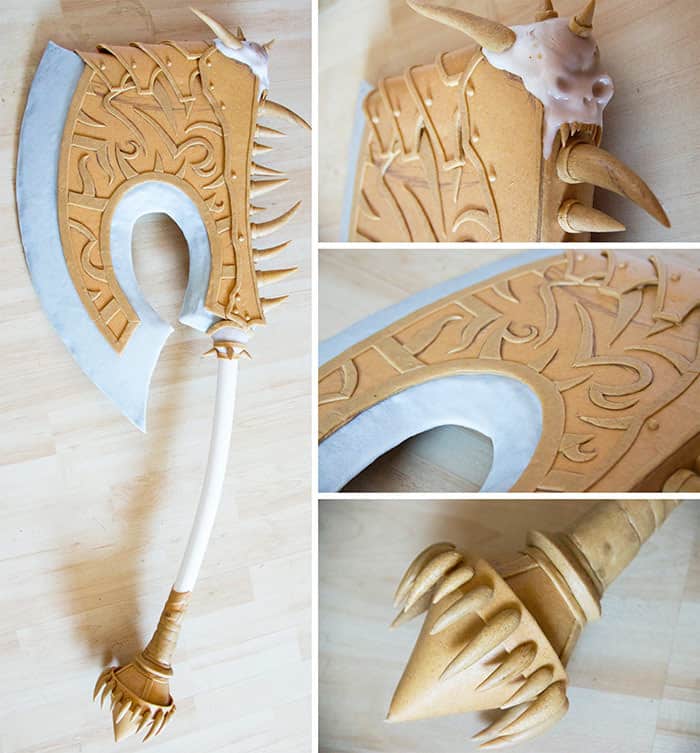
The final piece cost me a half Wonderflex XL sheet and a half XL sheet of Worbla. At least I was able to create all the spikes out of leftovers and so save a lot of material through this way. The following paintjob was… time consuming. Black base, purple layer, bronze layer, dirt and shadows, white hightlights and finally a ton of blood.
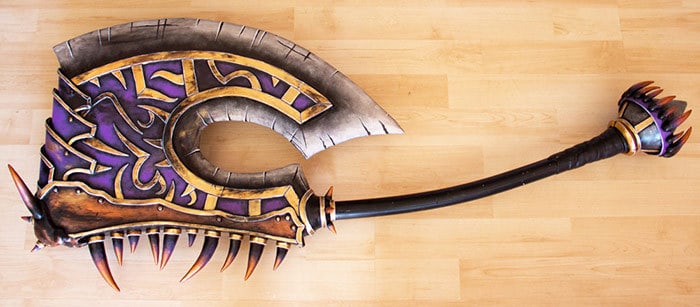
You’ll also notice that I’ve changed the color of Gorehowl. I just wanted this prop not only to fit perfectly to my armor, but also to get an own personal tough from me. I mean… many people already built a Gorehowl, but hey I’m the first one who had a purple axe at the end!
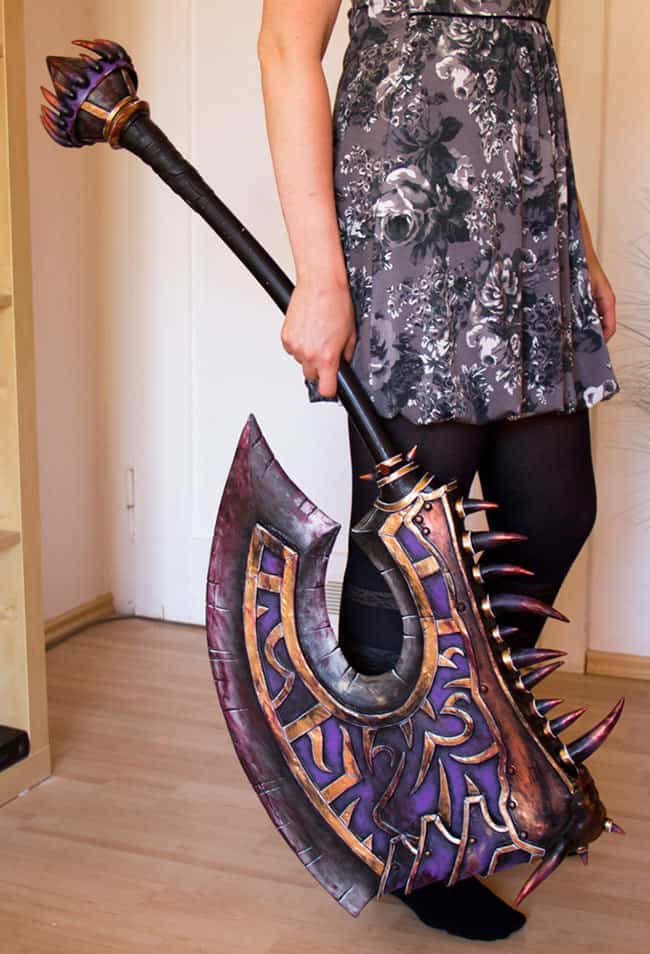
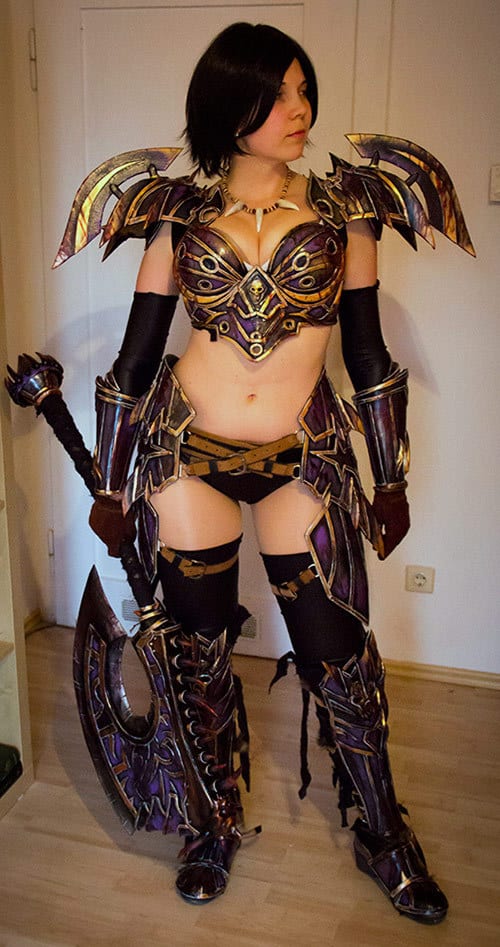
And as you can see… everything matched pretty well at the end. I have to say, the costume in total is also one of my most comfortable. I’m surely limited in my movement like always, but I’m able to walk normaly and wear it even for a pretty long time period since the fixing works well. Just check out my armor fixing tutorial for more infos! And… well, I admit I really like the sexy look!
In total the costume took around 300 hours of work, 4 XL sheets of Worbla as the basic armor material, and around 600 € of material costs.
Well… and now I just hope you’ll like the final look of this costume!
We use Amazon Affiliate links. If you buy something we might get a small commission. Thanks for your support! Learn more.


0 Comments