
When it’s time to find a new project, one question pops out every single time: Can I transport it?
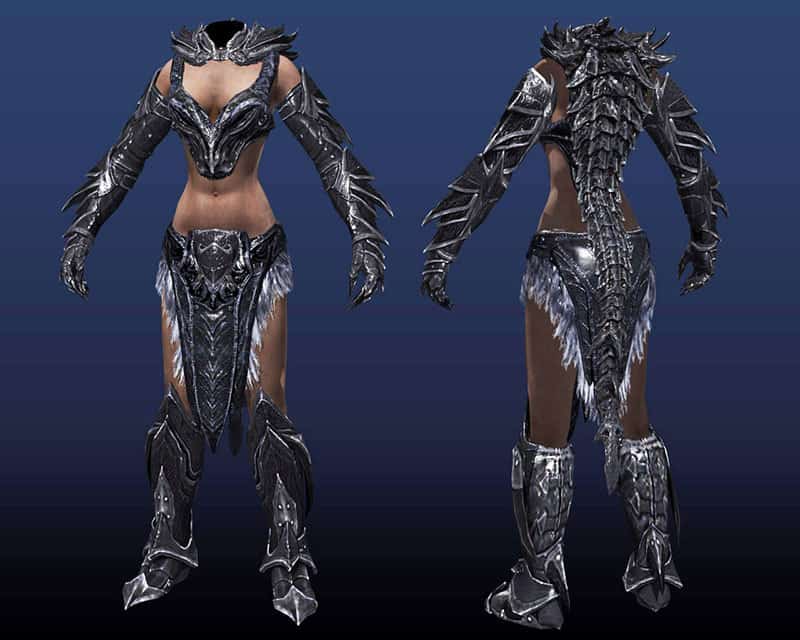
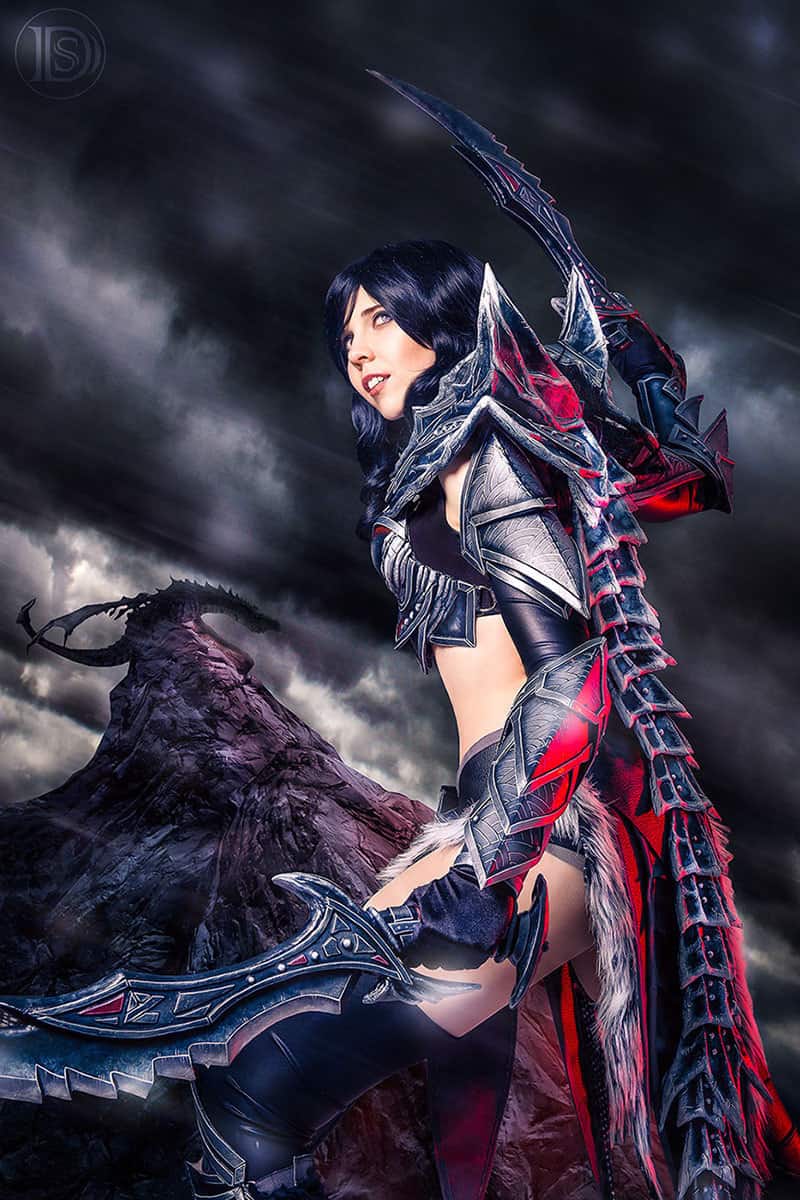
After countless hours in Skyrim (killing mammoths collecting their snouts), The Elder Srolls Series was a long inspiration for a new costume and like many others I also fell in love with the stunning design of the Deadric Armor. Sadly however my own inventory was not as gigantic as that of my character (which means the volume of my suitcase limits the possibility to bring this armor set to life), but this problem shouldn’t stop me from take on this project. I still had to change and adjust many things. So an alternative was an armor mod I found after a bit of digging on nexusmods.com. It was surely not the same original design, but the overall look and especially the spine made the project quite attractive for me!
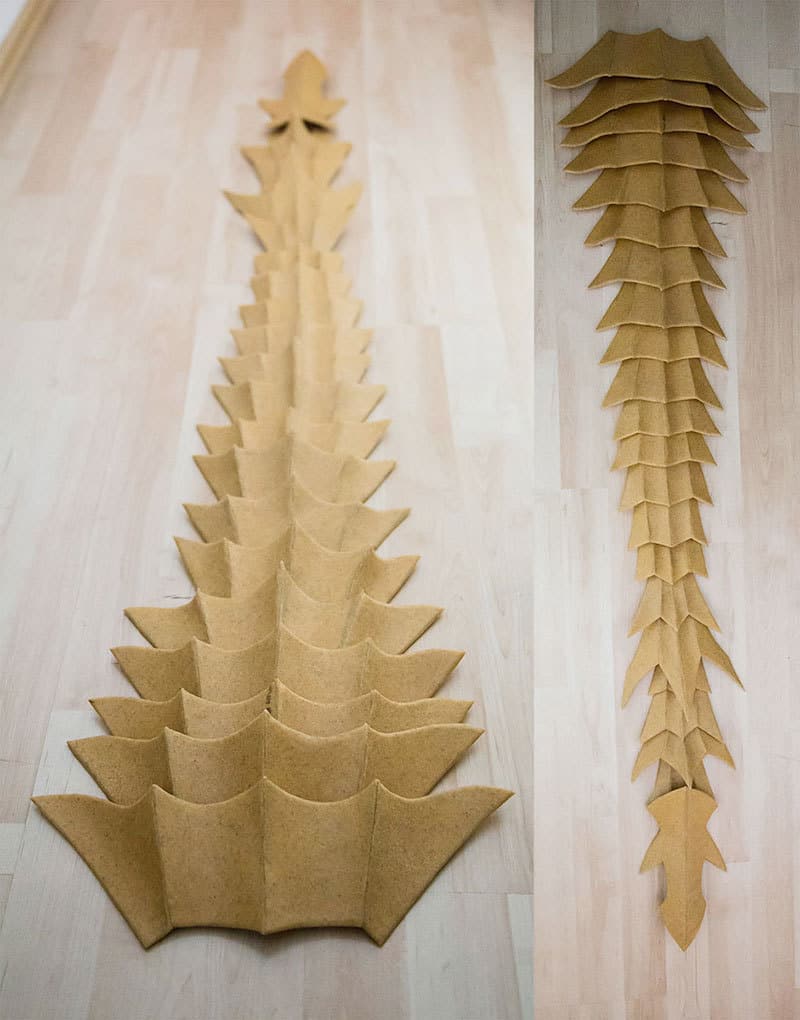
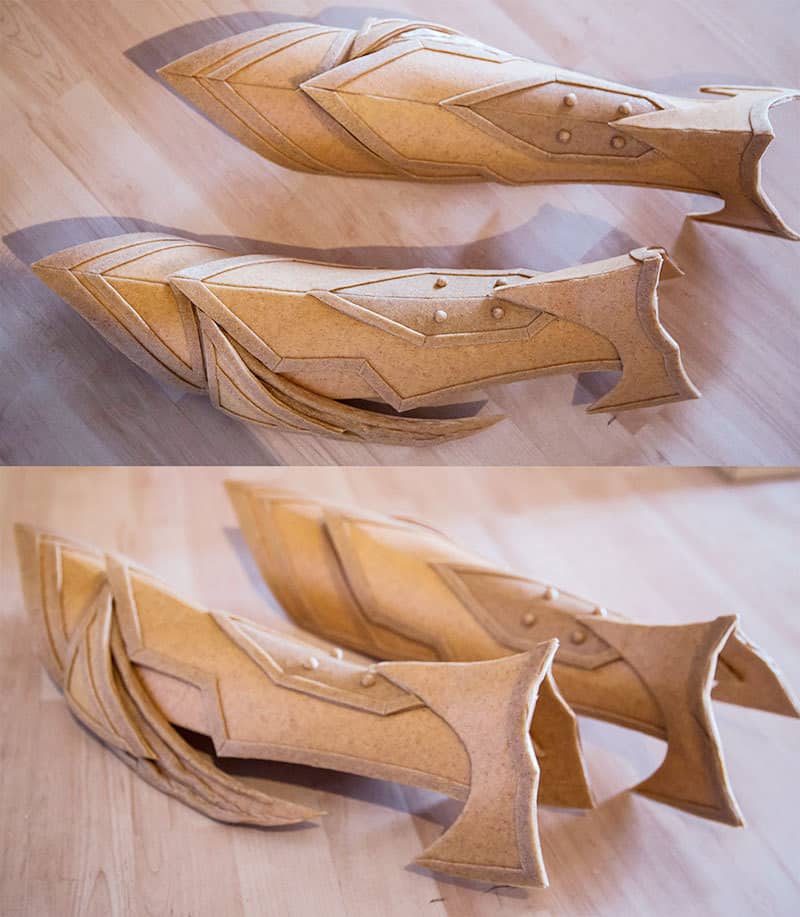
The spine was clearly the most exhausting but also the most interesting part to make. I’ve built 22 separate pieces out of Worbla with my sandwich technique, starting with the biggest one and cutting my patterns smaller and smaller each time. At this point however I had no idea how heavy this thing would become and especially the attachment should turn out to be quite a challenge to solve. (For more armor cosplay tutorials just check out my books for better explanations: Please check out my cosplay crafting books and patterns!)
The additional detail work required patience. A LOT of patience! Luckily this was THE opportunity to get rid of all my Worbla scraps I’ve collected during the last projects. During the sculpting I burnt my fingers quite a lot, but since I don’t feel that much in them anymore it was fine, ha ha! However it would have helped to dip my finger tips into some cold water before touching the hot Worbla.

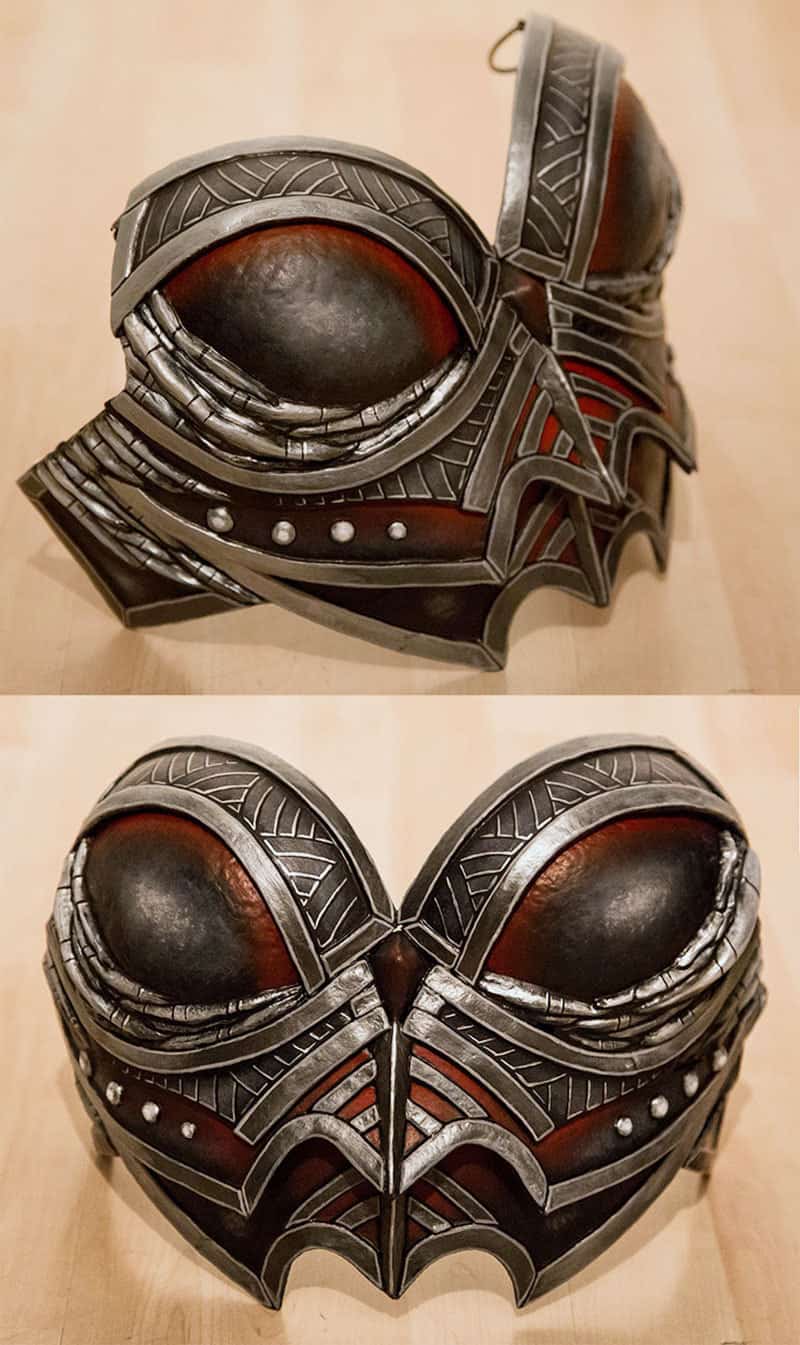
The paint job was done with acrylics. After priming the pieces with around five layers of wood glue (Elmer’s glue is a great substitute product for this part in america) we’ve painted everything black and added lights and details later. And with 22 separate pieces… this took quite a while!
The next step were the pauldrons. Actually it was not that hard to make them, but since I had only one week to finish this project I just had no time for experimentation. I guess, next time I’ll try some Pepakura techniques, but I had to rush with the pauldrons that much that I’ve ended up with something that just kind of looked like the Deadric pauldrons. At least similar.
I guess, it turned out okay, but this was not the only time I’ve wished to have a few more days for a costume to make it right. Not just to make it okay, but right. However I guess as an artist I’m always my own biggest critique.
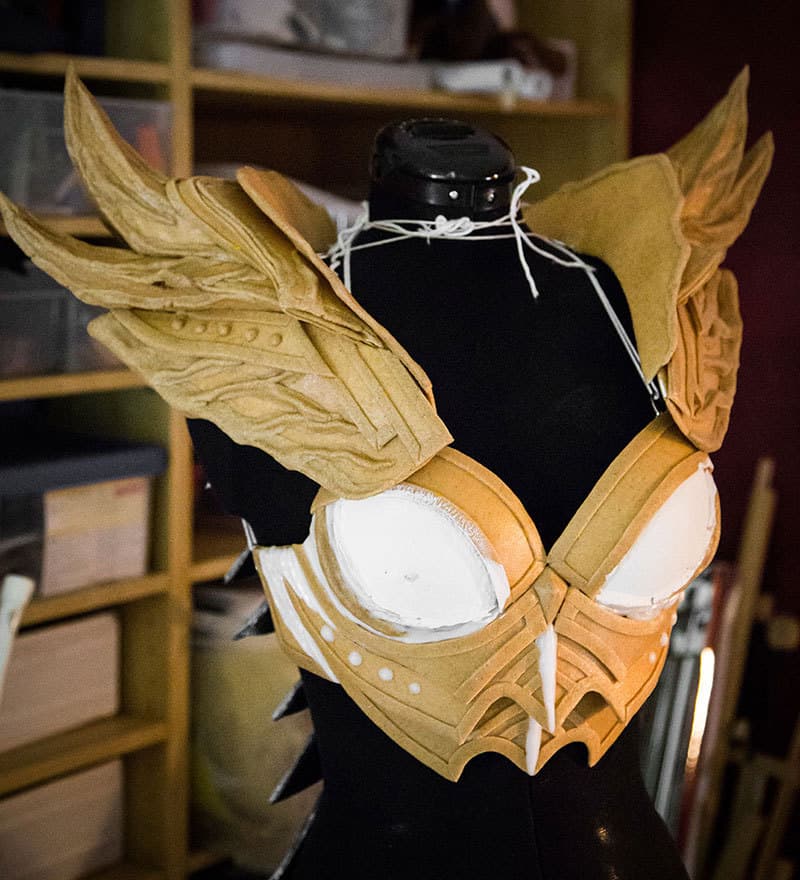
With the breastplate this was a little test adjustment. (The white stuff is Friendly Plastic btw!) I was satisfied with the result and for a few days of work it was good enough. Also if you want to learn to how create a breastplate out of Worbla, check out my Youtube tutorial! It’s really easy if you need only a basic shape! Then paint job was done, okay-ish, too.
Ha ha, you probably notice I’m not super excited about this project, but sometimes I’m just “Meh… everything is meeeeh!!!”
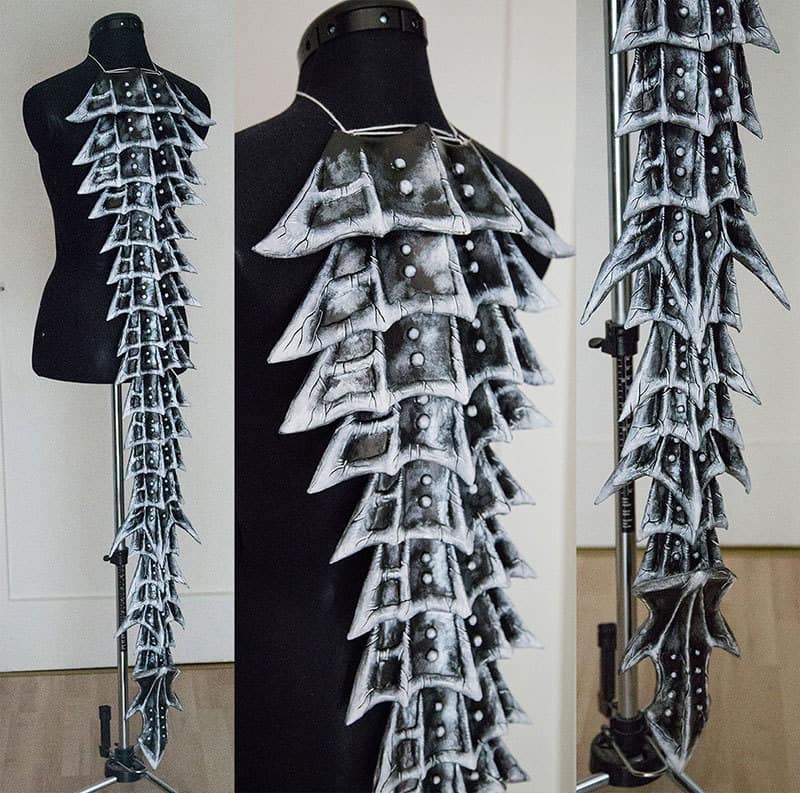
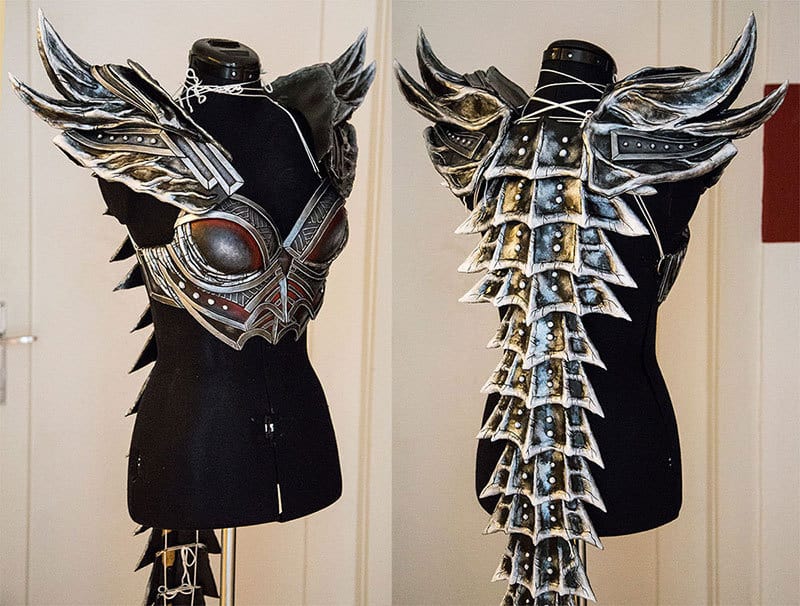
After I’ve put everything together as a test assembly however, it looked already better! I began to really to like the shapes which slowly came together and especially the spine gave the costume a great, overall look! Lucky!
At this point I already struggled with the attachment of the 22 spine pieces. I added two D rings to every scale and tried to connect them with some weird string and knot system, but the complete construction was so heavy that it teared apart during my movements. So the final solution was to add a stripe of velcro to every D ring (which means every scale was attached with two velcros) and then connect everything with a long, velcro belt from the top to the bottom. Since everything was detachable in this way, I was able to separate the whole spine and transport it much easier in the gaps between the rest of the costumes in my suitcase.
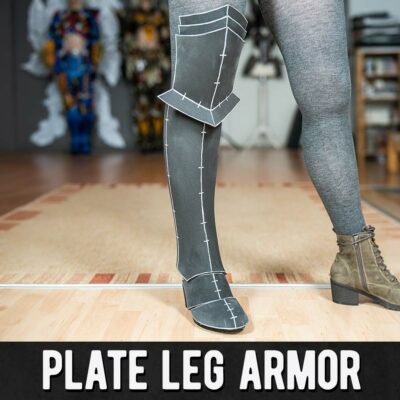
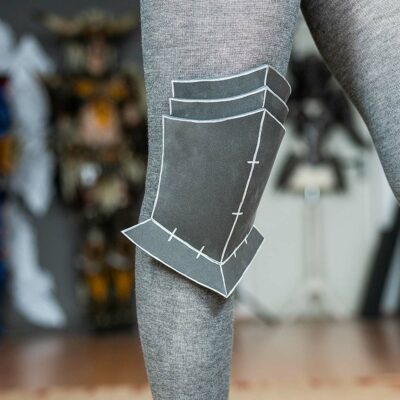
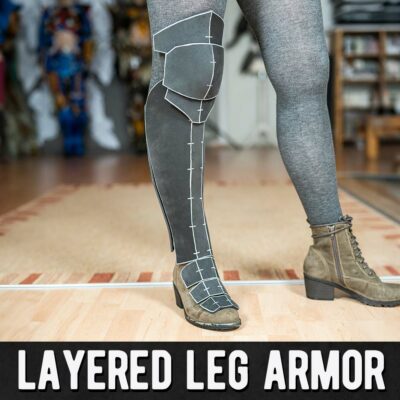
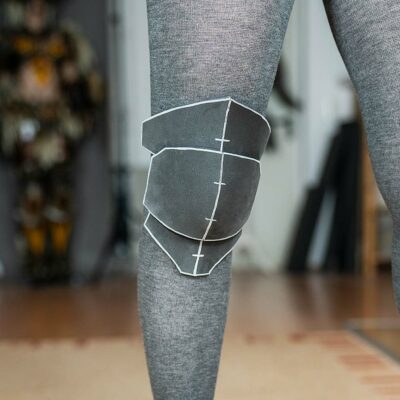
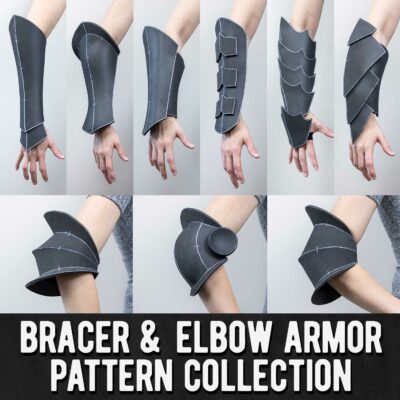
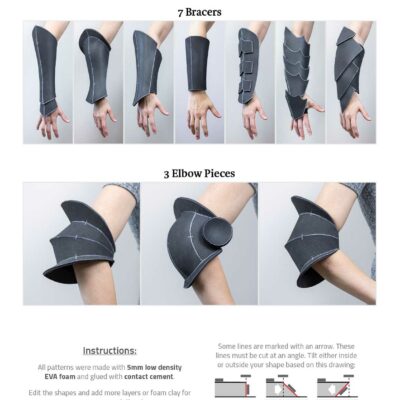
The shin pieces and the following shoe armor was done pretty easily. I just printed out my shin armor patterns (which you can download here), made some adjustments – added some layers – and done! If you’re curios: You can also see a pretty detailed step by step video of a bracer I’ve created on my Youtube Channel. I have a tutorial for EVERYTHING!
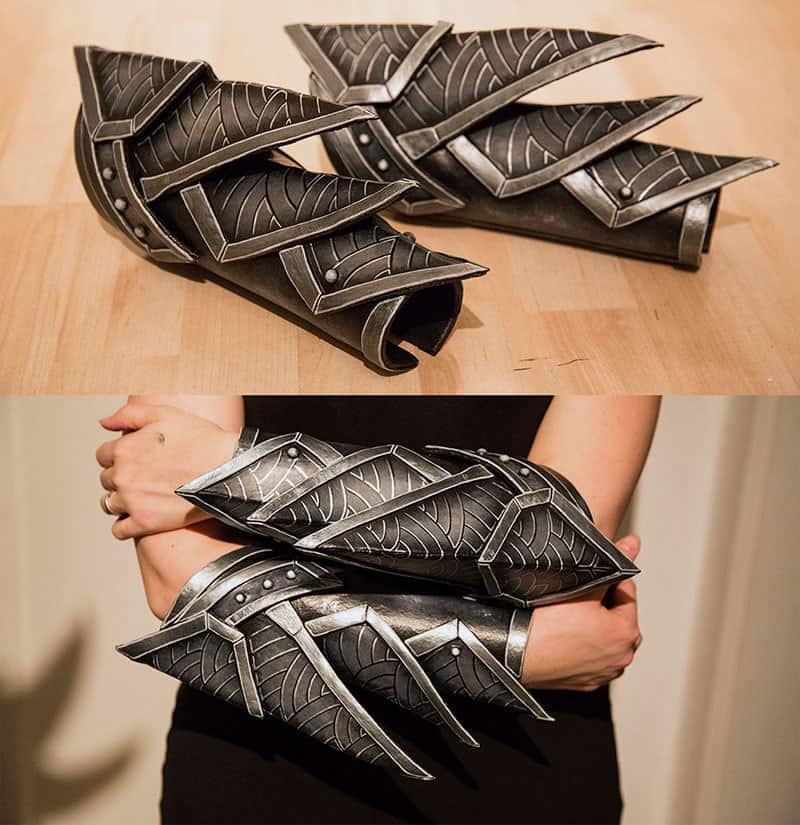
The bracer were made pretty similar to the shin armor: Just printed out my patterns, made some adjustments, transferred everything to craft foam and Worbla, primed and painted everything afterwards. If you take a closer look, you’ll notice how simple the construction really is, but the final paint job by Benni gave these armor pieces still a great look at the end.
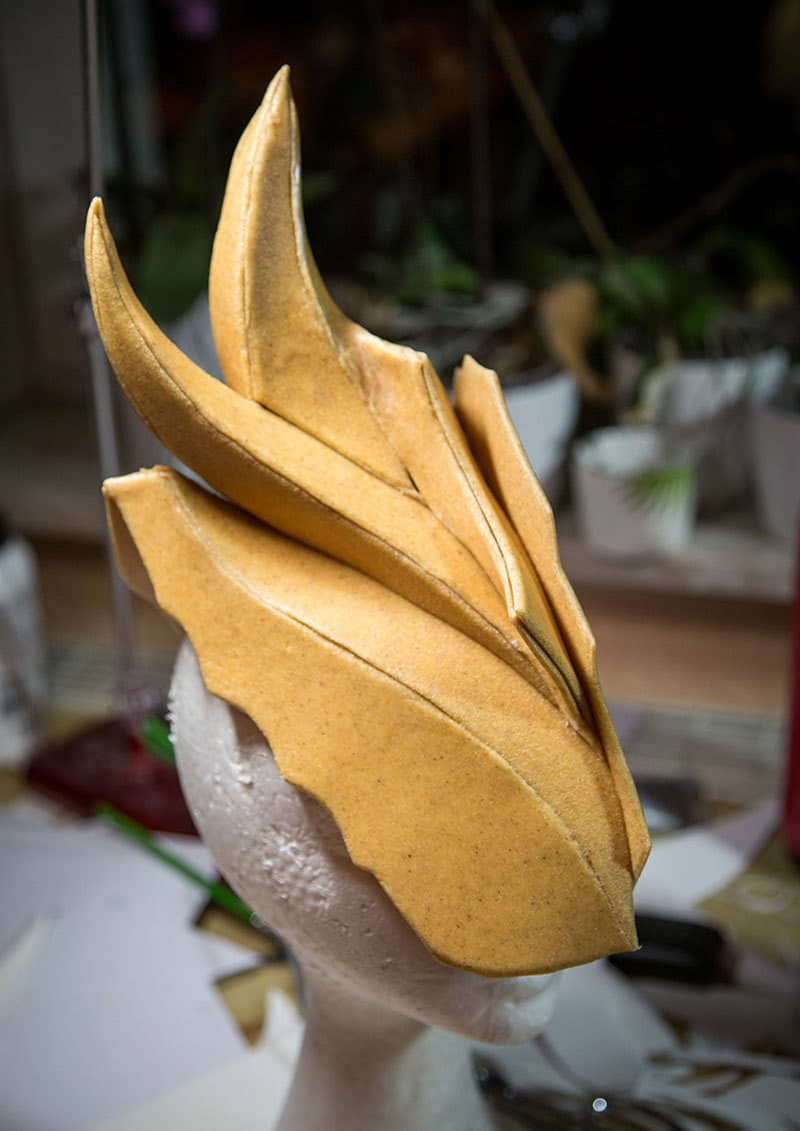
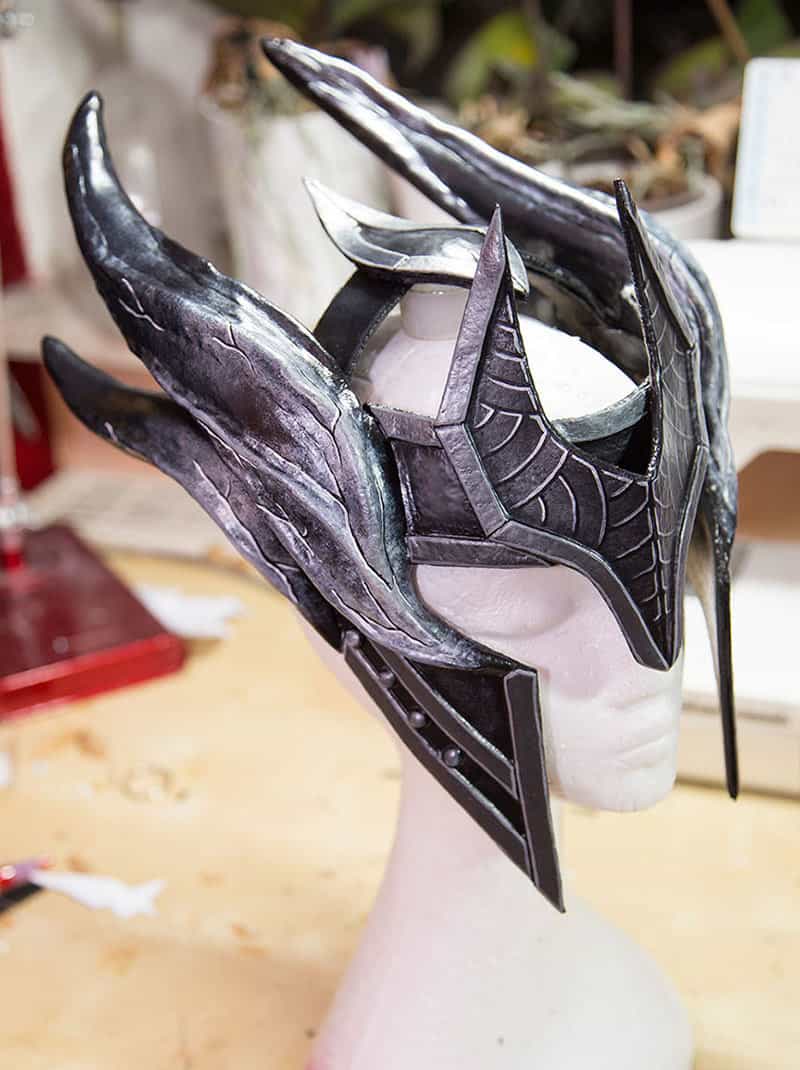
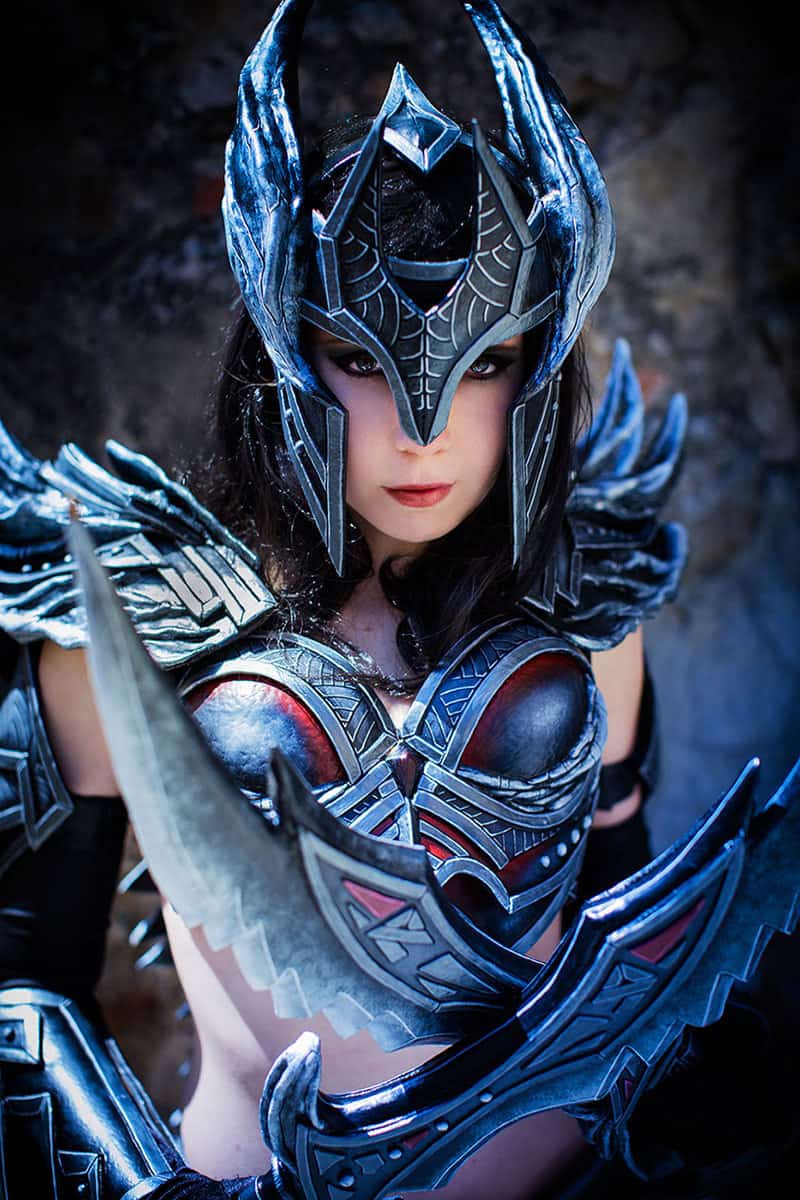
I also had the feeling, that the costume requires a head piece. I’m not a fan of helmets in general, but I really like this mask thingis which help shape my face greatly. However since I really ran out of time, I just smashed out horns of pink insulation foam and Worbla as fast as could and hoped it would look good enough in the end.
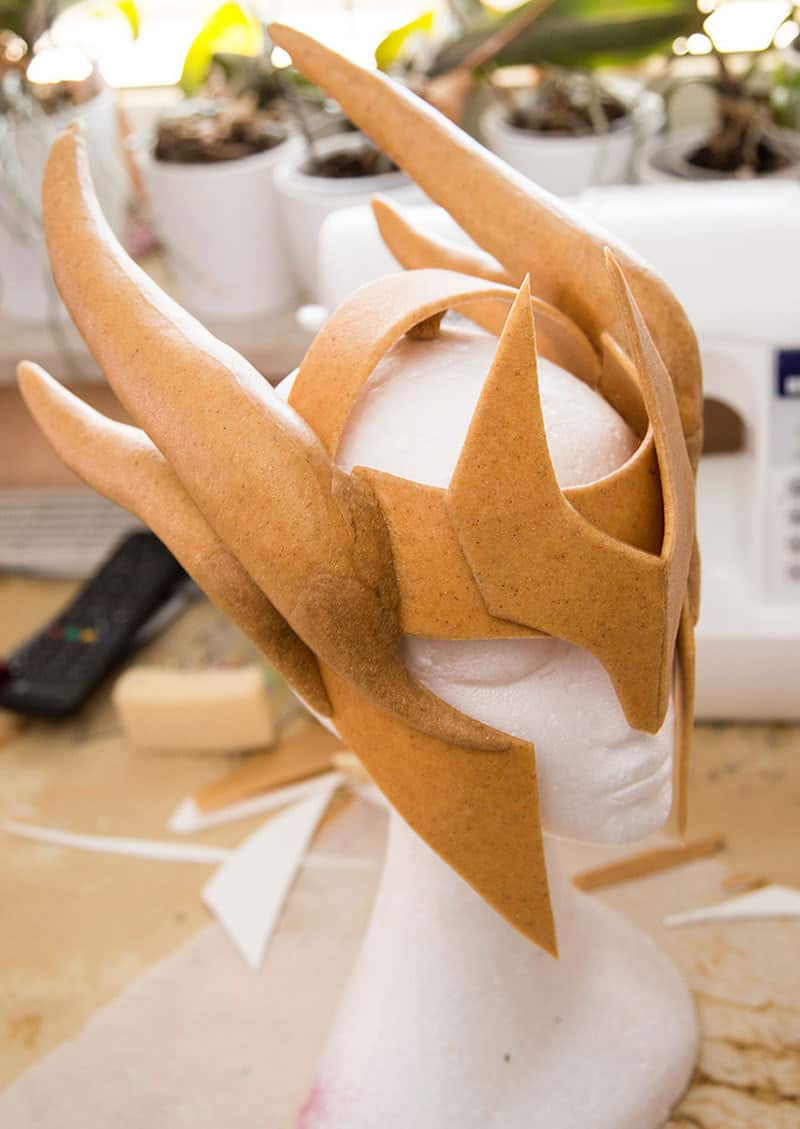
Yeah, it was okay I guess (Sorry for not being too enthusiastic with this piece) …
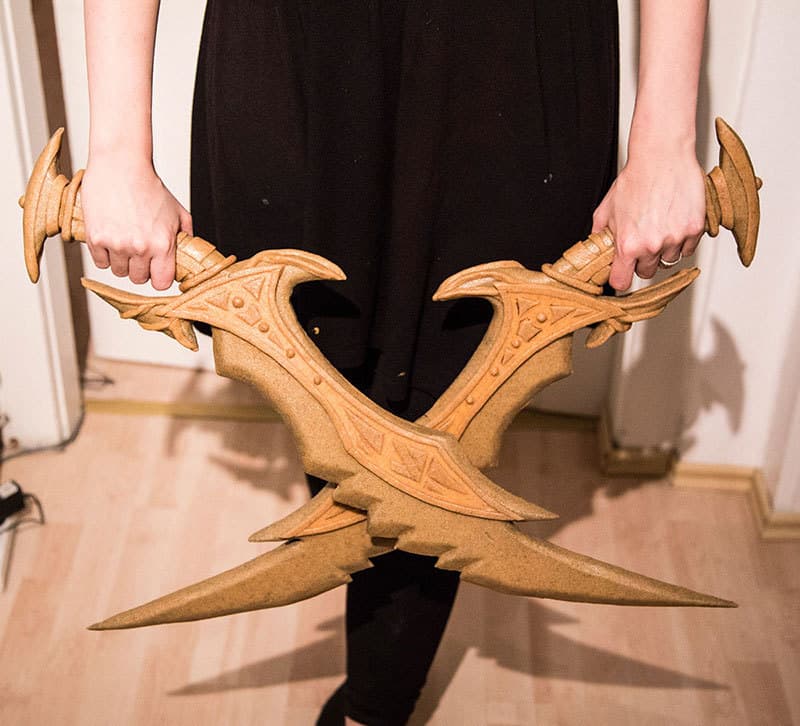
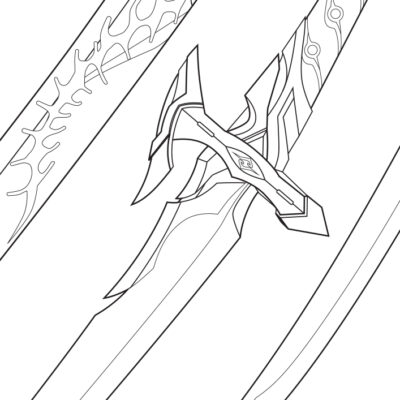
Like I’ve said, I only had one week! So to finish the daggers only two days were left! Yikes!
As you can see, I’ve created a base out of a printed pattern and some EVA foam and sadly the first try turned out far too bulky. I stressed already that much that I even almost didn’t care that it didn’t look right and focused all my energy just to finish at least one Deadric dagger, until… a surprise order of pretty thin EVA foam was delivered (the sheets were supposed to be thicker, but it seems that Ebay had a wrong description on them – Again LUCKY!!!).
And sadly, these sheets were just perfect…
So really at the last day we stopped sleeping and pulled out two new daggers in only a few hours!
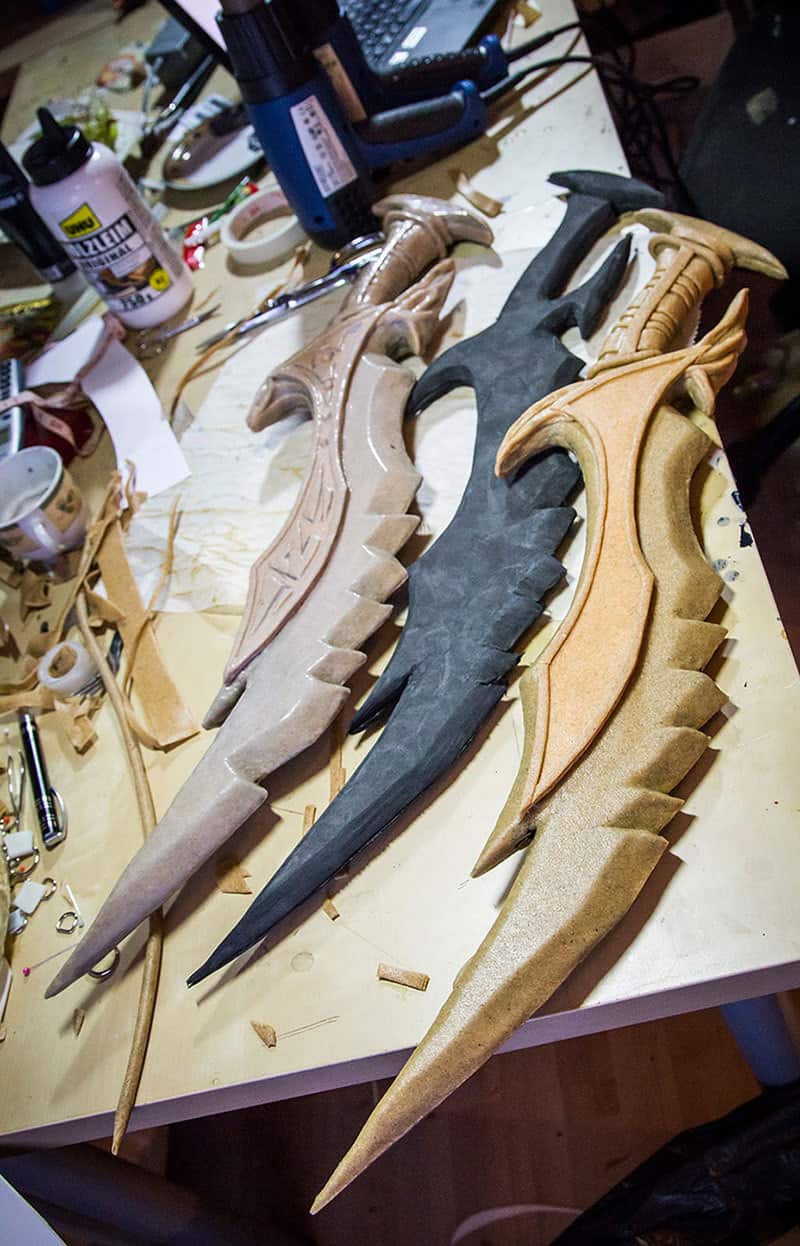
IN A FEW HOURS! I still have no idea how I made this…
Benni called me insane, but then it was his turn to paint everything in even less time, ha ha! Looser! :)
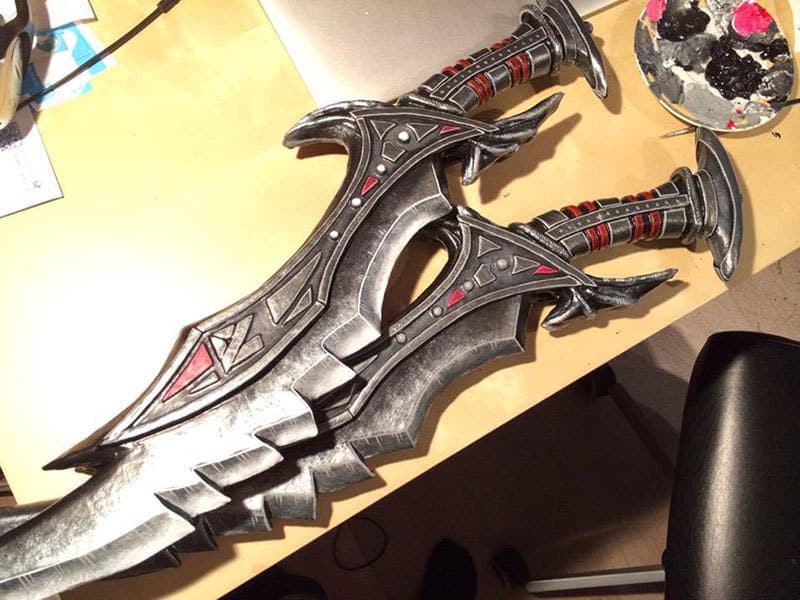
Well, we both made it in the end… :)
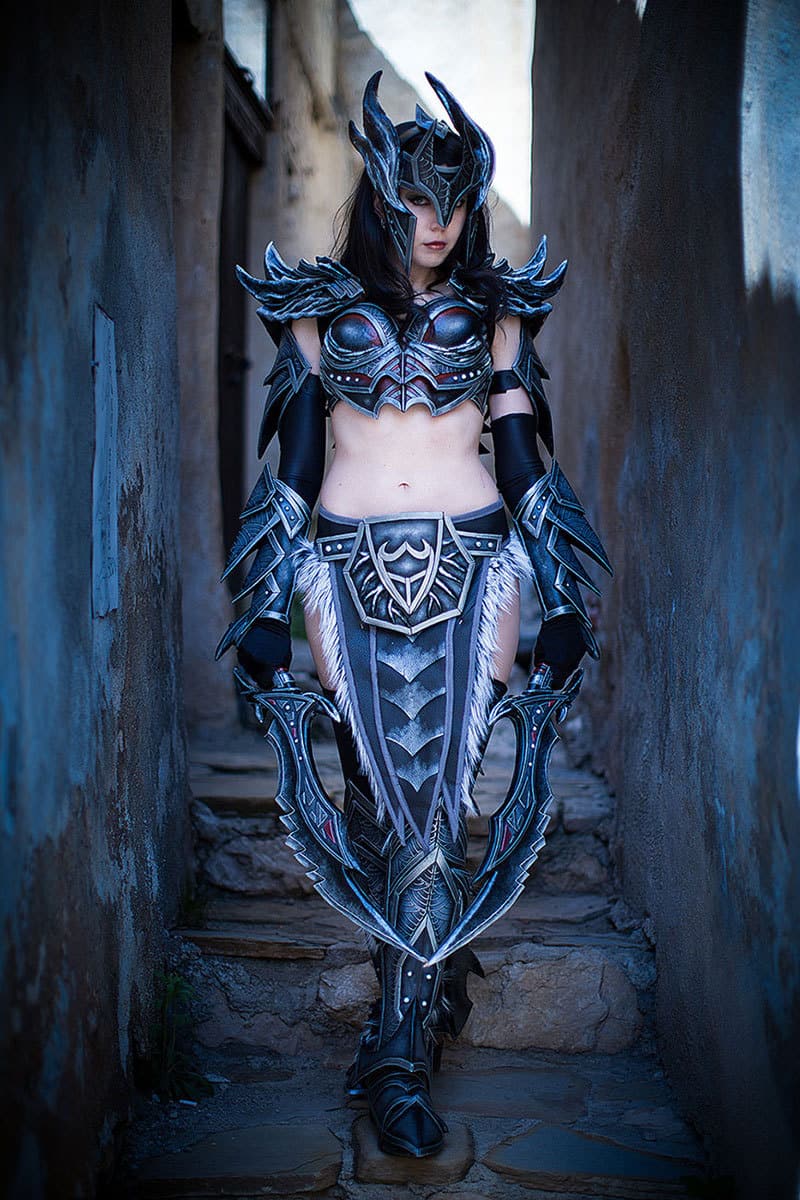
Okay, I admit, at Katsucon, the convention the costume was supposed to be debuted at, my spine armor completely fell apart, but the first time is always an experiment. You should always try to wear the costume at least once before attending a convention in it! So after one hellish week of work and some further adjustments and improvements afterwards, I was quite satisfied with a nice, more or less comfortable costume that was easy to transport and had a unique and original design. Thanks again for the design mysterious artist who made the mod!
Here are a few shots of the finished costume.


Do you have a pattern for the tail?? I would love to make one!
hi. So, I want to make something like this for a cosplay of a dragon holder/ mistress for a Renaissance Faire. Would it work if I used cardboard instead of Worbla?
Hi there so what is the Worbla? I s that like mdf wood. Where can I get some from. How do you cut it? Love it.
Absolute wicked, sick, bad ass…love Skyrim/Elder scrolls, excellent work!
I want
I want LOL
One of your best…you look so damn hot in it…Black hair suits your face so well. Keep inspiring us Kamui and Benni too !