
.Master Nova Cosplay from Heroes of the Storm
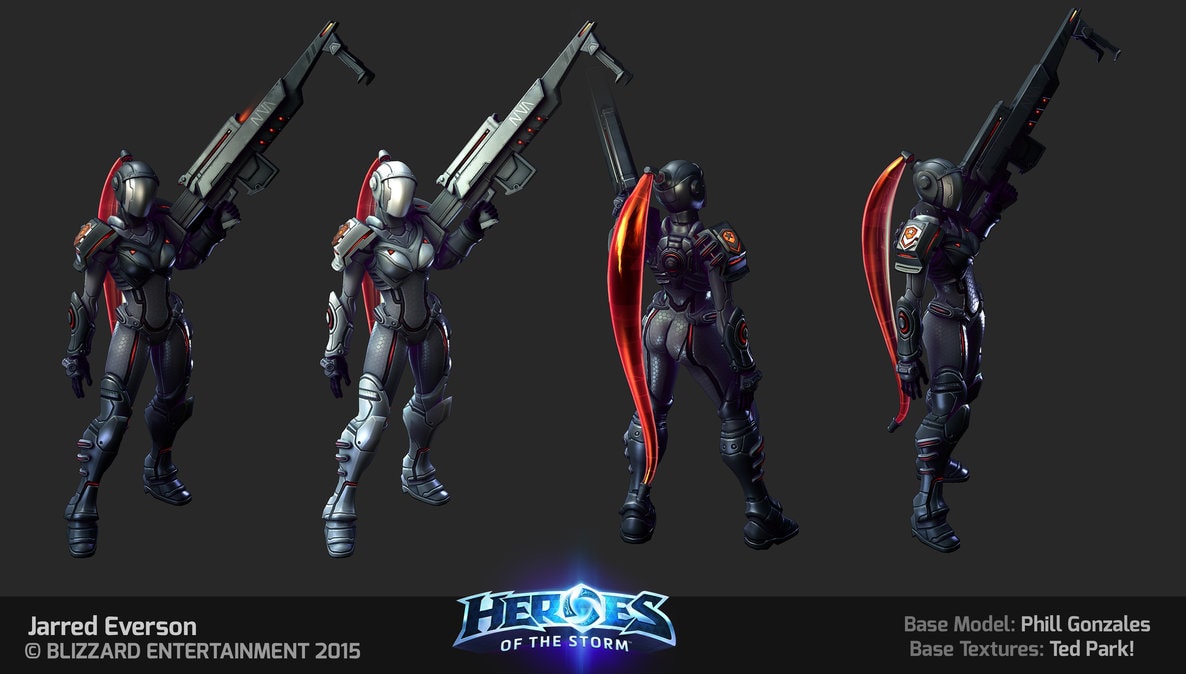
I started building the Master Skin Nova (which is now called Elite Agent) from Heroes of the Storm back in 2015. I wanted to bring something really impressive to BlizzCon – something that looks super cool in the dimmed halls of the convention. And I wanted to try out a full EVA foam armor as well as improve my skills when it comes to light installations. So Nova with her crazy light up ponytail and the illuminated armor was just the perfect project for that.
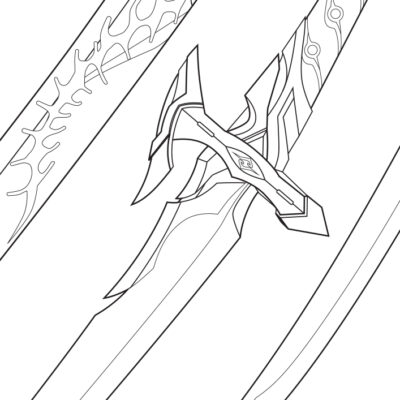
Building the blaster
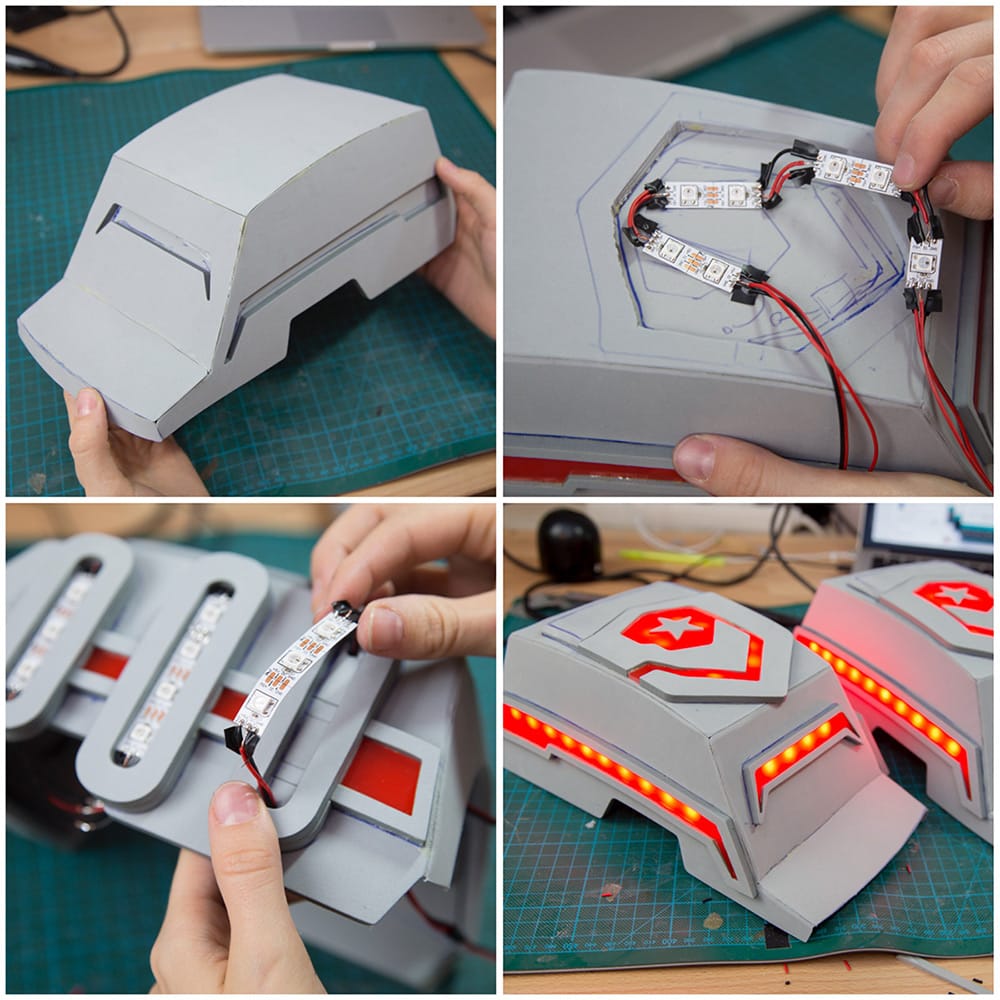
Nova was actually the very first time I used EVA foam instead of Worbla for armor. Never worked with the material before so this was the first challenge. To get familiar with the material I took it slow and began with the weapon first. Back in 2015 we just got our brand new laser cutter, a Full Spectrum Laser, and we were eager to try out. Nova’s rifle was the perfect little test project! Benni created a detailed blueprint and together we slowly figured how how thick each layer of foam needed to be to build up the right shape. Aside of that we also had to build in hollow areas for the LED circuit and make the whole piece detachable into three separate parts for easier transportation.
The electronics
I used digital RGB LED strips, which were controlled by a Trinket Pro 5V and powered up with a Powerboost 500C and a 6600 mAh LiPo battery. All products can be found on the Adafruit website. I’ll explain the whole circuit as well as the code in my new Animated LED book if you are curious for more info.
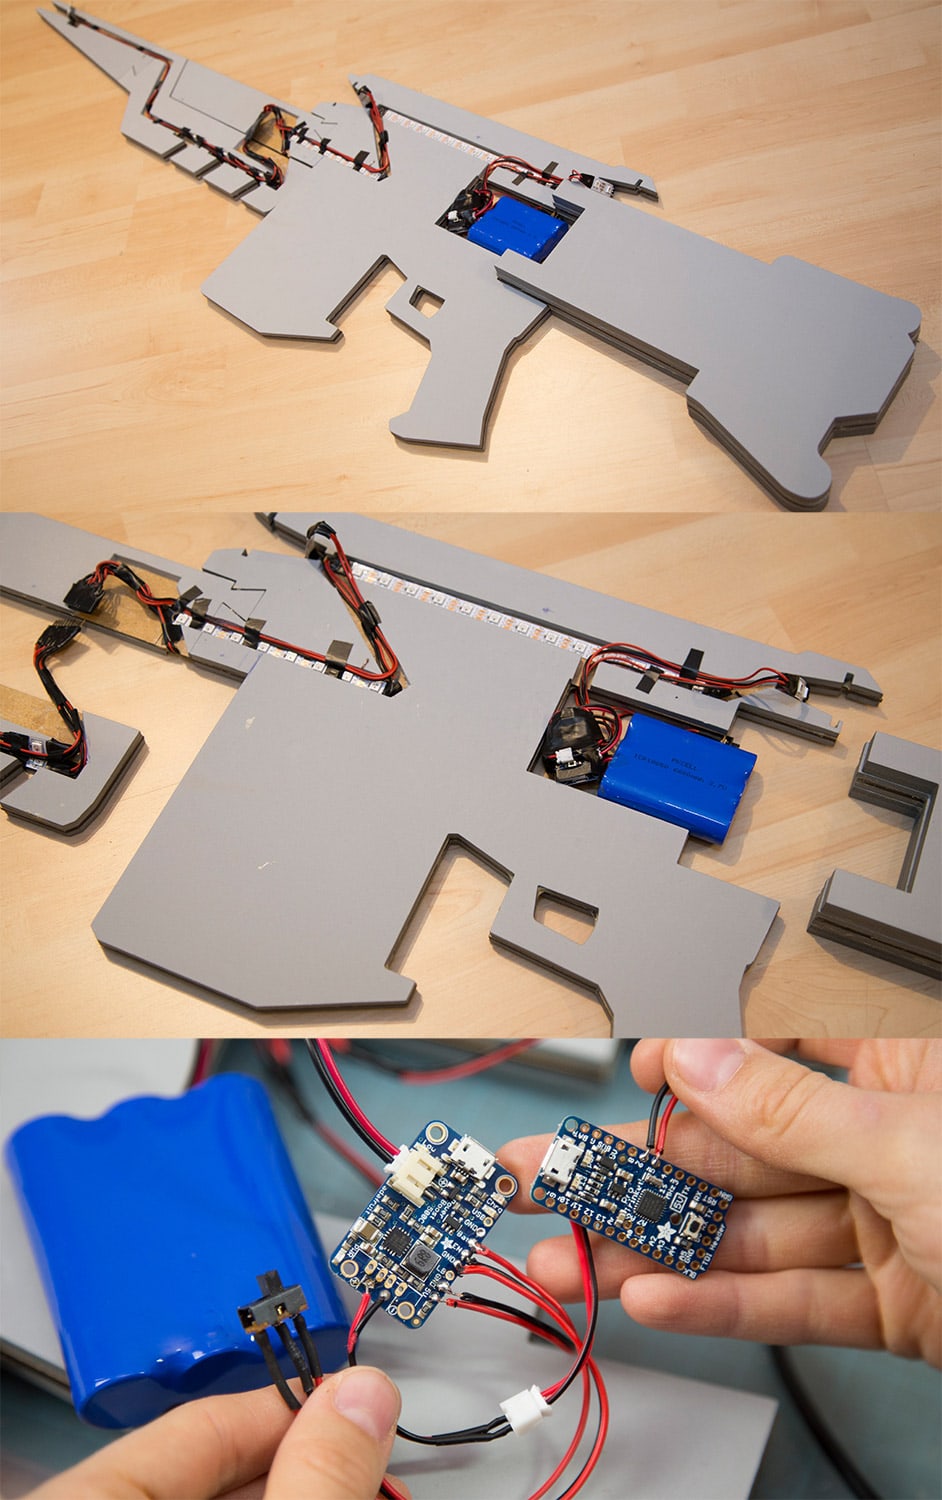
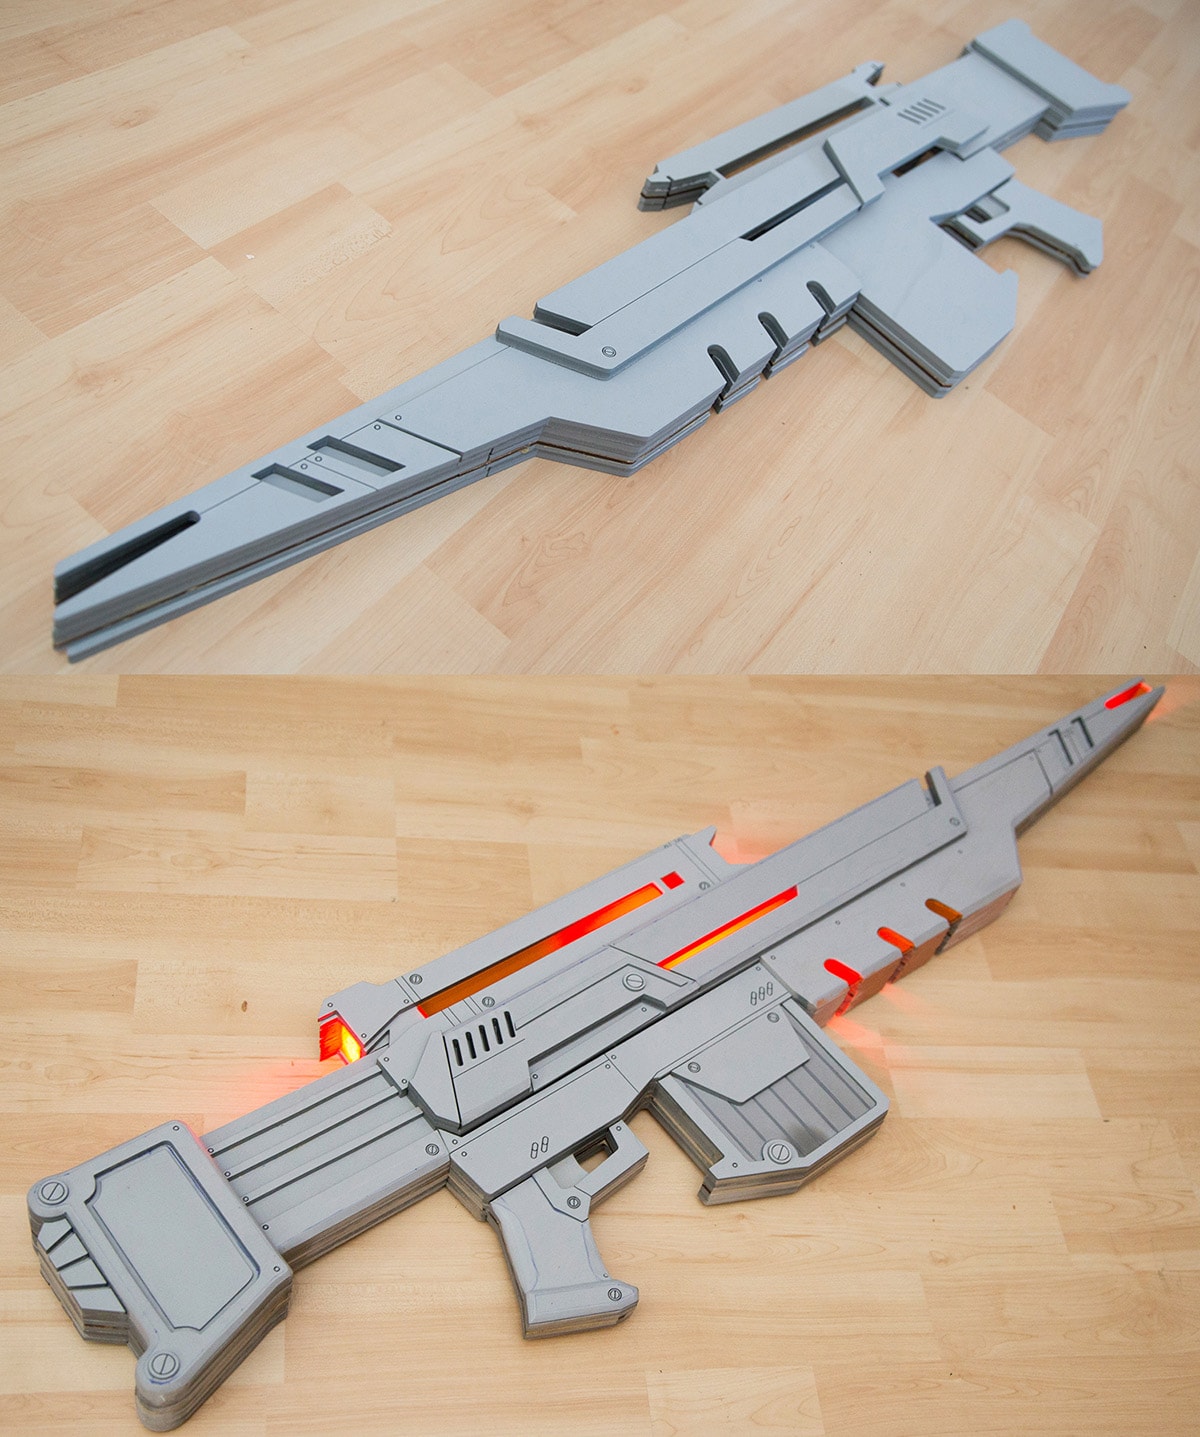
After adding a few layers, this is how the rifle looked like. You can see the space for the circuit, but also the separate parts of the gun pretty well. I actually connected them with strong Neodym magnets. Aside of a little bit dremeling the edges, the whole prop was completely laser cut by Benni and then assembled by me.
Here is also a video of the animated LEDs. Guess it shows pretty well how I build them in.
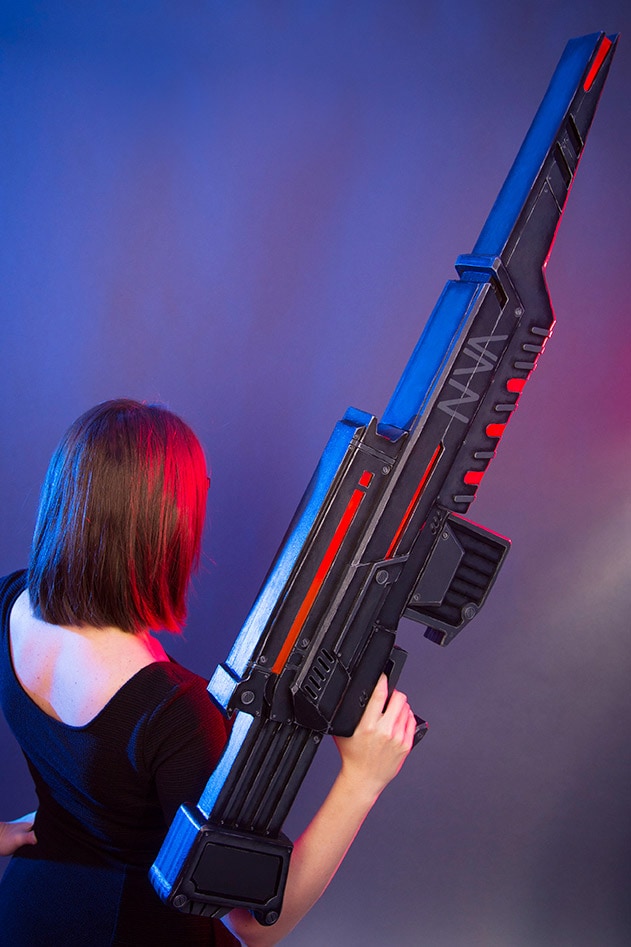
And well, that’s the final rifle! As always, Benni’s paint job with simple acrylics and brushes was amazing! We have also a Painting Book by the way!
I actually uploaded a detailed making of video of the rifle if you are curious. Man this video is old already!

By loading the video, you agree to YouTube's privacy policy.
Learn more
Creating the paudrons
So, next was the armor! Just as for the rifle I used EVA foam from cosplayshop.be. First, I wanted to try out the laser cutter for the armor as well and the most suitable parts for this were the pauldrons. While it worked more or less, it took far too much time to draw the patterns on the computer and keep the bending of the material in mind. Props are mostly flat, so laser cutting them works, but armor needs to be bended and reshaped and this actually changed the measurements of the patterned pieces. So I finished the pauldrons, placed the LED strips and then went back to traditional drawing and cutting by hand for the other parts.
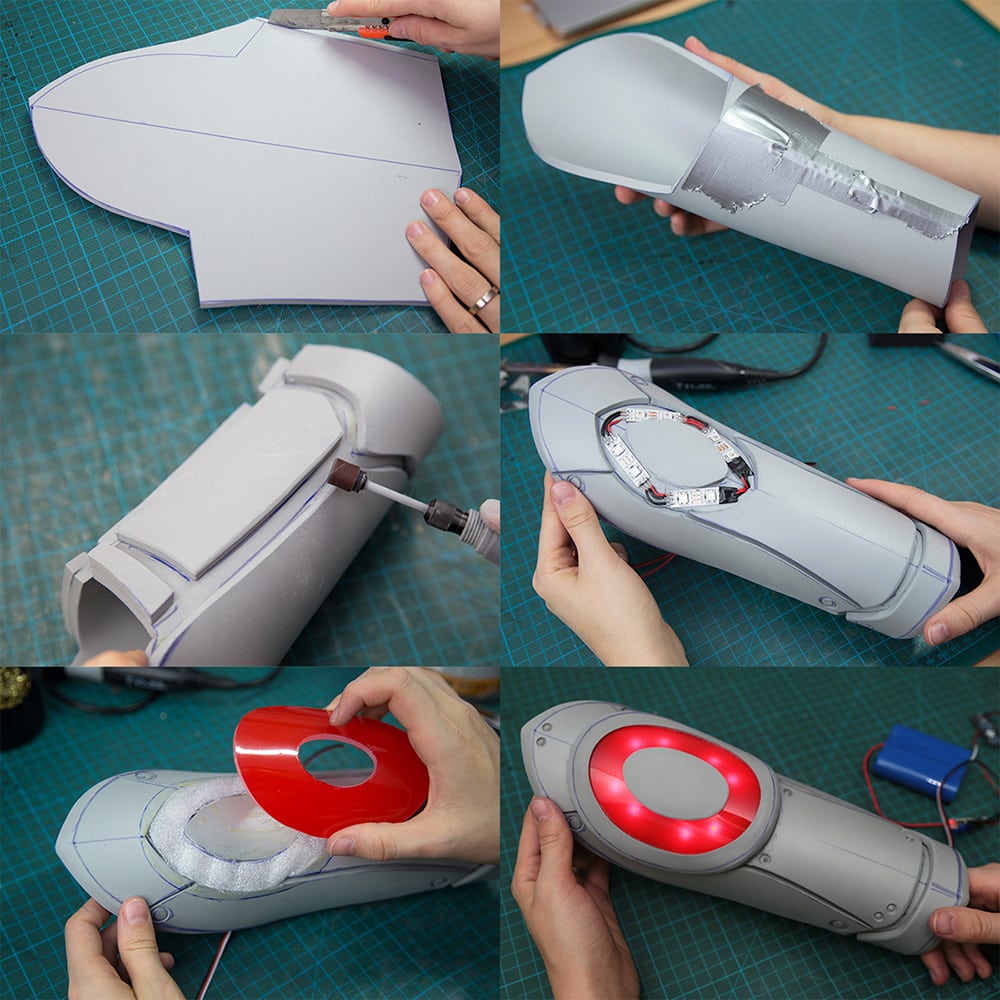
Next on: The breastplate
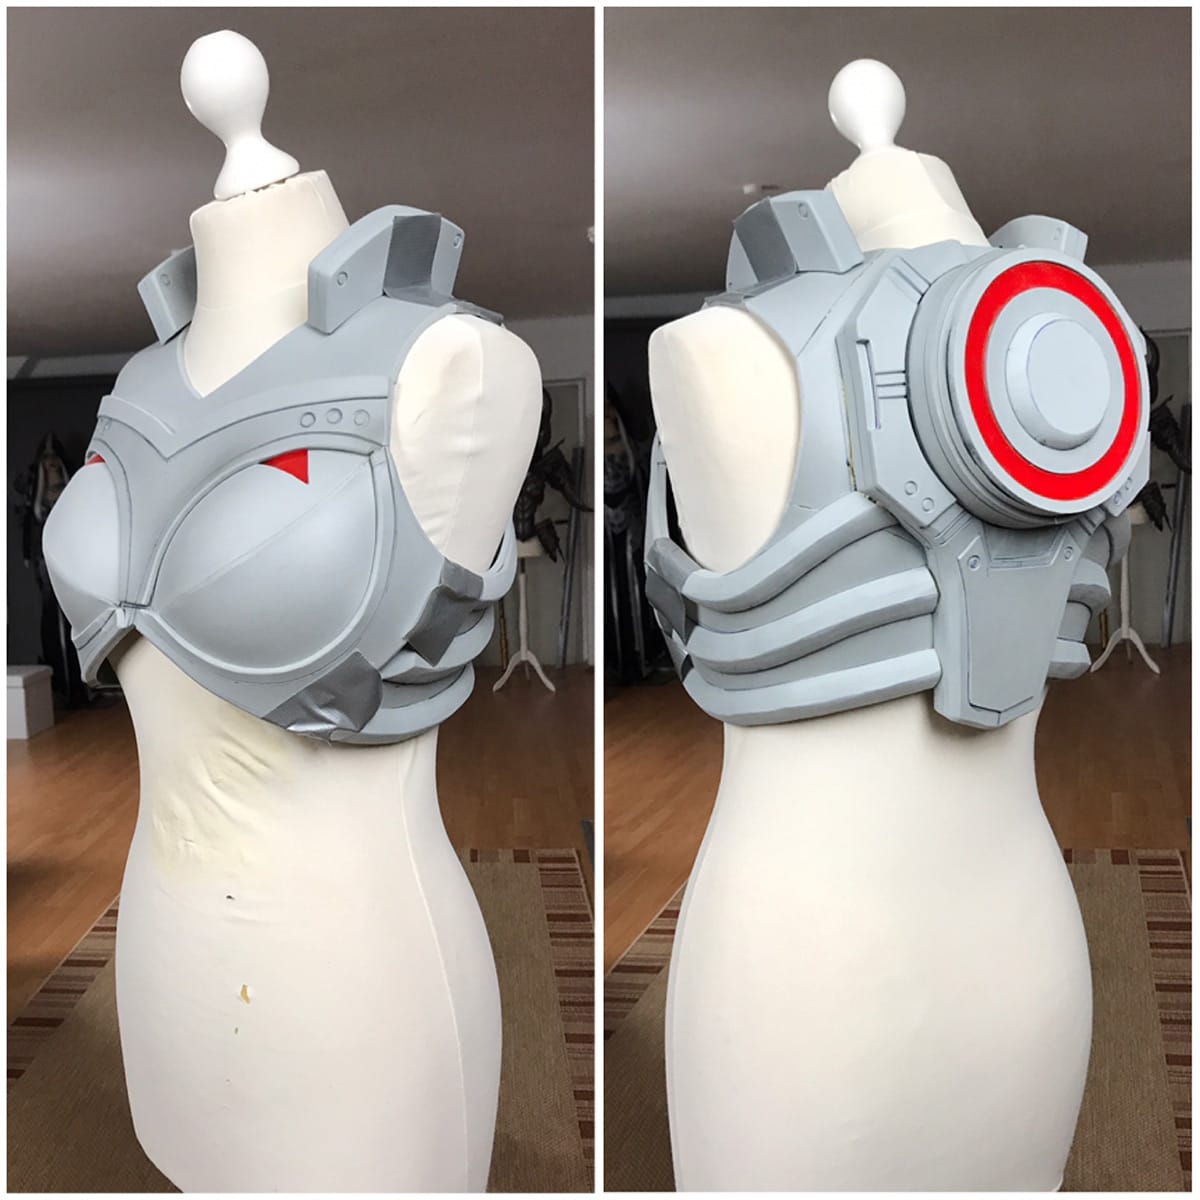
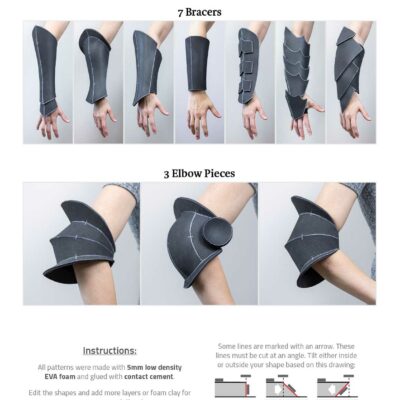
I wrapped myself in kitchen foil and duct tape, drew on a pattern, cut it out and traced it on foam. It’s pretty similar to an EVA foam build I’ve recently uploaded on Youtube. It took me some time to get comfortable with the new material, but the foam is really easy to handle and my patterns weren’t that difficult to shape. I mainly used 5mm foam, so cutting and shaping the material with heat was also pretty easy. You might want to check out my EVA foam guide in my blog if you want to create some foam armor as well!
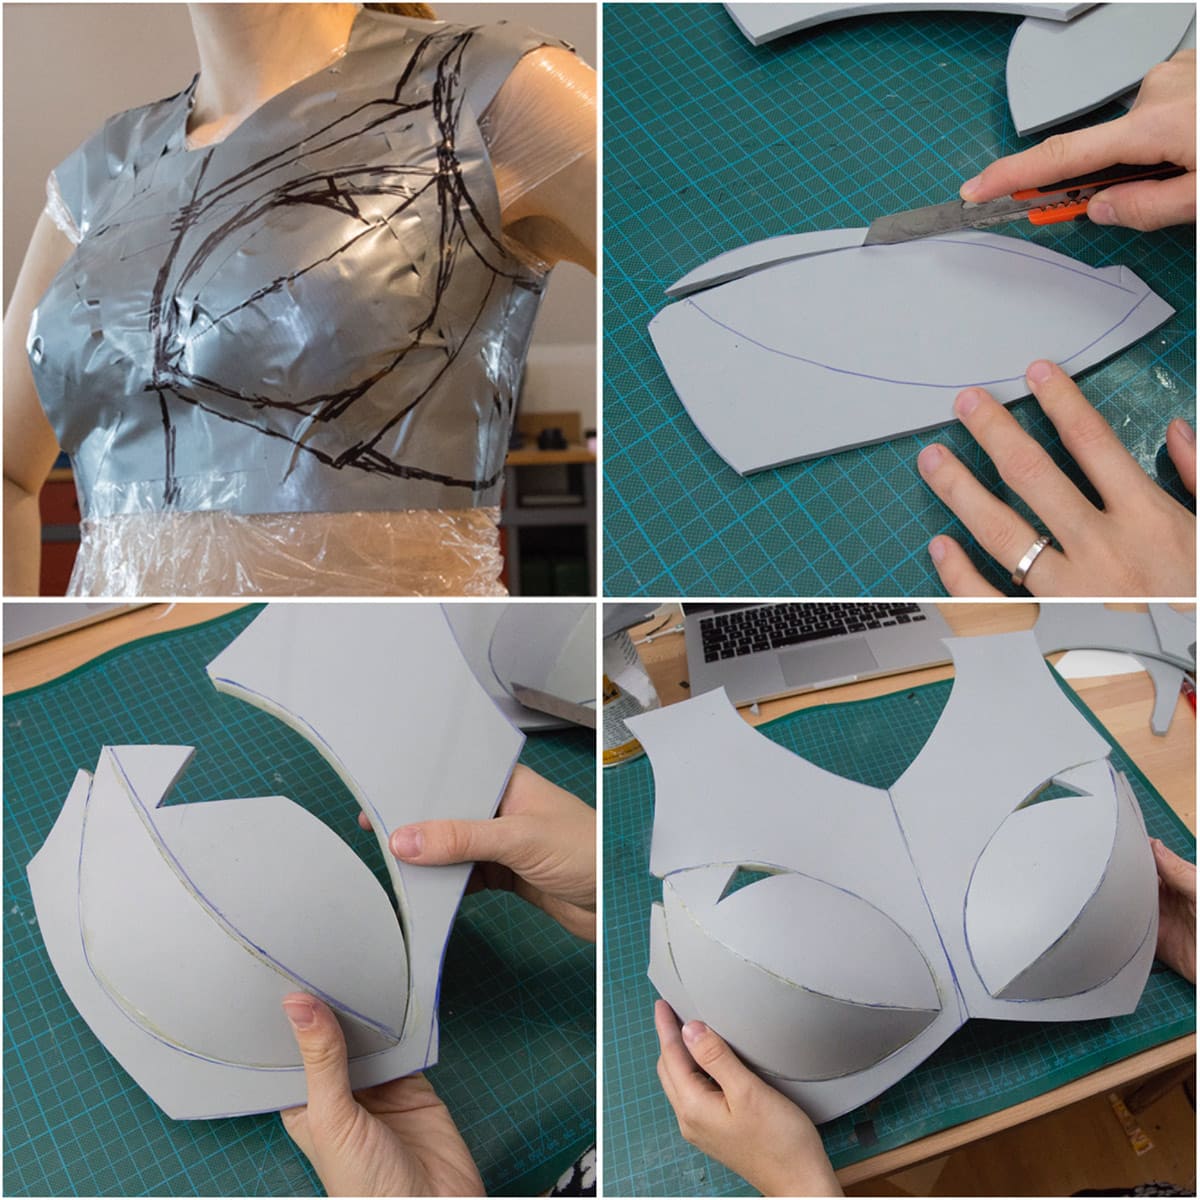
Afterwards I added some details and the breastplate was ready for the paint job. I wish I would be able to show you here more progress photos, but I was in such a rush to finish the costume for BlizzCon that it was really hard to keep my camera in mind. The orange parts you see here would light up later. Also the round thing on the back is actually hollow and detachable. This was supposed to be the core of my LED circuit.
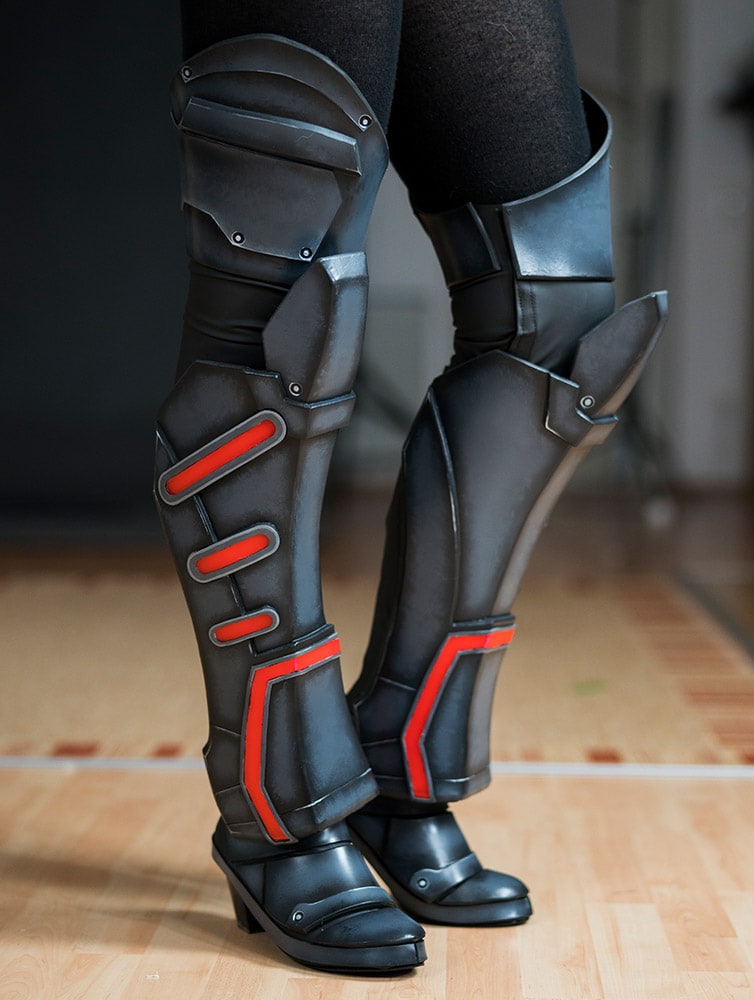
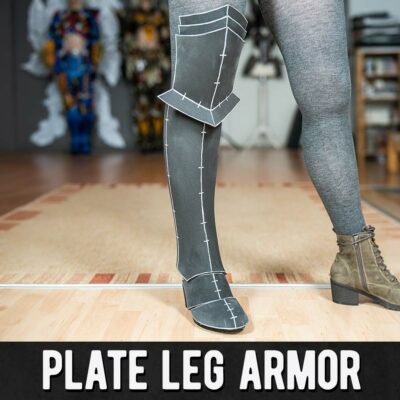
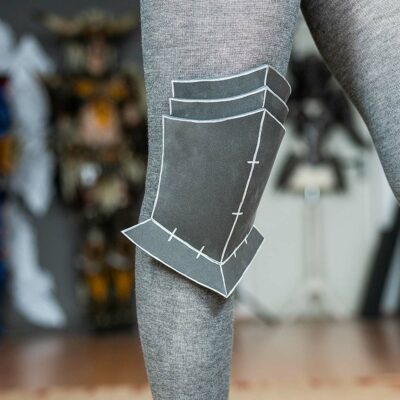
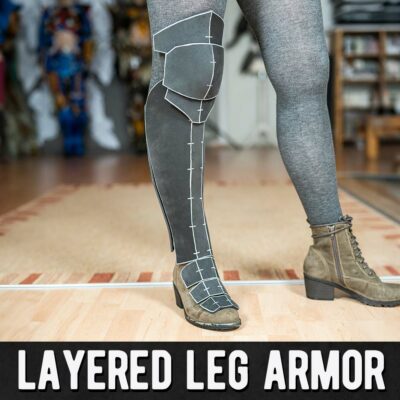
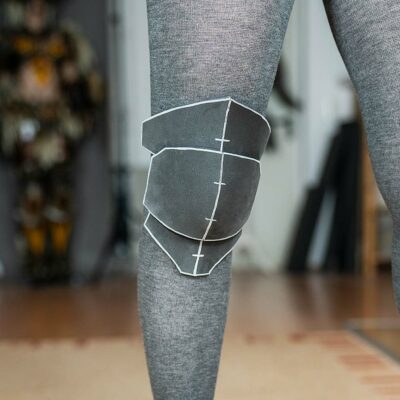
The leg and shoe armor
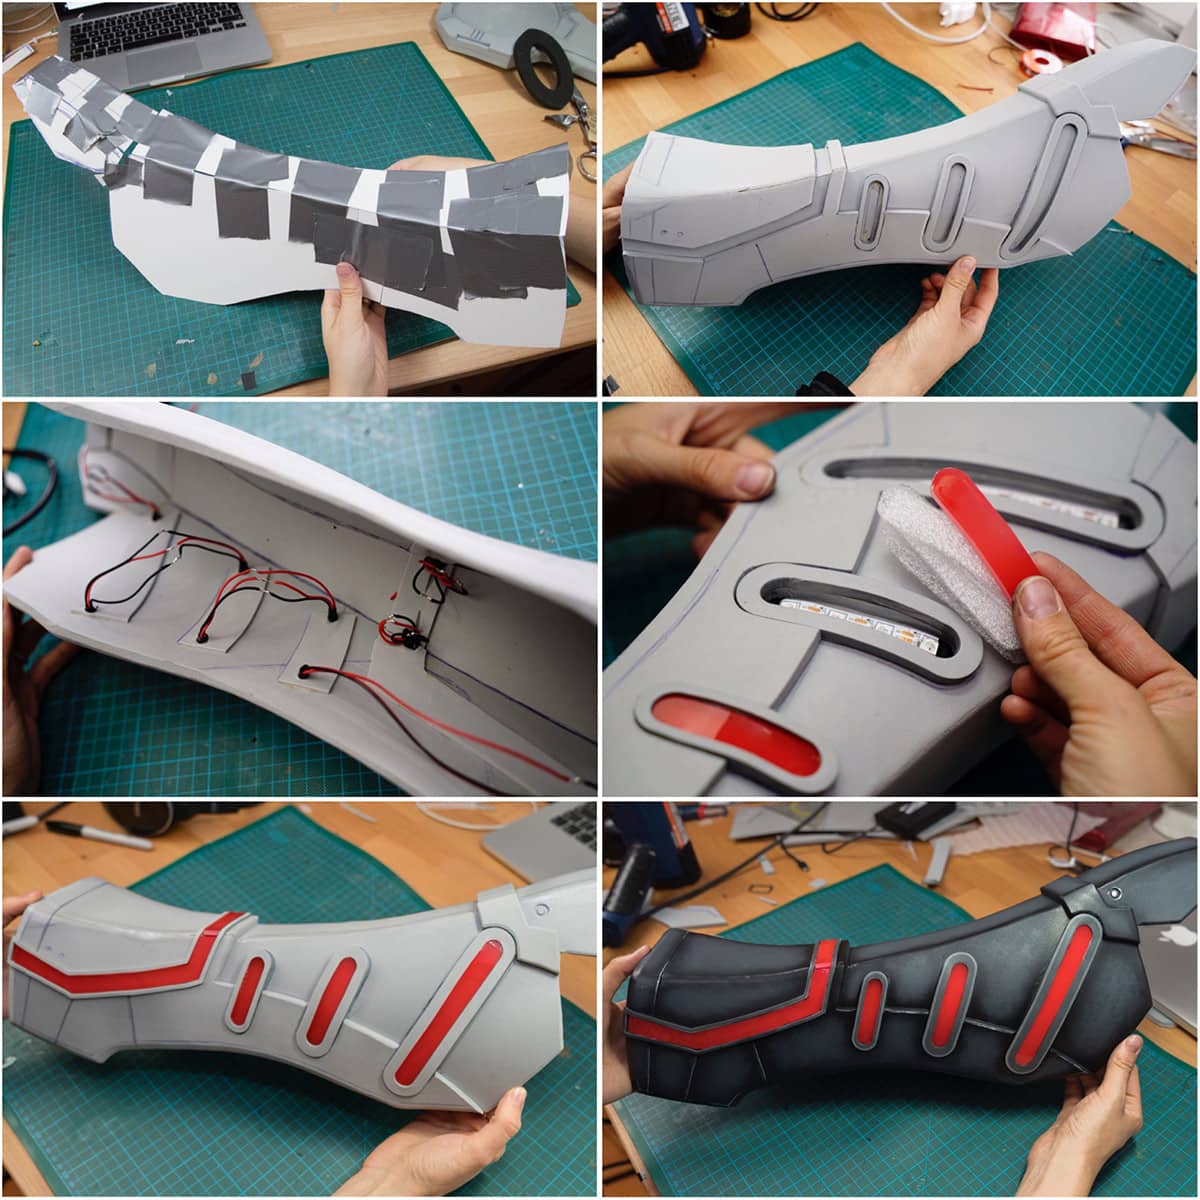
Next on the shin guards! It wasn’t able just to wrap my legs to get the patterns, since the design was very rectangular and weirdly shaped. Instead I made a rough design on paper, cut it out, taped it together and adjusted it until I found the right shape. The part of the costume was really challenging, especially because the material I worked with was flexible – the red acrylic I used for the lights was completely stiff tough! As you can see, I had wires running all trough the armor. I used digital RGB LED strips, which I placed inside the foam, covered it with a few layers of packing material and covered it then with 3mm of laser cut milky acrylic with a translucent orange foil on top. All LED strips were then soldered together and got a plug for connecting them to the power source.
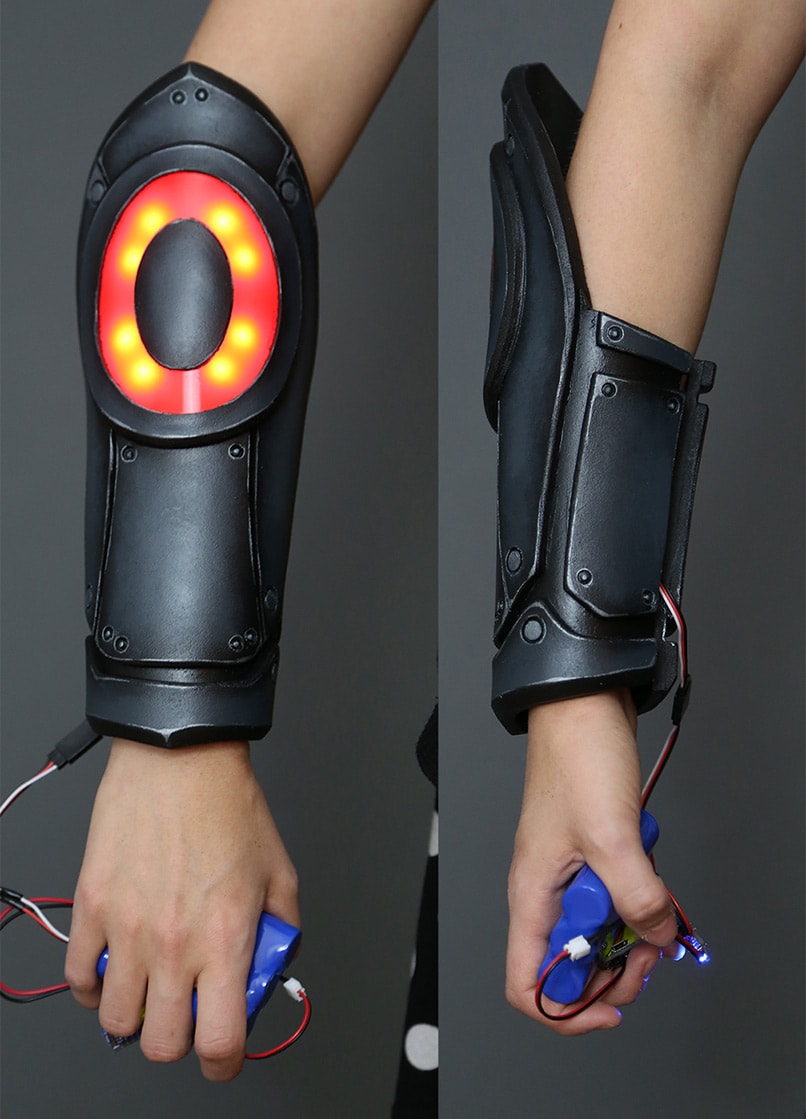
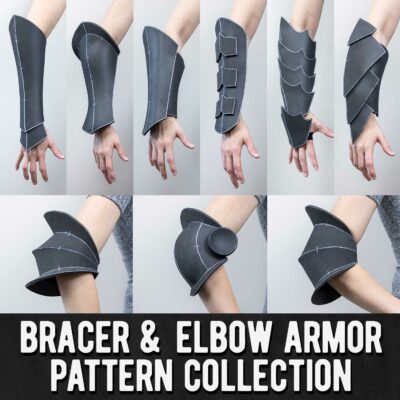
And that’s the bracer. Same steps as before. The bracers were actually one of my first armor pieces and while I was happy with their shape two years before, I noticed that today I would probably do things very differently. But I was learning and I’m still learning today, so it’s good if I get better I guess! ;)
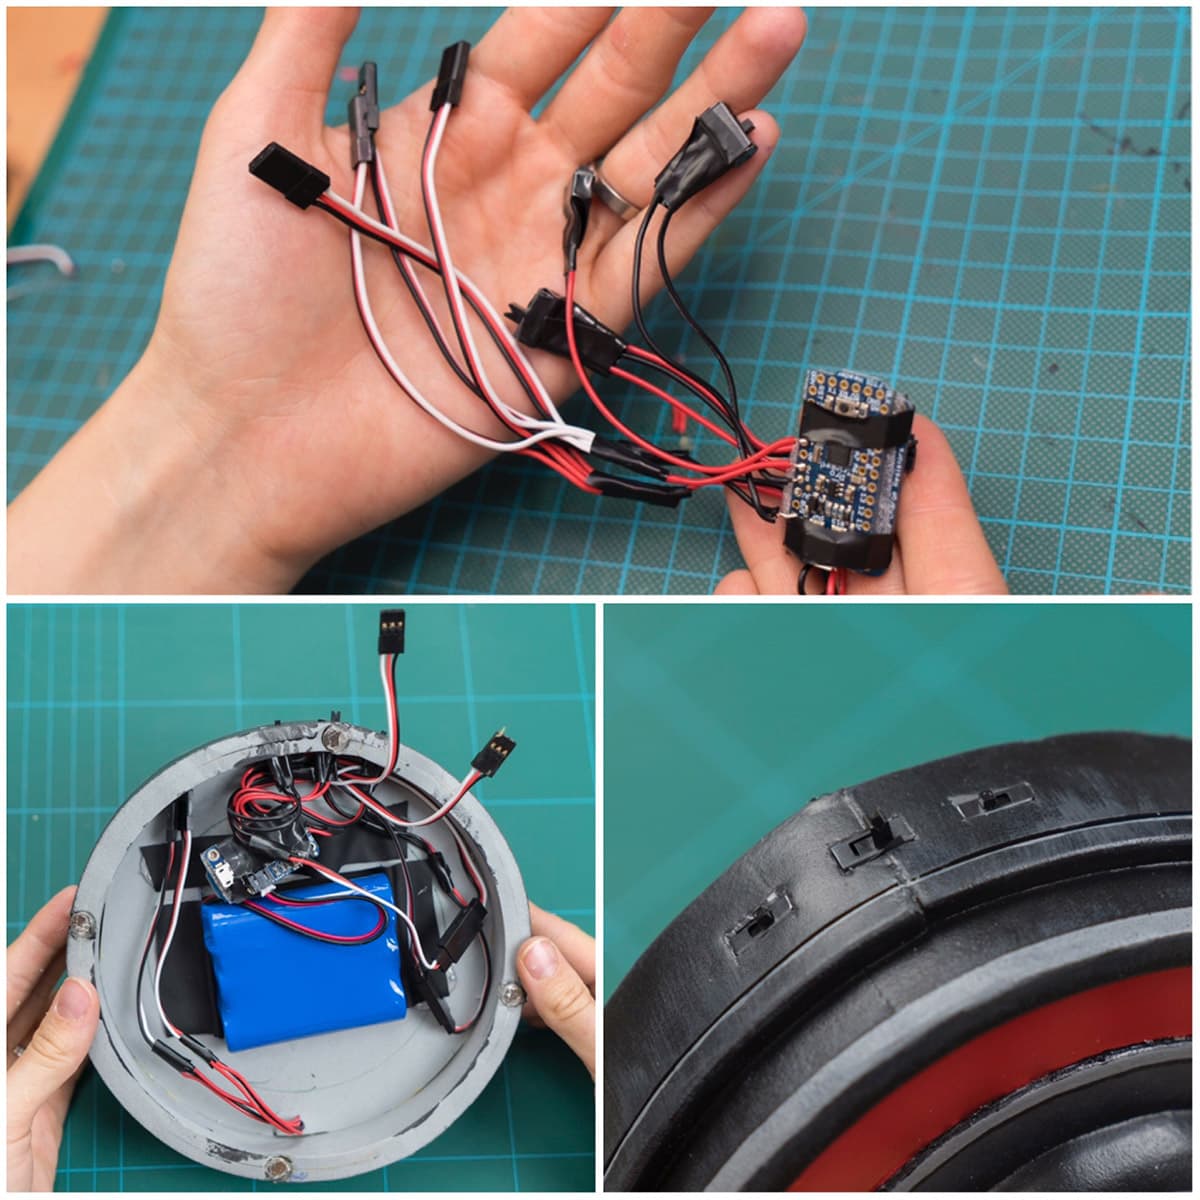
With finishing all armor parts it was also time to build the final circuit. Just like for the rifle, I used a Trinket Pro 5V, a Powerboost 500C and a strong LiPo battery. I added several plugs to connect the LED strips of the armor to the circuit and used 3 switches to control the lights. One for on and off and two for switching between 4 different animations. This means, all armor parts needed a direct connection to the circuit to light up. They are all controlled and powered by one single source, so I didn’t had to hide any batteries inside my costume. Instead I had wires running all over my body. To keep them invisible, I simple sewed them into my bodysuit.
Here is a test of all animations:
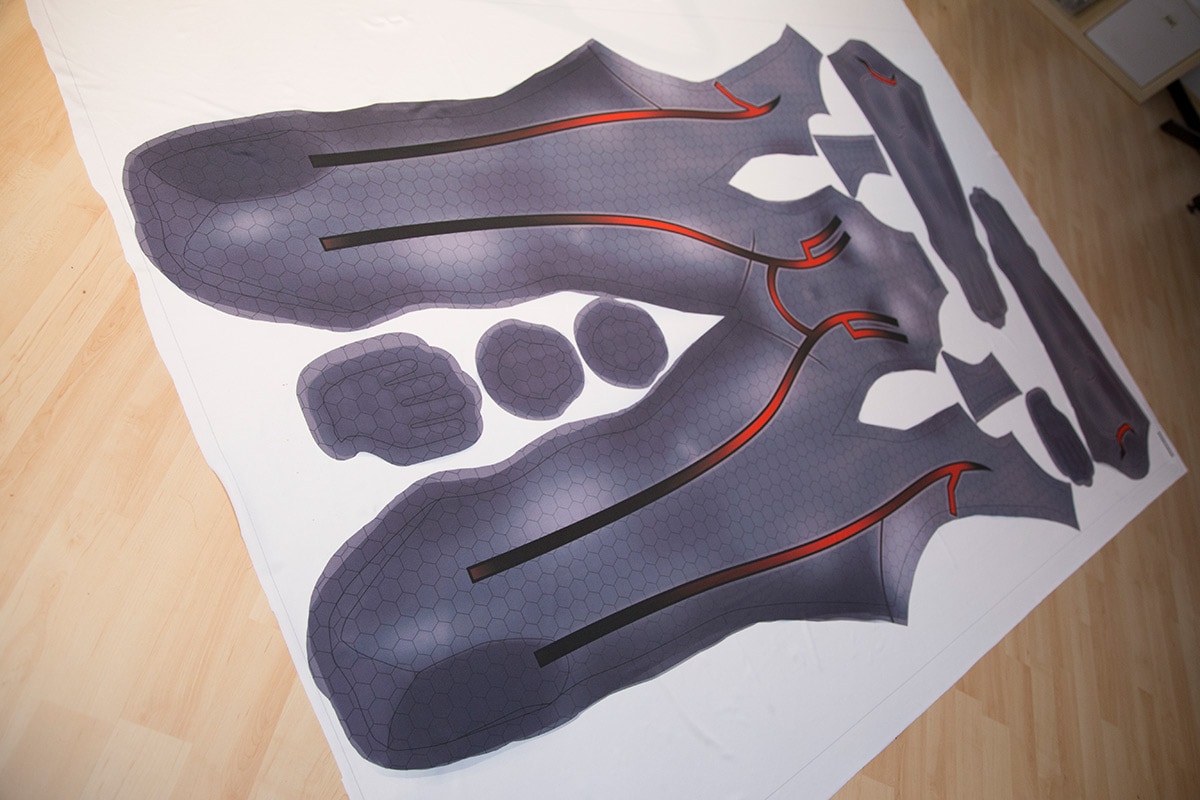
Getting the bodysuit right
So, next the bodysuit! We’ve got a basic template design from our buddy Nathan DeLuca (who is also doing commissions btw). It was the file of a basic superhero suit with highlights for the muscles. Using this, Benni created the design for Nova’s bodysuit on top. Next we searched for a fabric printing company (Bags of Love in UK) and did a first test print to get the colors right. Next, we sent them the file for the bodysuit and got it printed without a few days. After sewing it together though, it turned out that the measurements of the file didn’t fit me at all (it actually fit Benni better than me) and we had redesign the whole template and measurements.
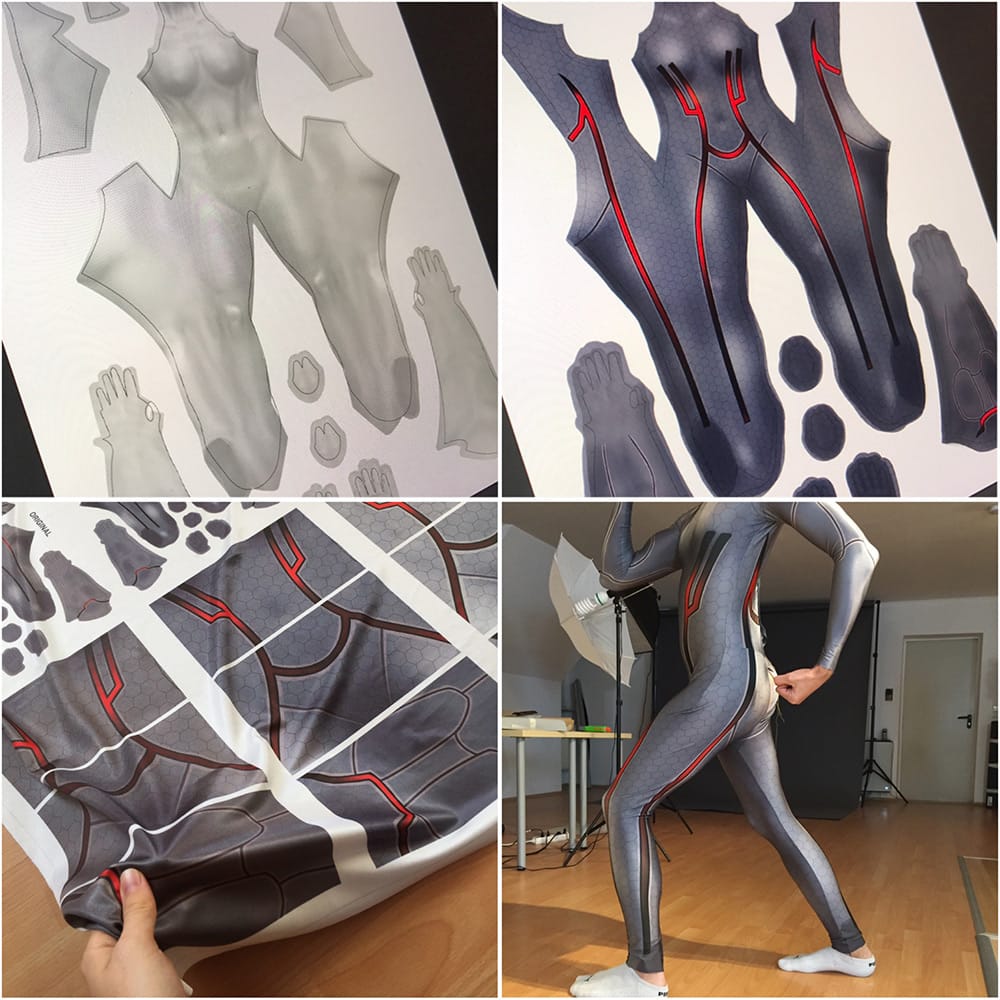
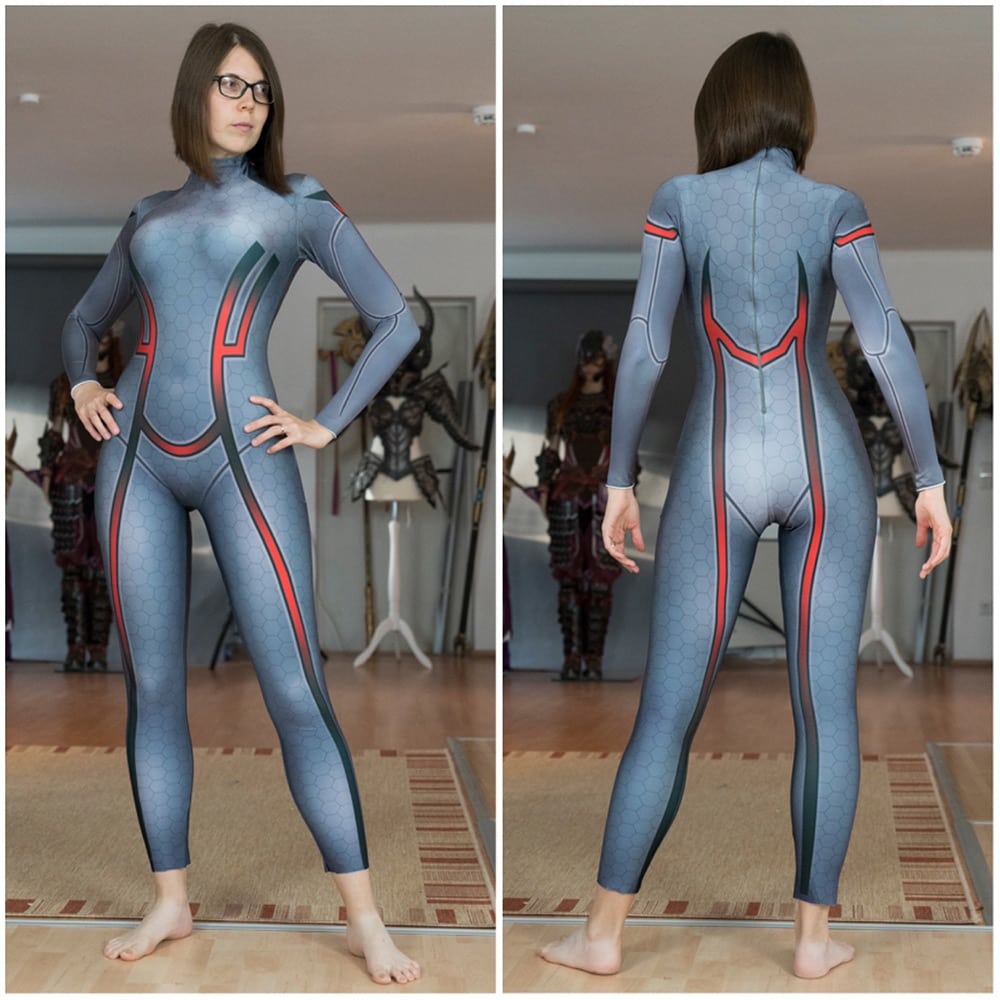
The next try with our own version fit me perfectly!
Crating the helmet
So, back in 2015 BlizzCon came closer and closer and I was already almost done with the costume. Only the pony tail was missing. And this was the true challenge!
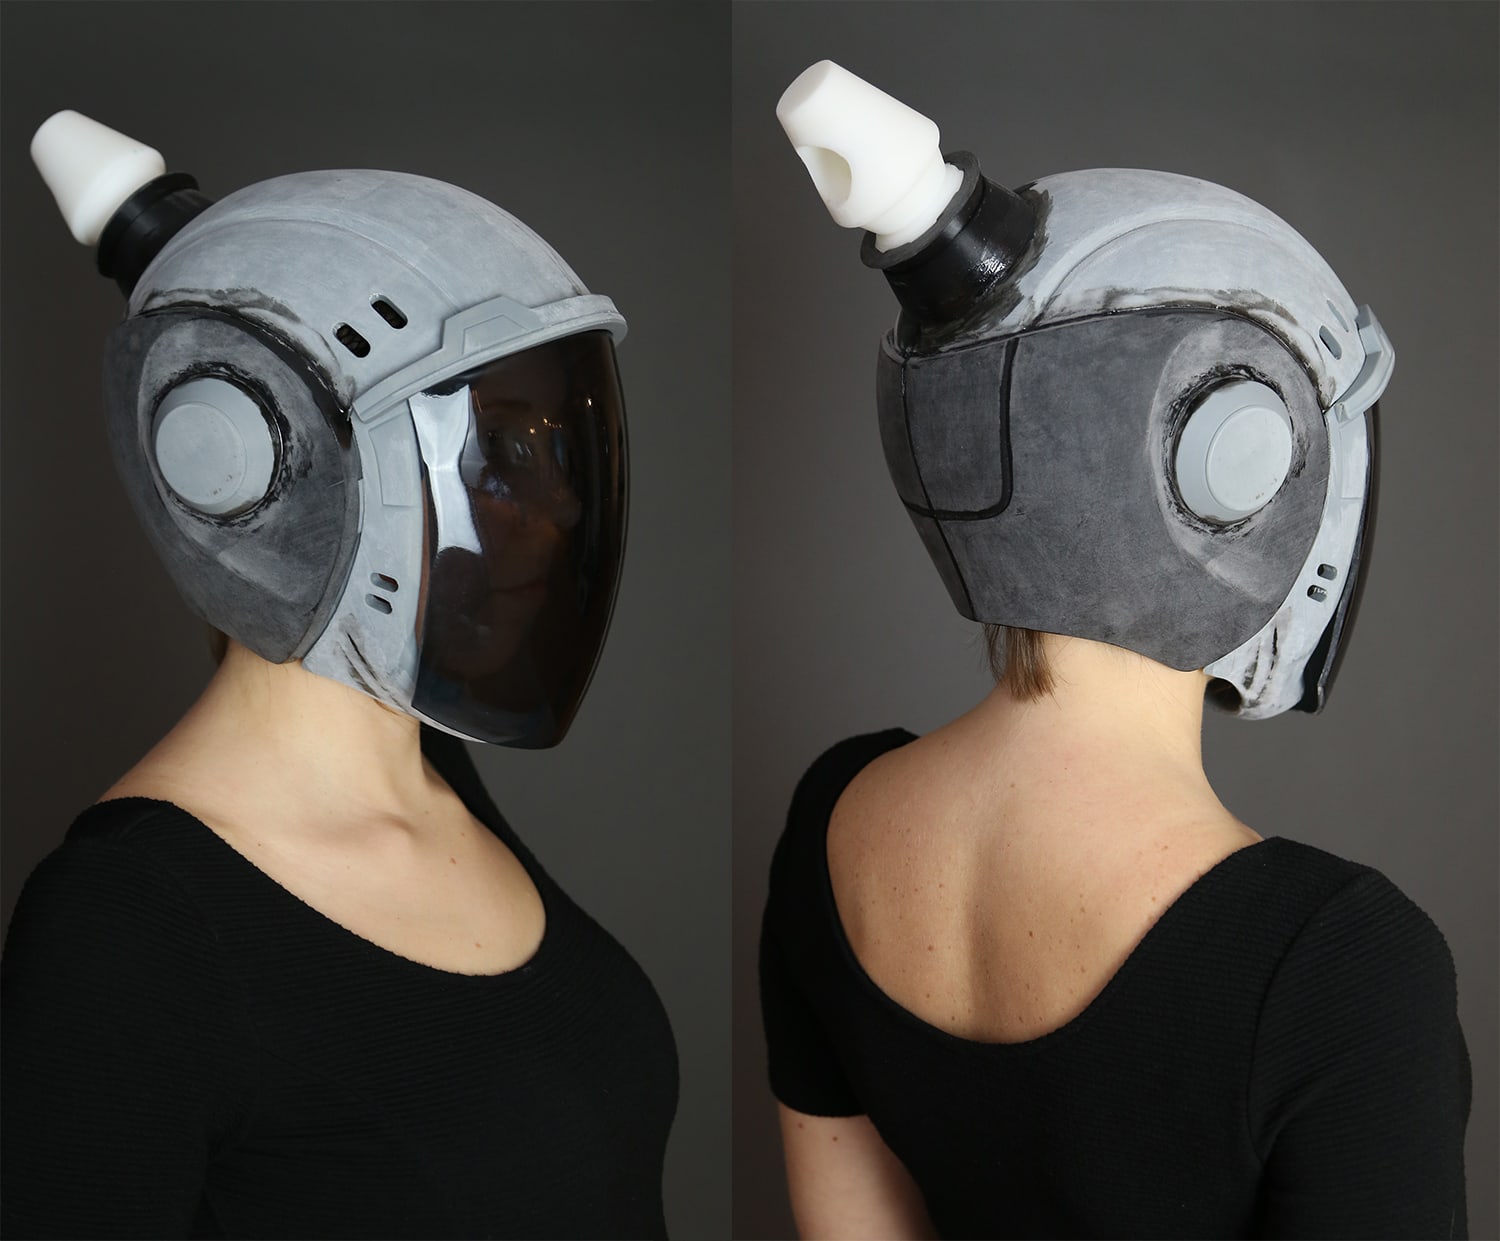
First, the helmet tough! I first tried to build it out of EVA foam and Worbla, but noticed pretty early, that the material wouldn’t be strong enough to hold up the light up ponytail later. So we asked Benni’s brother Jakob (@blackmaskedfox) to help us out. He is a great 3D artist and did a truly amazing job! Based on a few photos of my head and screenshots from the Cosplay Reference Kit of Nova he made a helmet with a detachable front piece and a proper attachment for the ponytail.

To get the transparent visor, I bought a dark toned acrylic, which I heated up in the oven. We 3D printed the visor from Jakob’s design and pressed the hot acrylic then over the printed plastic. I was not able to take any step by step photos since it took me, Benni and Jakob to create enough force for shaping the visor. It was basically like vacuum forming without… well.. the vacuum part. So we had literally 5 seconds to get the acrylic out of the oven and pull it over the plastic visor until it cooled down. It took us 5 tries until we got it finally right.
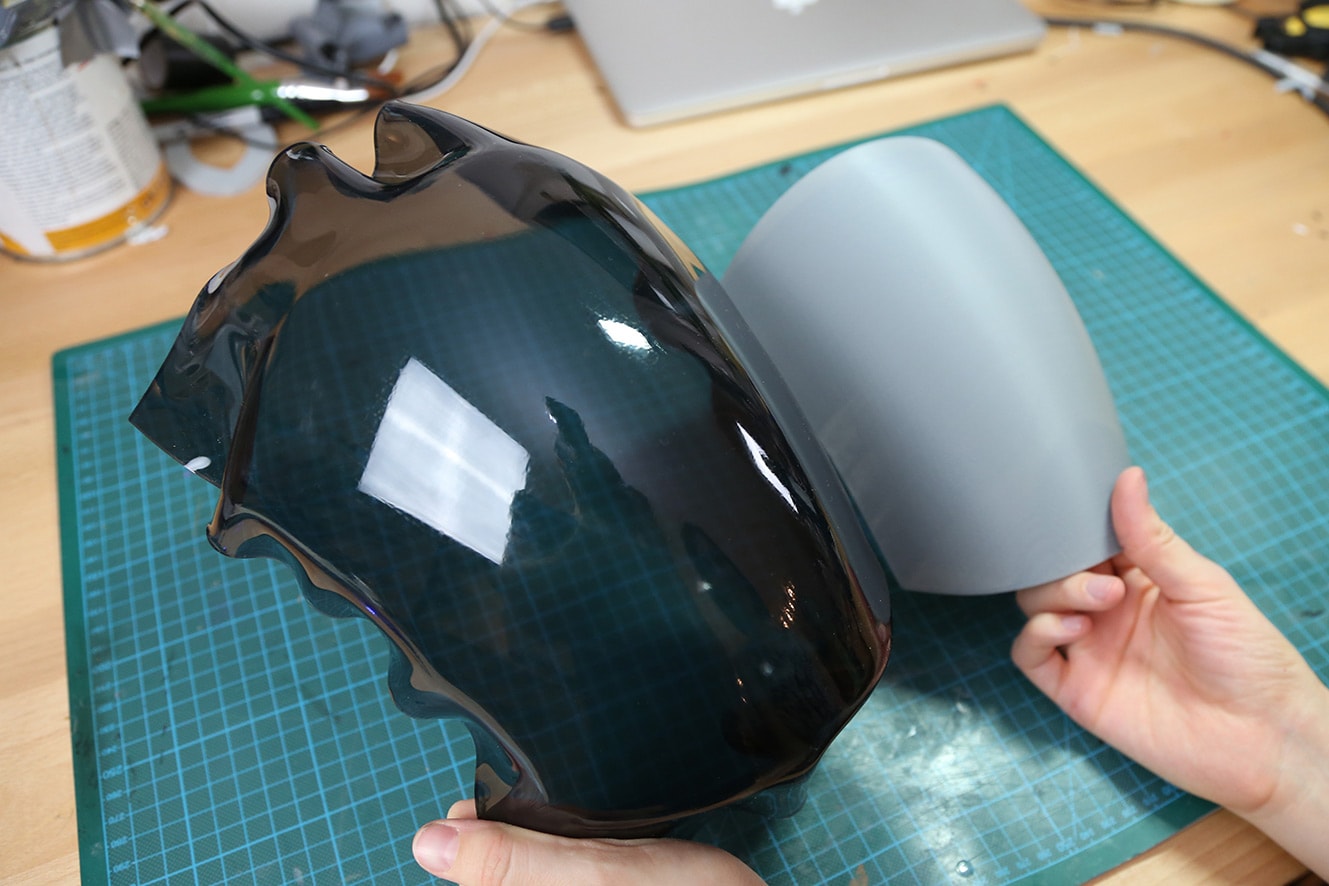
Well, and after I cut the visor into shape with my Dremel and our 3D printer was done with printing the helmet, this was the result!
The moment I failed
So, and now it was time for the truly difficult part: The light up ponytail. I really wanted to stay close to the reference and tried to figured out a way to bring it to life. My idea was, to build up 30 rings with different diameters and mount sections of LED strip on them. The code would light up ring after ring, creating a similar effect as the in-game reference had. My friend Jon McPhalen already offered me to help with the code. Afterwards I would cover the whole build in translucent, black fabric.
So far the good. After Benni 3D printed me a bunch of rings and I spent days with all the wiring and mounting the LED strips. This result looked pretty promising! However, sadly this changed after we brought the whole thing into shape.
The rings weren’t properly placed and had to be adjusted, but I got a clear idea how the final result would look like. And I hated it. The ponytail was literally a piece of light up poop and Blizzcon was just 2 days way. At this point though I had no idea how to make it better or save the whole thing. I was super frustrated, especially since I stressed so much to get the costume done in time. Instead of going crazy and finishing the costume in a way I wouldn’t like, I made a decision: I cancelled the project and flew the BlizzCon without a costume in my suitcase.
The costume would lay around for two years without me touching it at all.
The light up ponytail
Now, in 2017, it was finally time for my Advanced LED book and I was missing a costume for the cover photo. Every single one of my books features a fitting cover image. I was all out of costumes with animated LED strips. Except Nova. So, I finally had a new reason to finish her and got back to the ponytail.
Instead of staying true to the original reference, I wanted to try out something new. This time I wanted to try out single hair strands, which would light up randomly. Other characters in Starcraft had these kind of dreadlocks as well so I thought it would fit too. I looked a lot at Adafruit’s website and found the amazing Neopixel Cyber Falls wig, which illuminated random LED strips with a raindrop animation. They also included a full wiring diagram and the code, which was just perfect for my Nova ponytail. So, I destroyed my old shitty hair sausage and got rid of all the 3D printed rings. Next, I soldered 10 meters of LED strips together again. Afterwards I cut them into 10 separate strips with different lengths.
To diffuse the light and give the LED strips volume, I also wrapped them in several layers of plastic packing material.
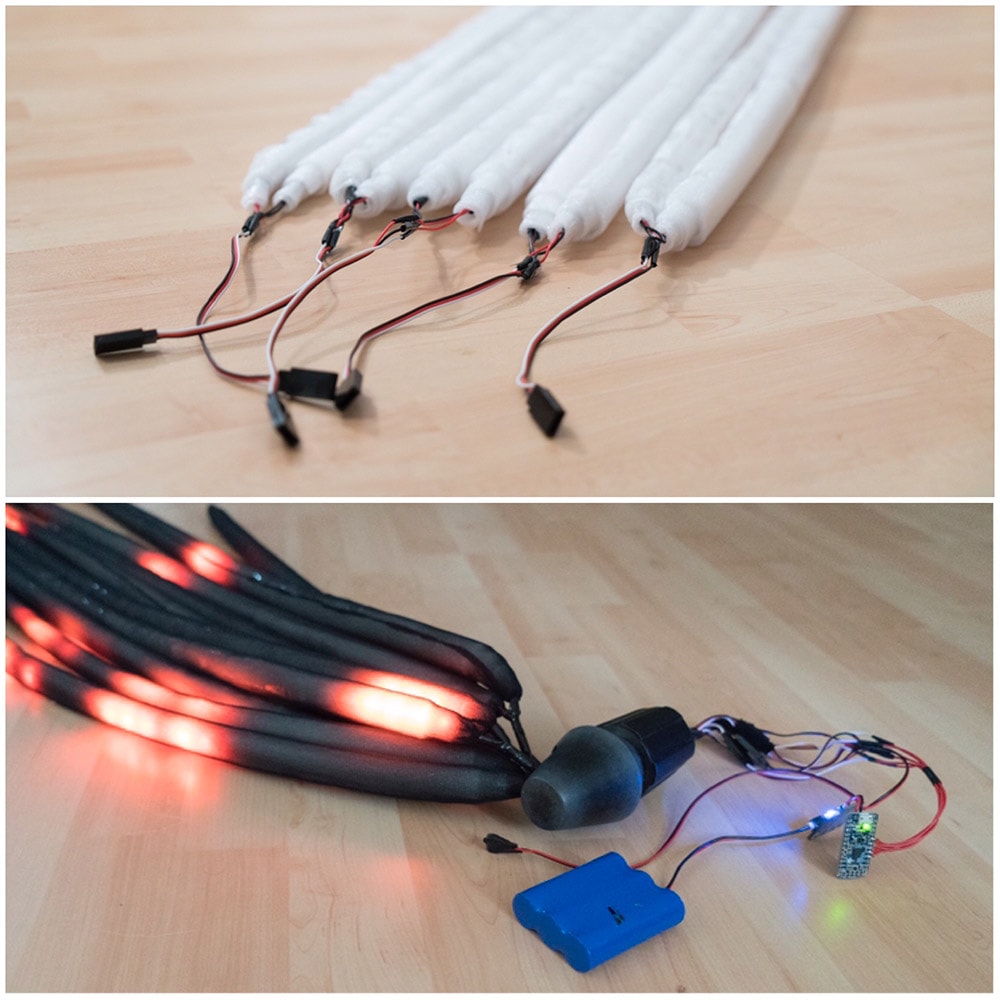
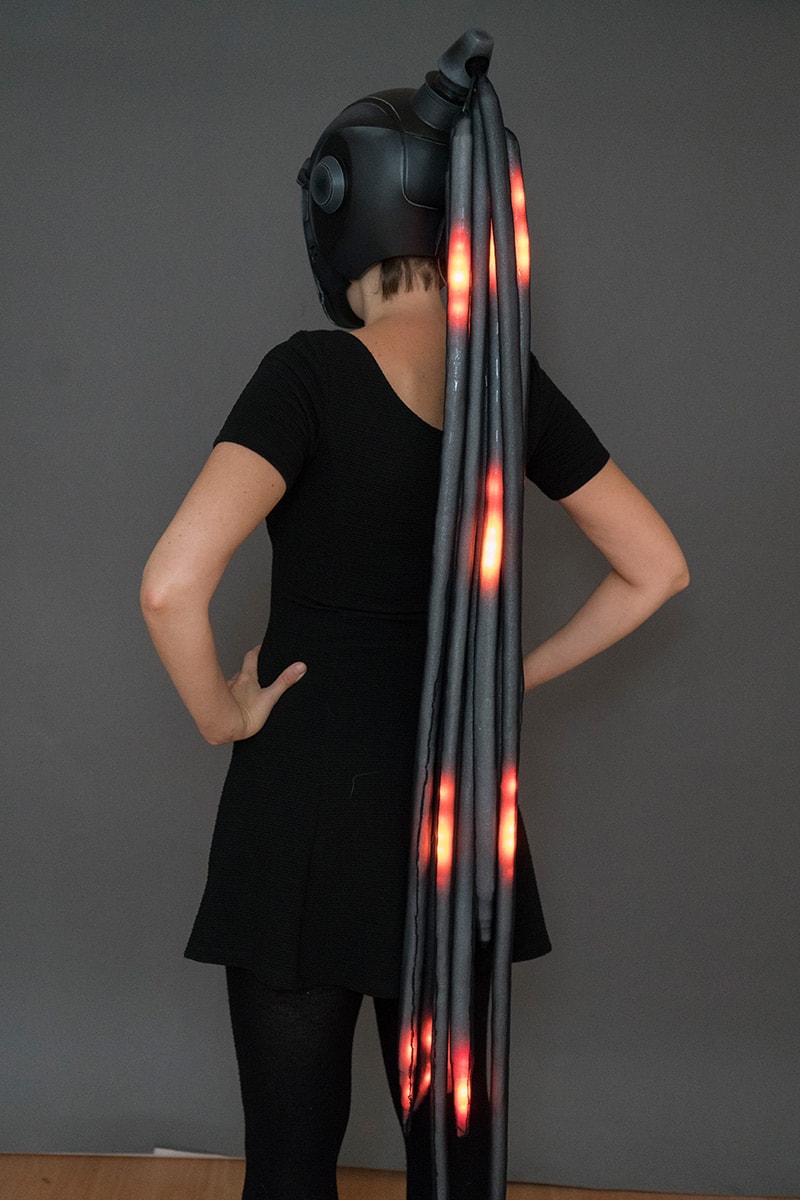
Next I covered the LED strip sausages in transparent black mesh fabric and attached the whole thing to the helmet. And this was the result!
It’s not about being 100% accurate
I was super happy how the ponytail turned out! Now was finally able to finish the rest of the costume. Not much was left though. Benni had to paint a few parts of the armor. I meanwhile I finished the circuit and the code for the LED strips and built a few last costume parts. So, finally everything worked, I got into the costume and got some first shots! Take I look how I got into the costume and how the whole circuit works!
My Master Nova was FINALLY done!
And here are the first photos! As you will notice, they were just perfect as a cover for my Advanced LED book!
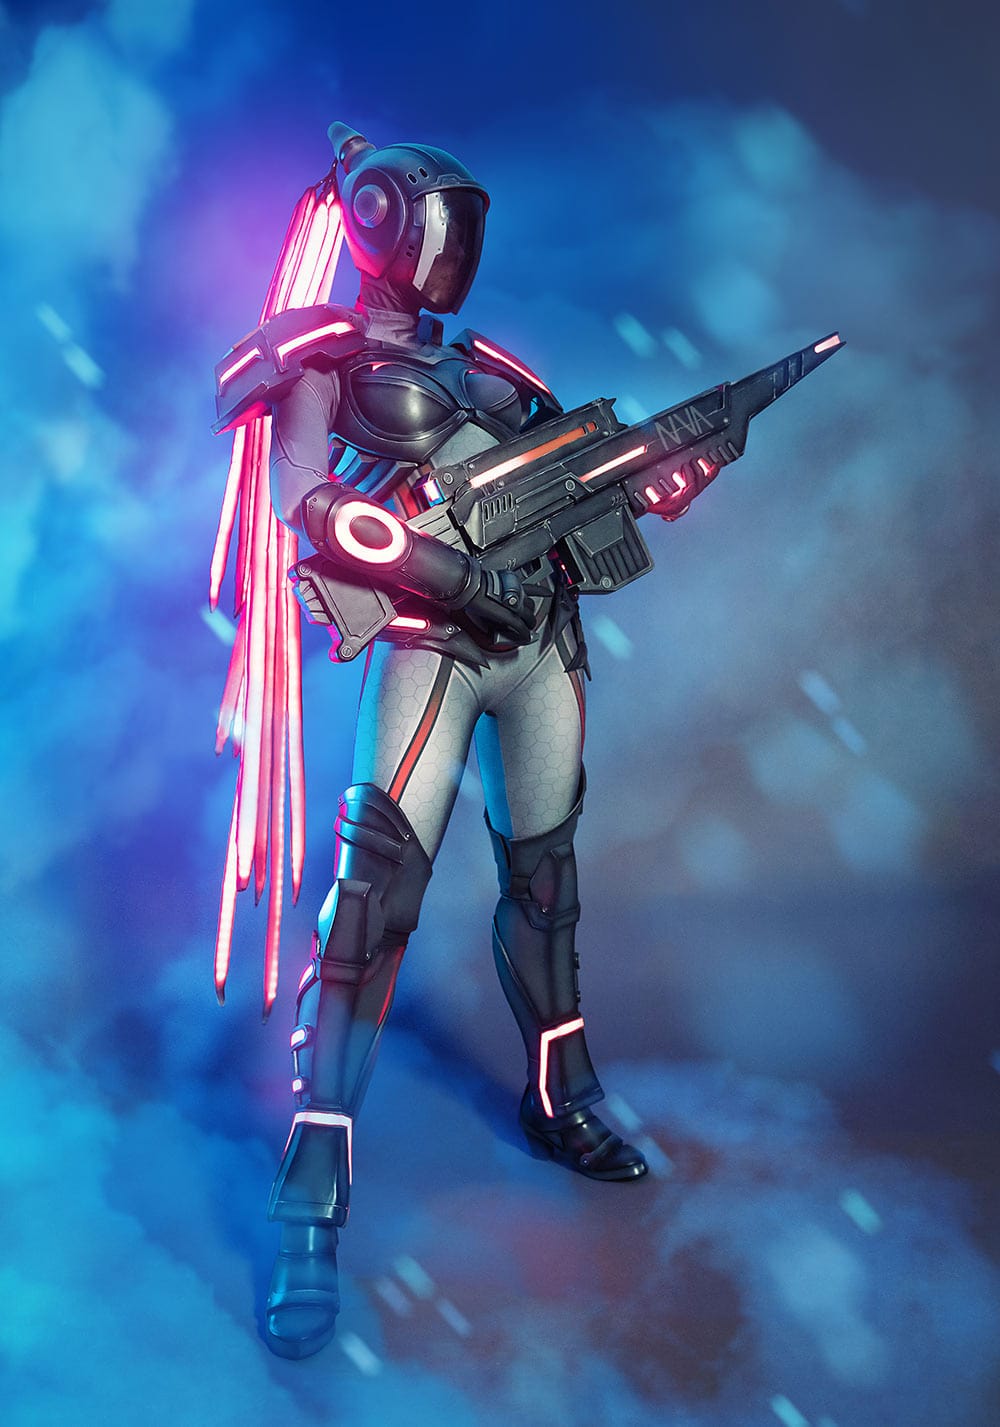
The costume itself turned out really comfortable since it’s only a bodysuit and some soft foam armor pieces on top. It takes a while to connect all plugs for the circuit and hide all wires properly though. The helmet is probably the only problem. It’s well ventilated so I don’t have a problem with fog inside. However, being able to get in and out only with help is a bit little scary. Also the ponytail has some weight and I need to be careful about how I move my head and neck.
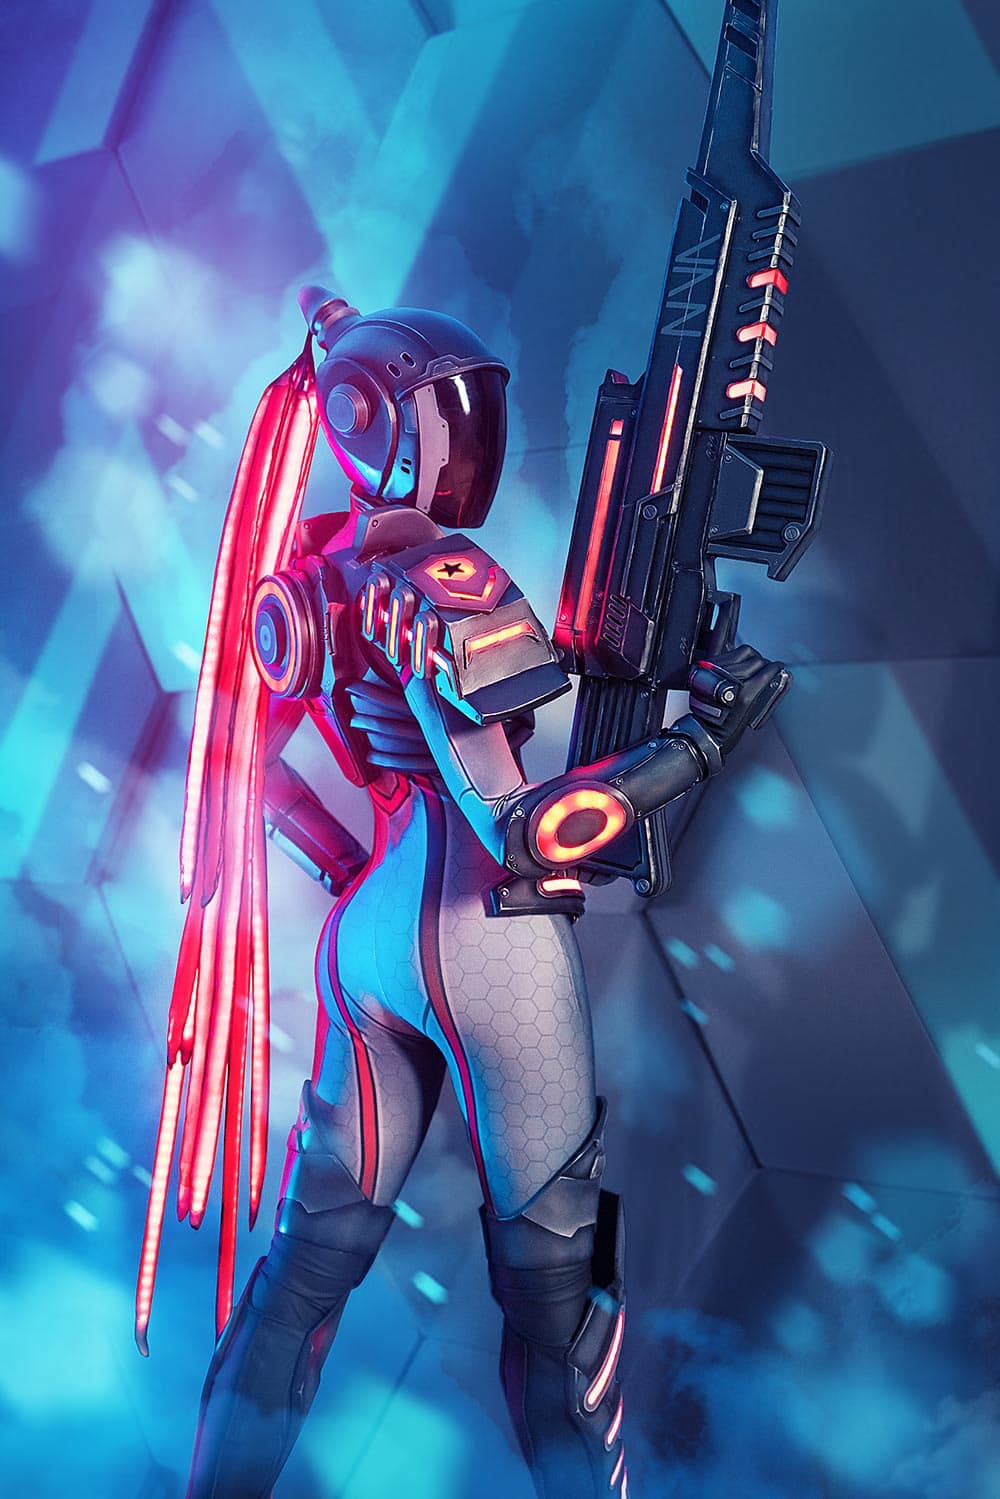
To get the photos above, I actually changed the code of the ponytail. I overloaded my battery to turn all 10 meters of LED strips on at the same time. In addition the armor has a “photo mode” which turns all LEDs on as well. This way Benni got some pretty nice shots for the costume. However, the ponytail literally killed my battery within 5 minutes after charging it for 6 hours. Still worth it tough! I totally love how the costume turned out! Even though it’s a little bummer that I won’t be at BlizzCon and wear Nova there. After 5 years of going I wanted to take a break and will visit some events in Australia instead. Maybe I’ll bring something even bigger next year! ;)


It’s amazing, the most passionate cosplay I’ve ever seen.
I’m learning cosplay, it’s nice to interact with you guys
I’d like to find or make a similar domed acrylic face-plate for a cosplay I’m putting together, do you know if your acrylic was cast or extruded? Does it even matter?
This is sooo cool! My dad got me one of your cosplay books for Xmas and ur made me so happy! The only disappointing thing is the price of worbla.
Awesome!