
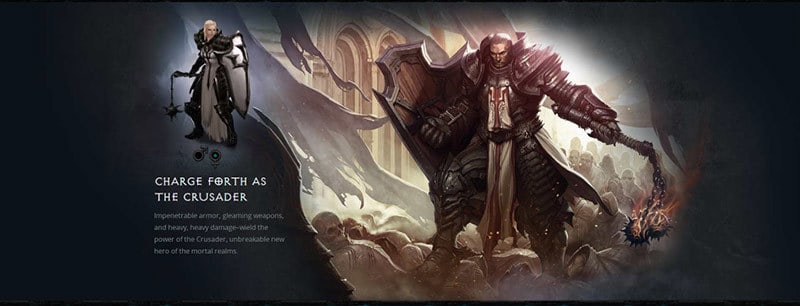
When it comes to the choice of a new costume it goes always down to the dimensions of my suitcase. It doesn’t really matter how much I love a character, a TV show, a game or a comic – if my suitcase doesn’t like it, then the final costume won’t come with me and have to stay at home. And there are a ton of costumes which my suitcase ddidn’t approved! From characters with massive weapons, weird helmets or just a giant full body armor. The Crusader from Diablo III has all of that, but at this time I just didn’t listen my complaining suitcase. It was finally time to go wild!
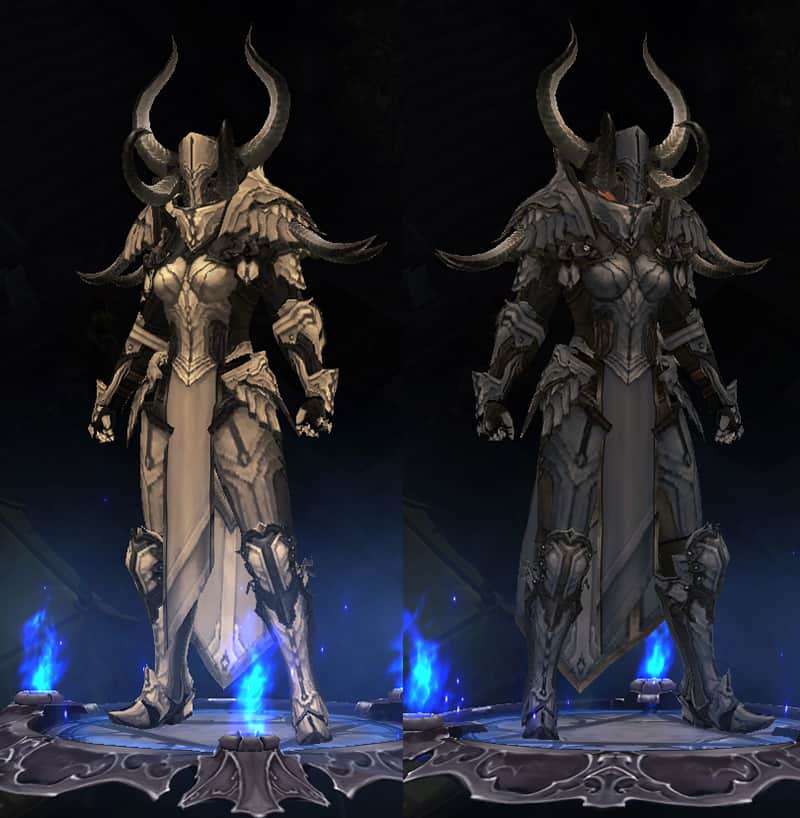
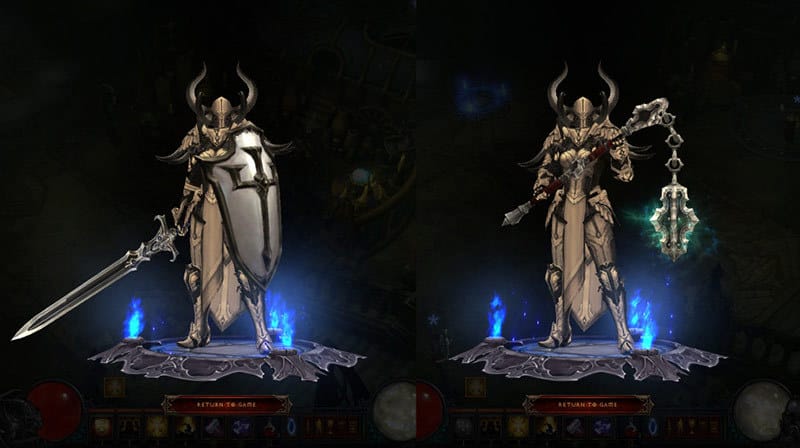
So.. the Crusader. I could tell you a long story how I felt love into this class I’ve saw the very first time during the live presentation at Gamescom 2013. I could tell you how much I loved the armors – mud and unclear on the screen – presented at Blizzcon 2014. And I can tell you a story how I excited I was when I finally got acssess to the Alpha of Reaper of Souls and competely ignored the rest of the contest until my little Crusader got the armor set I wished and become my main reference for this costume. Oh, I could tell you a long, long story. But honestly I guess the costume progress is more interesting then my addiction with it’s reference, ha ha!
When I start with a costume, I often prefer to pick up the most difficult part at first. Since it’s often the most important part, it’s a good reference for the rest of the costume and helps me to keep a special style. In addition it give me an idea about the estimate time I will need for this project in total. From the beginning I didn’t plan to bring this costume to any convention which didn’t give me a deadline for the project. As a main resource for my current painting book it was however necessary to rush a little bit. Well, I gave me 3 weeks to finish the main parts of the armor. Not the best idea.
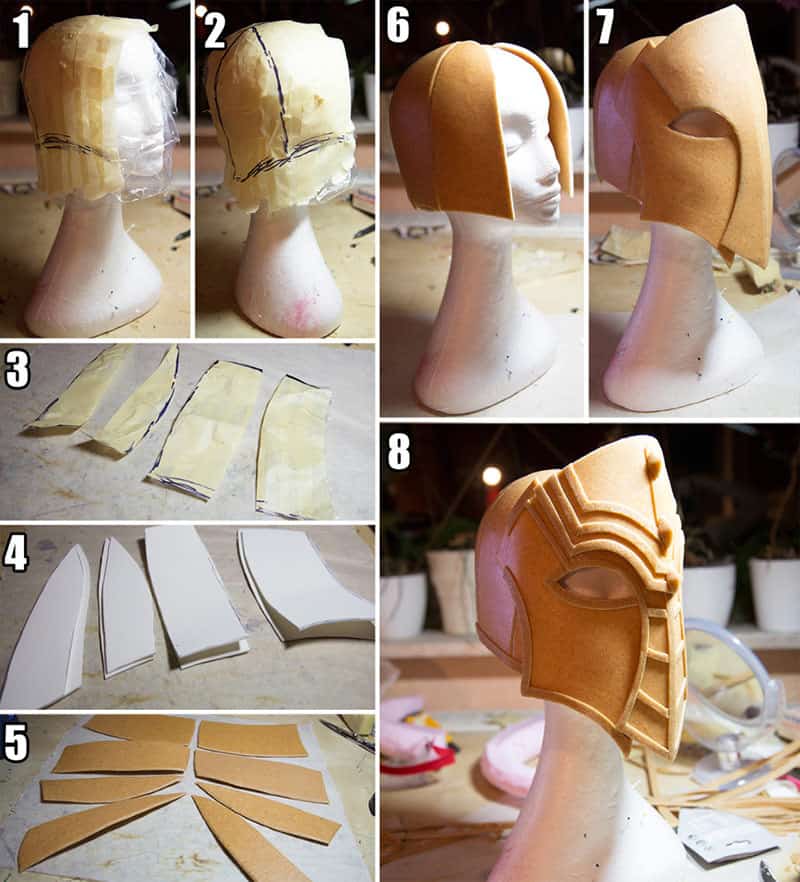
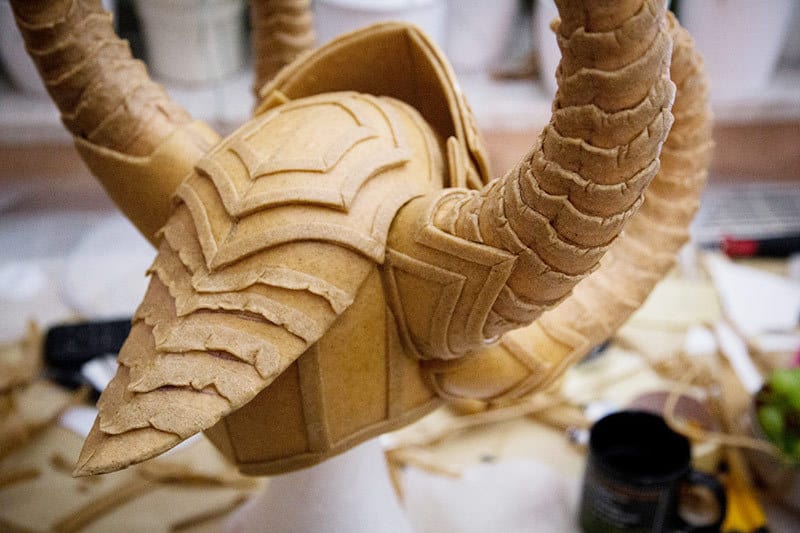
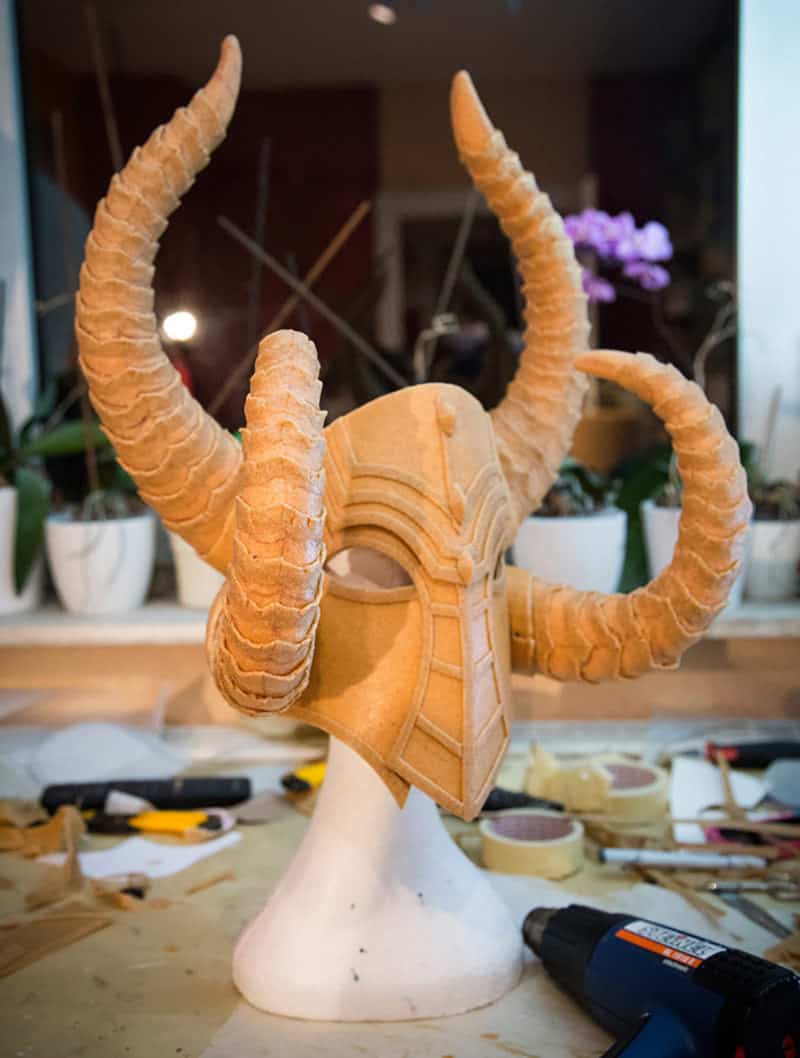
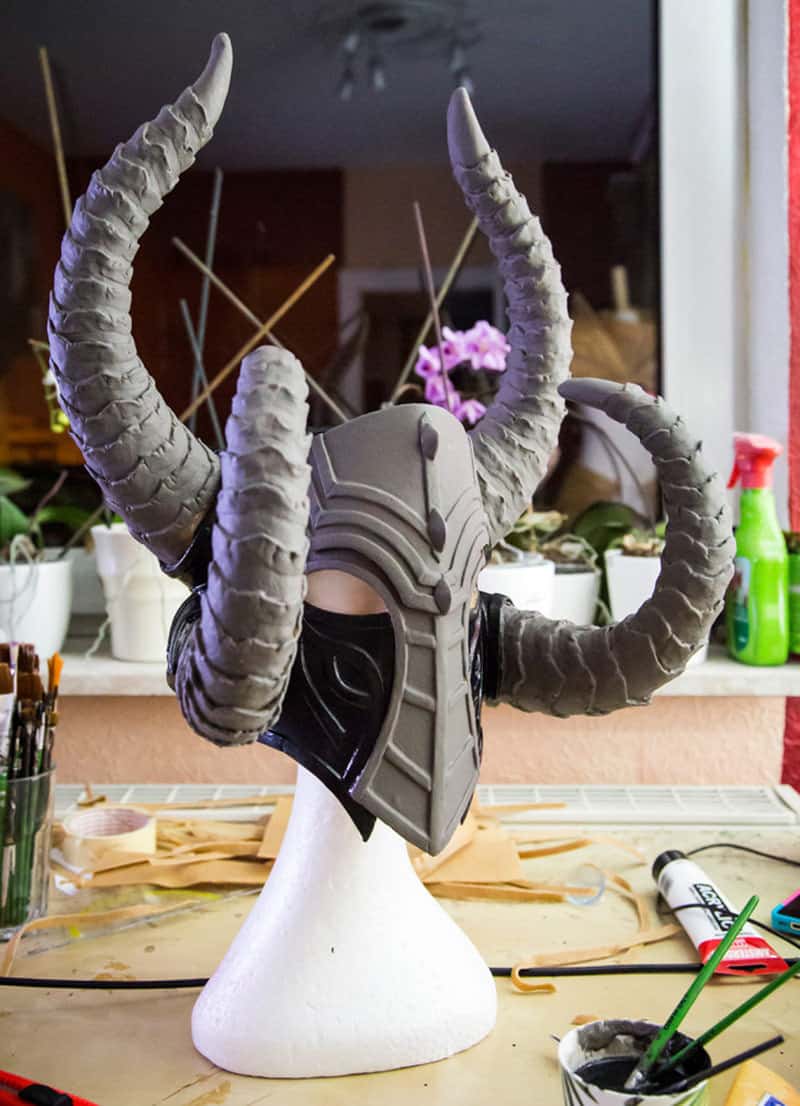
I’ve never build a helmet, but if you have a technique which works on everything, you’re also able to create everything! So as you can see I just used some kitchen foil and painters tape to create the pattern and used these then to build everything up. It’ was a little bit tricky to connect all pieces and bring them into shape, but once the base was done the following steps were child’s play. As mostly I’ve used Worbla and craft foam for the construction. You’ll find more details and tutorials in my Armor Making Book.
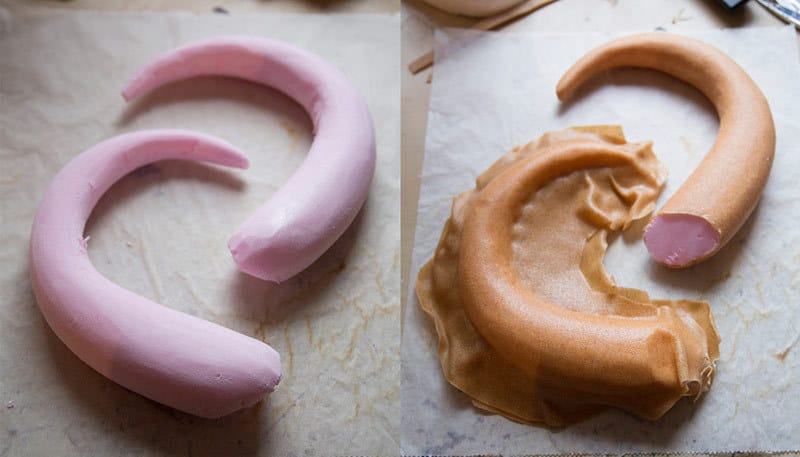
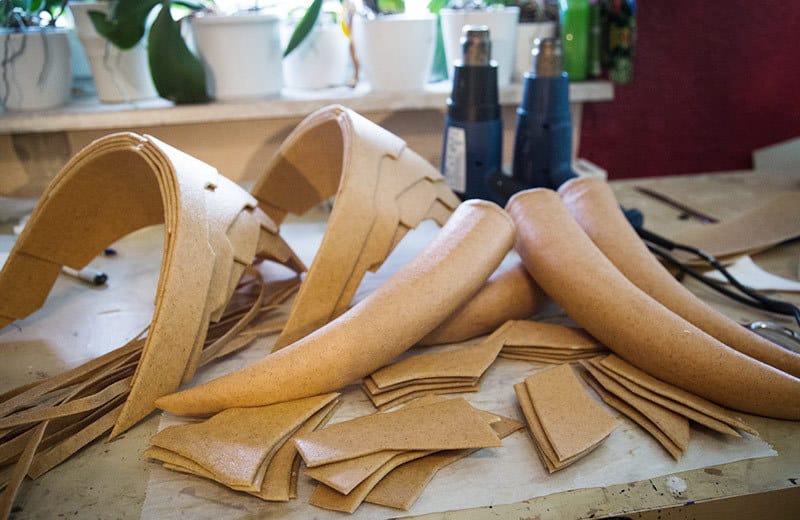
Instead of a craft foam core I’ve used now pink insulation foam for the horns. It’s pretty easy to carve this foam with a sharp hobby knife and getting it smooth with sanding paper. I honestly still didn’t found out which material works to get the foam hard and solid so I’ve decided to cover with from both sides with Worbla. To get rid of the seams I just reheated the Worbla a bit and used a roll of painters tape to get an even surface.
Then it was time to add the details! SO many details! And with four horns it cost me forever to sculpt their texture on! If you believe or not, but only these stripes for the details cost me a half XL sheet of Worbla! I also have no idea how much time I’ve spent on these things, but I’m just happy to sitting here, typing this blog entry and knowing it’s done!
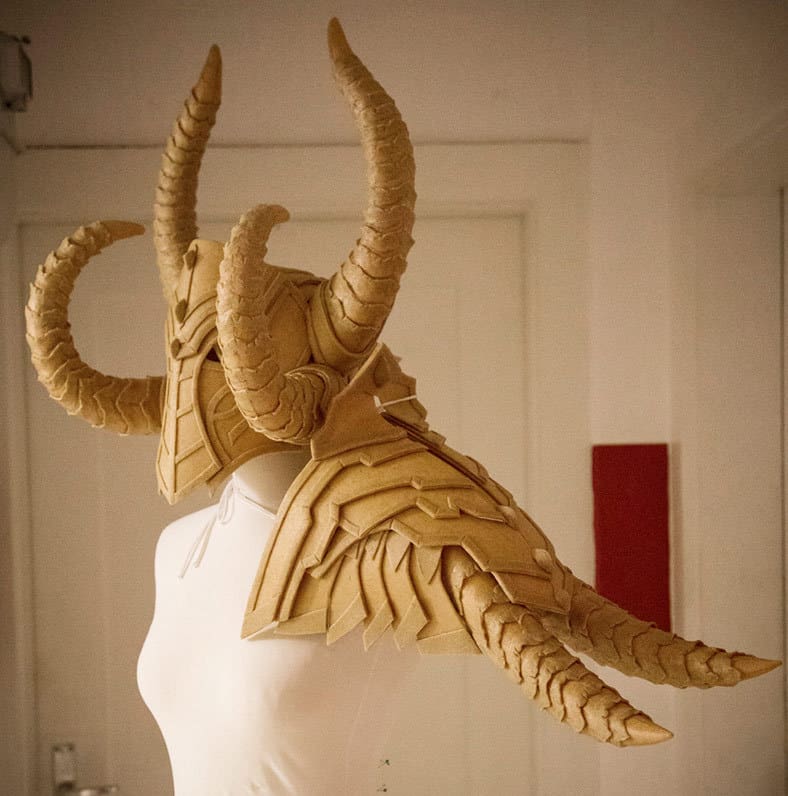
The final helmet then was a massive, gigantic and pretty heavy monster which would request a lot of pain killers while it will be worn. However I also already know at this point, that the sunlight during a photoshoot will everything this costume will see. And I yes, it maybe sounds sad if you spent a lot of time and money on a project, but it gives you also a lot of freedom. I didn’t care how comfortable the armor will be, how I solve the transportation problems on the way to a convention or how I will survive a day in this thing for a whole day. No, I just followed my reference and didn’t limit myself by any problems which could maybe pop out later. I was the very first time free and I truly enjoyed it.
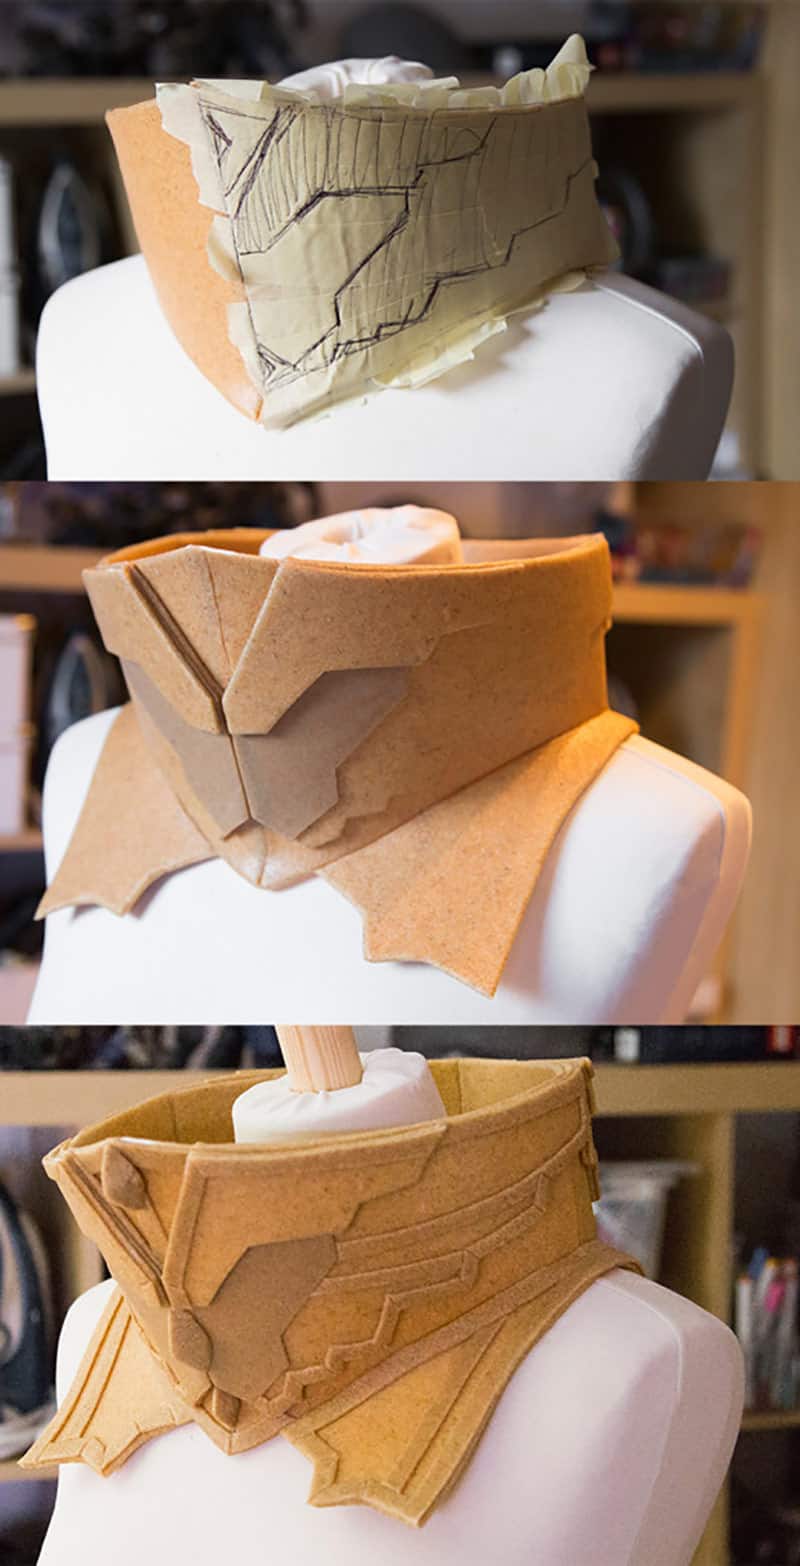
We’re coming to the collar: As you can see it begun with a very simple form which was shaped by a piece of news paper I cutted as long as I was satisfied as a reference for the pattern. Getting these “free” patterns without having any reference and working ony by eye sight is not that easy and cost a lot of patience, but it helps a lot to expriment with paper or craft foam directly on you body or your dressform and then to transfer this shape to the material you’re working with. Also once you have this basic form it’s easy to build additional details up. I guess the photos do explain my method pretty well.
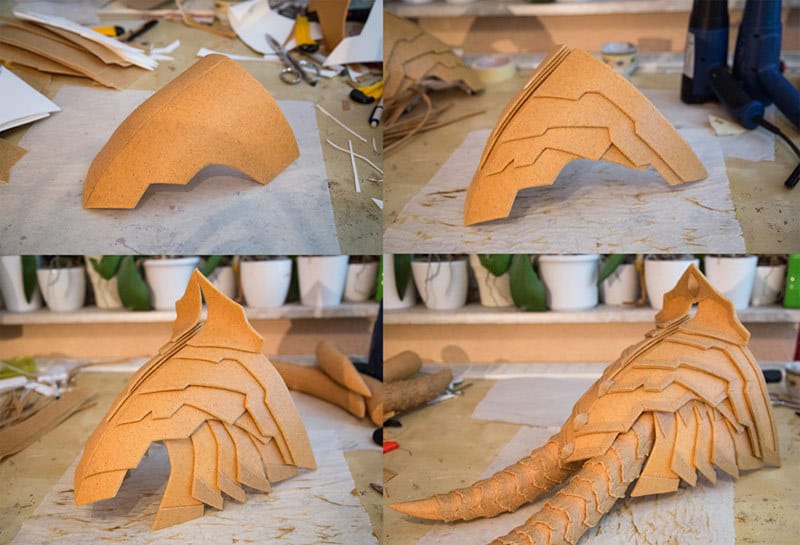
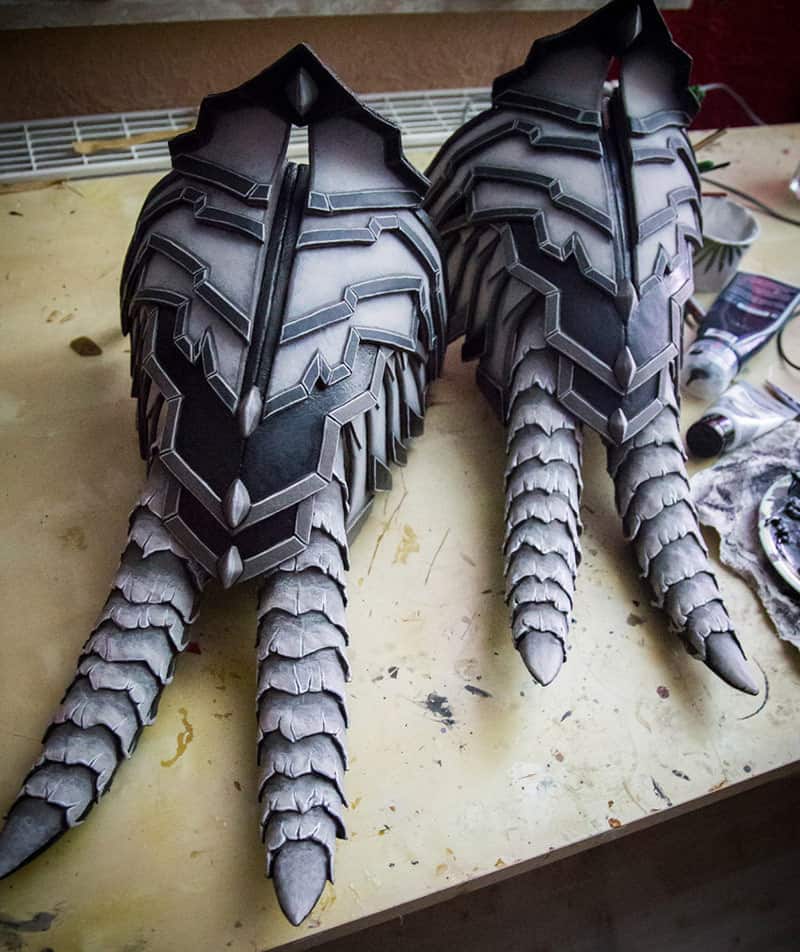
Aside from it’s size and it’s amount of details, the complexity of the armor made it very important to sort things and keep always an overview over your working table. Especialy the pauldrons were a huge puzzle I had to solve twice. For these armor parts I first prepared all pieces and then started slowly to connect everything together.
I guess at this point you can imagine, that it was extremely important to work at both pauldrons at the same time. Not only that it was difficult to form all pieces into the excact shape, but loosing track, forgetting or mixing up some pieces happend very fast. Despite of that I never work with numbers or add notes to the seperate pieces. It’s not that I don’t need them, but once I’m start working I do everything automatically without any break. I start, build and build and go to bed only if my armor piece is done. So getting some rest at 5, 6 or even 7 am is not uncommon for me.
Well, I told ya: I’ve planned 3 weeks for this costume! So time was running out slowly and I had to rush. And at this point you maybe ask why since I didn’t wanted to wear it at any convention.
To be honest: I’m a crazy workaholic. I set for myself imaginary deadlines – mostly they are conventions the costume is planned for. The Crusader however was not only a fun project, but my main image resource for my at this point upcoming book which I’ve planned to have printed for Katsucon 2014. My flight to Katsucon would leave at February 13th and it would cost me 2 weeks to get a test print and a final print of my new book. Writing including editing and layout would cost me also at least one week. So if I wanted to get my book for this event I was forced to finish all necessary part of the Crusader around mid January. And why didn’t I just started with this project earlier? Well, because it’s exciting to work under preassure, ha ha!
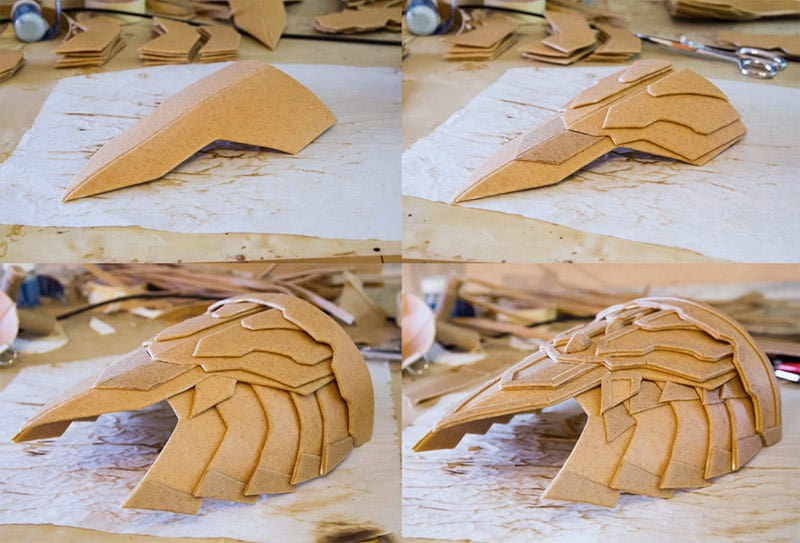
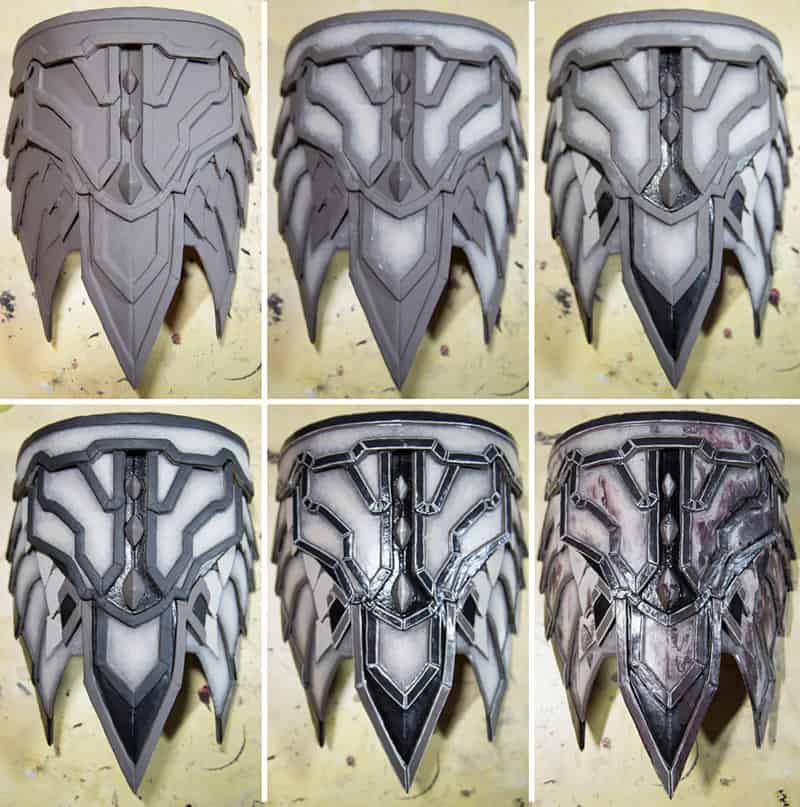
So, back to the progress: Like the pauldrons also the hip parts were pretty complicated. In the background of the photos you’ll notice that I sorted all parts and tried to keep my table clean and sorted. These armor pieces seem to look pretty hard to build, but in fact it was just a puzzle which you could solve if you found the first pieces. Once the base was connected and shaped, everything else followed automatically. However it still cost me many tries to get everything symmertrically. Or at least kind of.
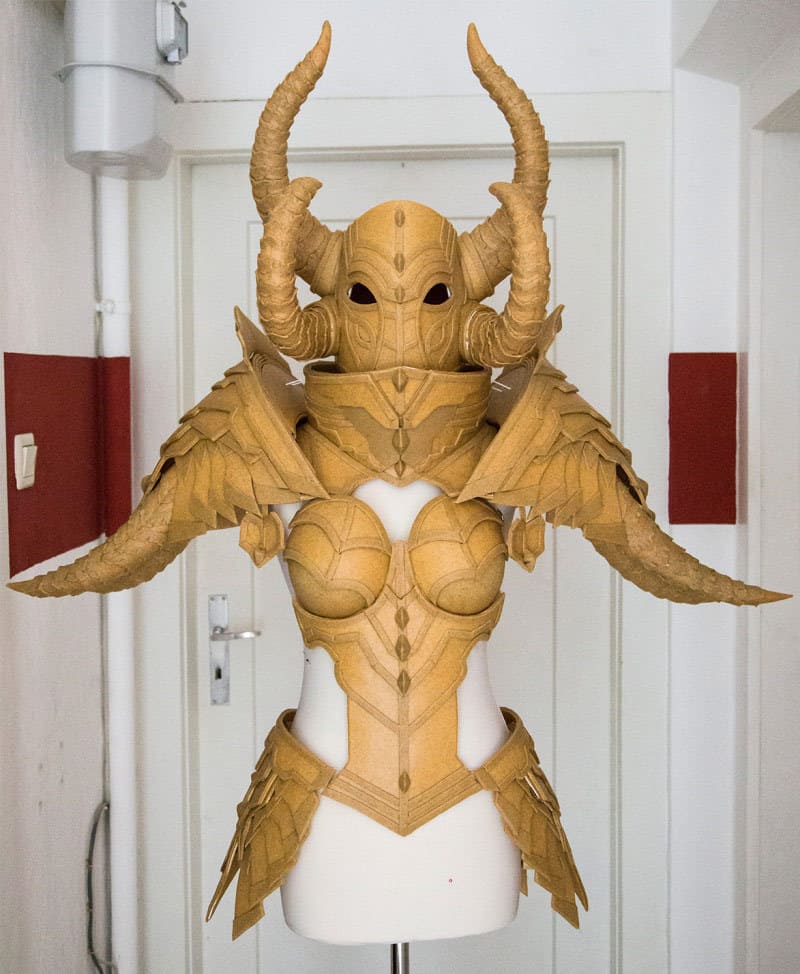
It was time for a little test build and I just loved it. Even at this point I loved how scary it already looked like and I still see this project as one of my best works. And if you’re interested: So far I’ve spent 5 sheets of Worbla.
And now it was time for the real work: The paint job!
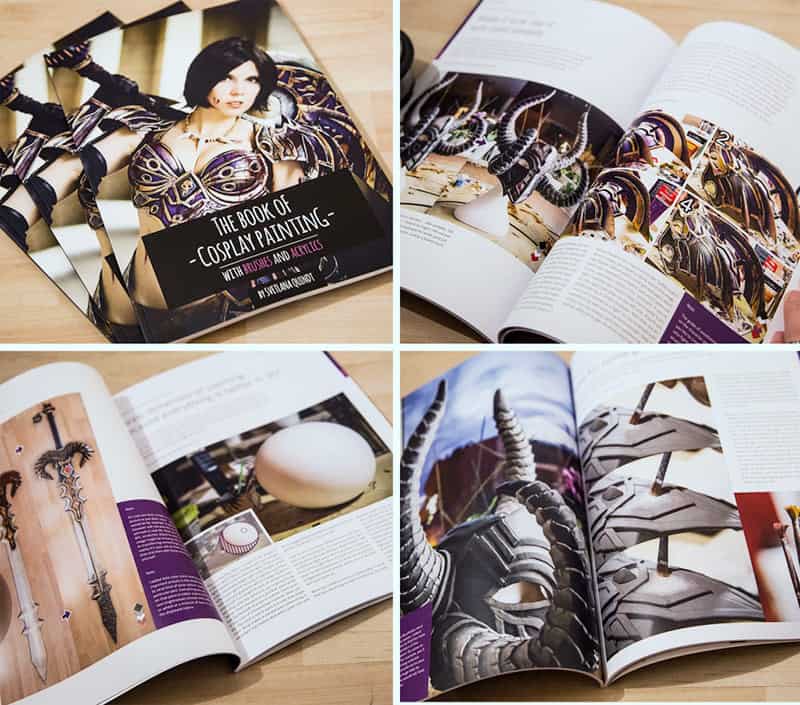
The title of the book the Crusader was build was “The Book of Cosplay Painting” and a deep look into the painting progress of this costume should be the main source for necessary tutorials and images. So a ton of photos followed. However please understand that I won’t show anything in this post. But you surely find all tutorials and progress pictures with detailed explainations in my finished book. Just follow this link!
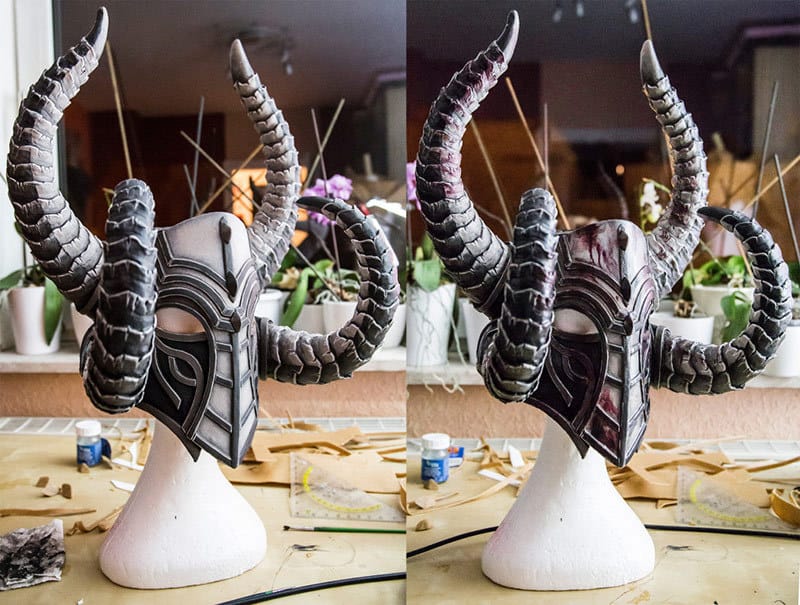
Again I’ve started with my helmet. Like mostly I’ve used simple acrylics, which I mixed in a tuppa ware to keep a good amount of it for all other armor parts. During this project I’ve stored my acrylics in my fridge which kept them fresh and ready for the next paint job.
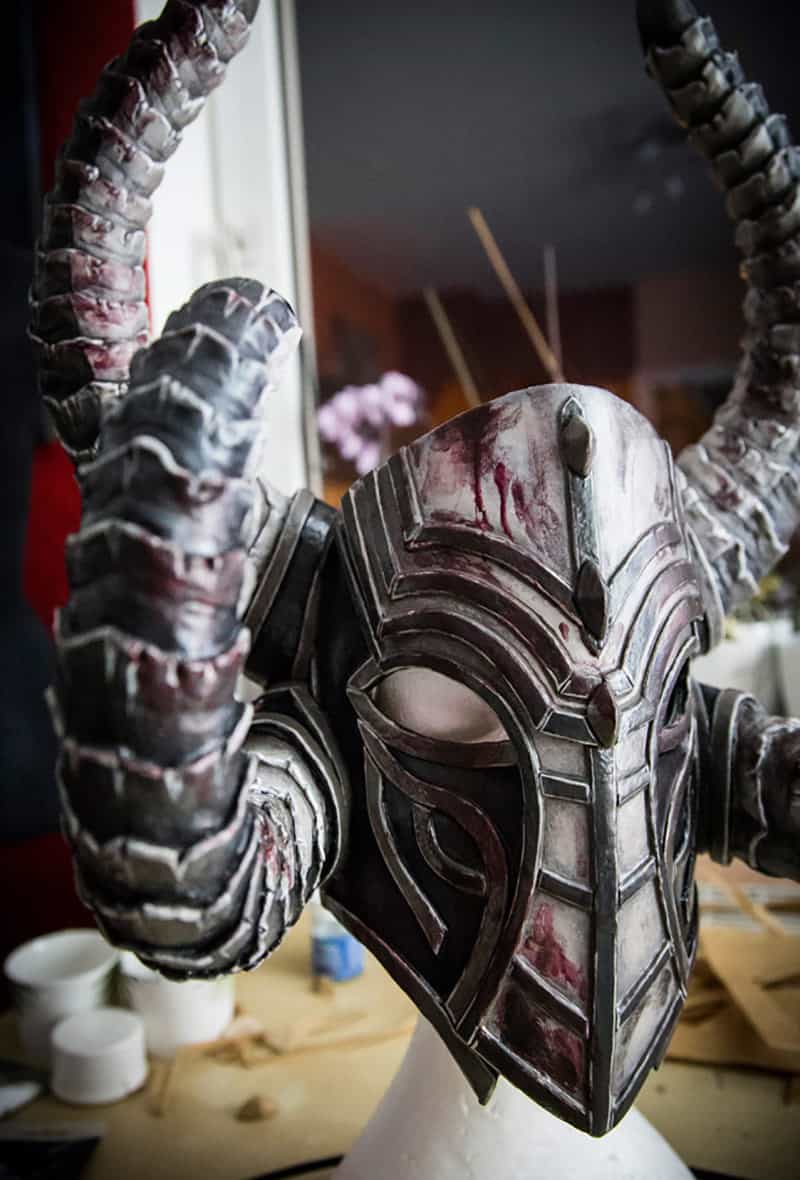
Just the same as the construction, the paint work on the helmet was the hardest and most time consuming part of my Crusador’s armor. I’ve applied several layers of basic paint, shaddows, lights and details and especially the horns drew me crazy. Alone this work step cost me two full days of work, but it didn’t cost me even 5 minutes until I felt asleep at 5am in morning. And all this hard work was just made to be destroyed by weathering effects and blood later.
In fact the Crusader is a melee class is a walking fortroess which use a deathbringing flail to wade through scores of foes, leaving demonic bodies smoldering in their wake. So you surely understand, that you’ll find rarely a Crusader in a brandnew equipment busy with polishing every single armor parts in the warm sun of Tarisfal. No, my Crusader should become soiled, rough. She requested an armor which tells his story just by a first sight on his bloodsoaked horns. It was time to get dirty!
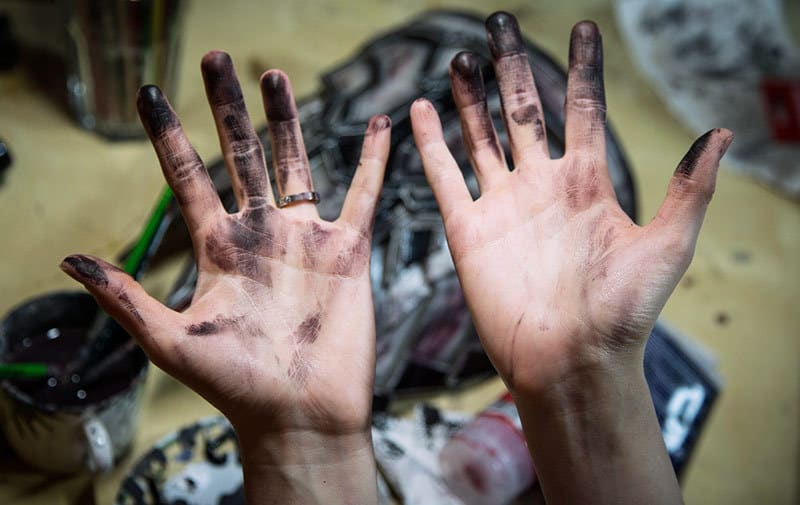
In my Painting Book you’ll find all details about weathering, blood and other dirty stuff, but here I mainly just dipped my fingers into black and red acrylics and played a little bit arround. I guess, it can be pretty difficult to destroy a paint job which took that long, but weathering means for me to add a pretty finish, to give my character a story and to bring it to life. My husband Benni, who painted many of my projects in the past, is completely not able even to watch what I do with his work. Since I painted all of my Crusaders’s armor however he just kept quiet and shaked his head, ha ha!
This step was seriously a lot of fun and I just felt like being back in the kindergarden, playing with paint and trying to mess up just everything around me!
But some hours – okay in fact many hours – I’ve also finished the paint job of my pauldrons…
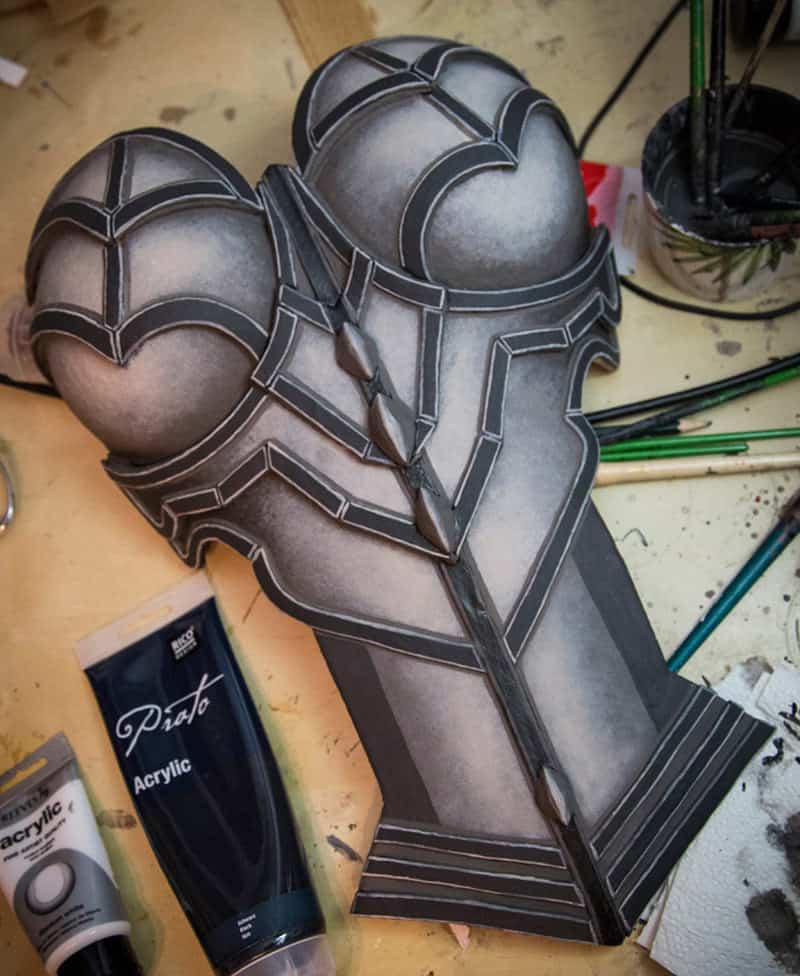
… my breastplate…
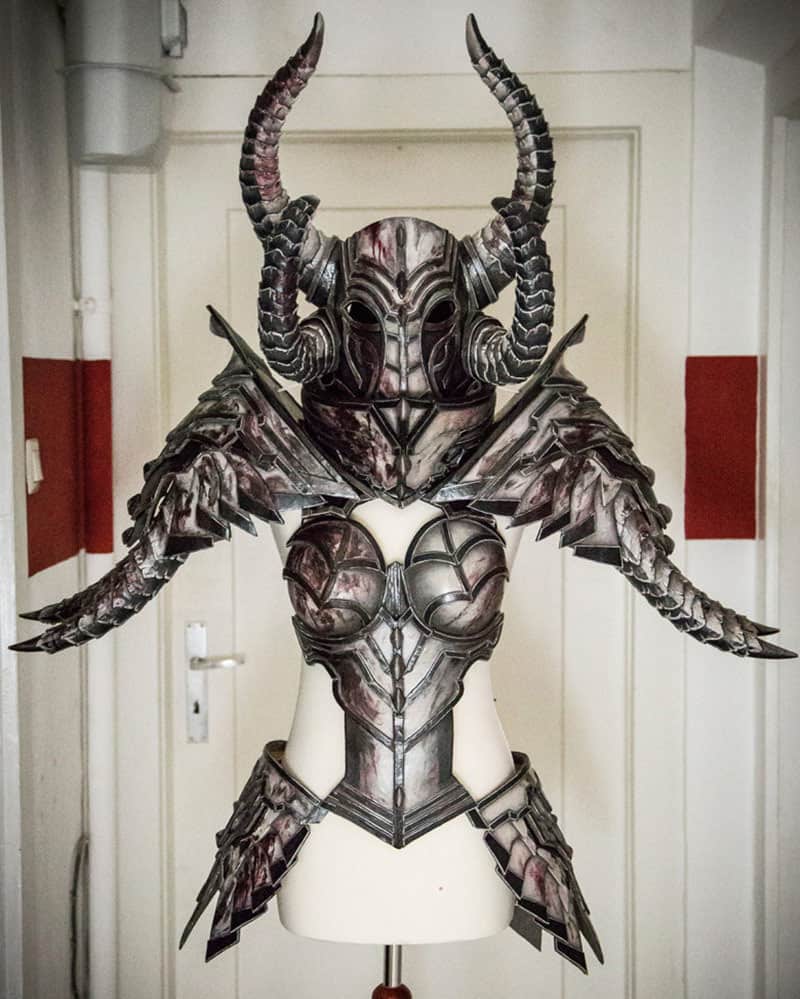
… and the whole, crazy, gigantic rest. 50% of the costume were after three weeks of hard work and far too less sleep done! I’ve adjusted the whole armor already before on my dressform, took photos for my Facebook page, but it was still very excting for me to see this project in it’s full 50 % progress glory adjusted again. As an artist I’m mostly very critically with my own work, but the Crusader was actually the first project I really hyped for. The massive amount of work done in just three weeks in combination with the freedom I had during this time made me really proud and happy and I was super excited to finish this project. Despite of that I was forced to pause it at this point: My book was waiting for me and the clock was ticking!
Soooo… my book! Despite of I was really tired after the Crusader, I still had to collect my last brain cells for a new tutorial collection for Katsucon. I’ll rush a little bit at this point since I guess it’s pretty boring to explain how I wrote this or that. Instead of here is the result: 48 pages in full color, written in English about different priming materials and painting materials, techniques, textures and effects. A lot of stuff which luckely got a lot of great feedback and made me really happy. :)
Like always you’ll find the digital version for 5$ and the print version for 20$ in my shop. Just follow this link!
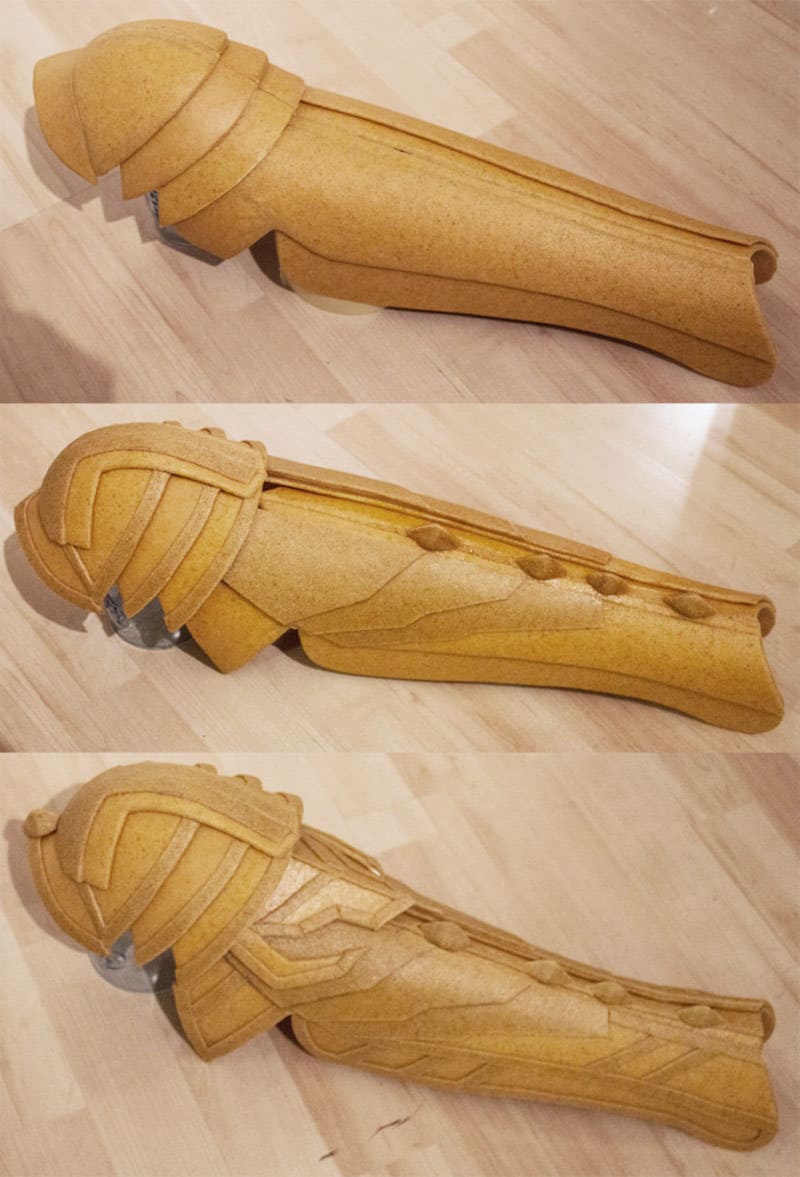
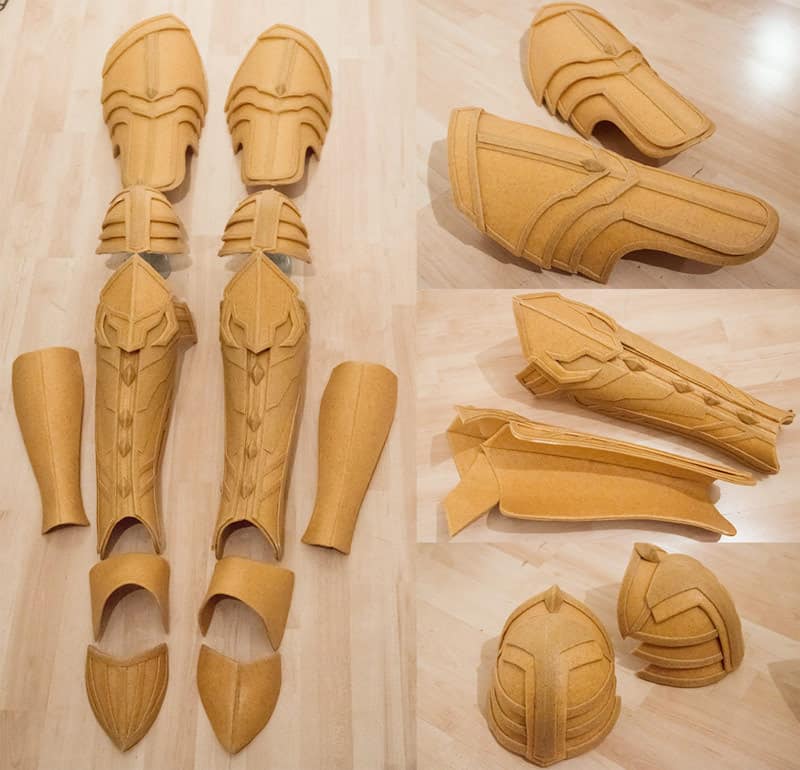
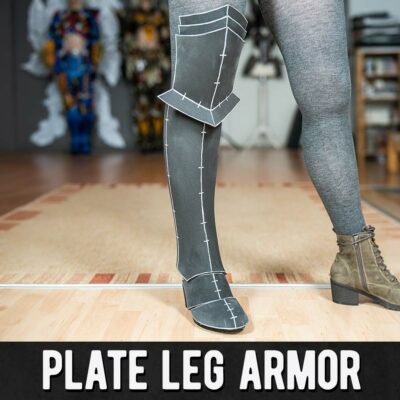
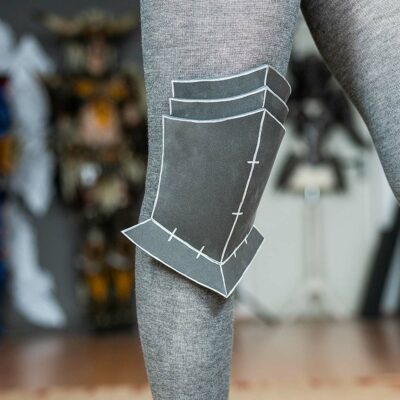
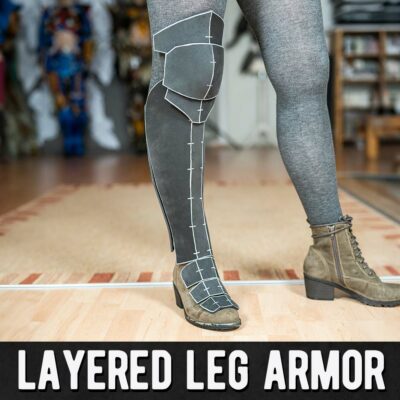
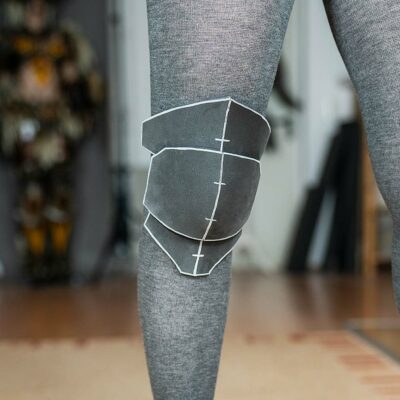
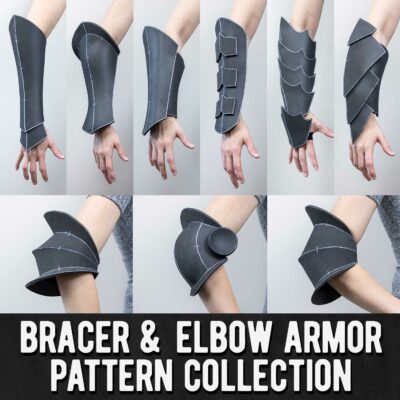
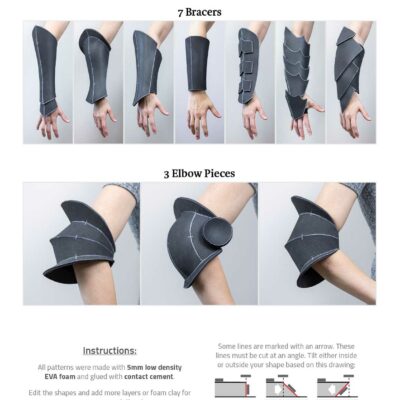
And now back to work! Time passed a little bit and I finally found some time for the Crusader again. Since projects which I actually can wear and bring to convention had priority my little walking fortress became a fun costume I came back to in my freetime. Since cosplay is now my full time job, it became almost like a hobby for me. A project in my dark corner, always patiently waiting for me once I have some minutes left. So, sadly the time was not enough to finish the project, but it I’ve added a lot of progress on the whole bottom part. Right now I’ve finished the shin and knee armor, but I’m not really satisfied with the upper leg armor and guess I have to change some things. I also already started with the painting work and bracers, but everything is still in progress and will maybe keep beeing in this status until I finish the project hopefully at the end of 2014.
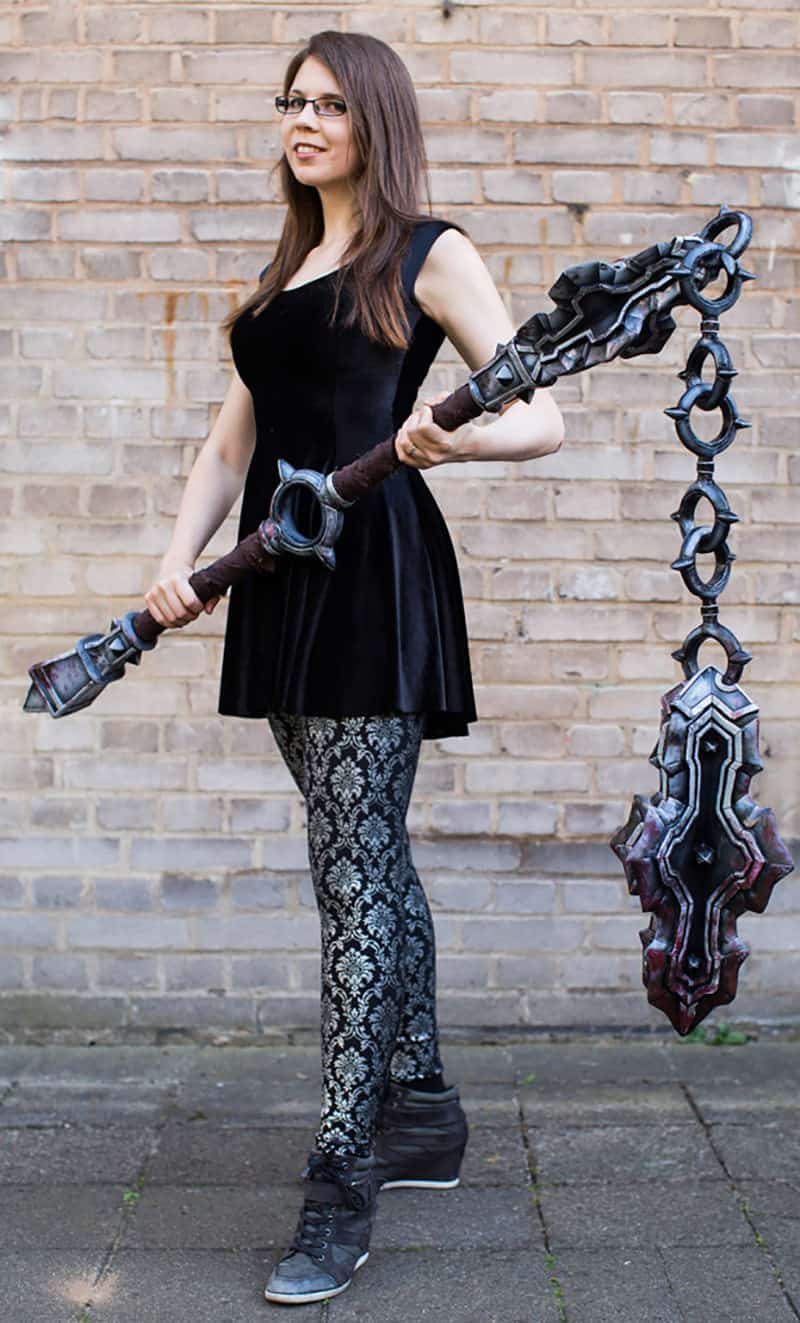
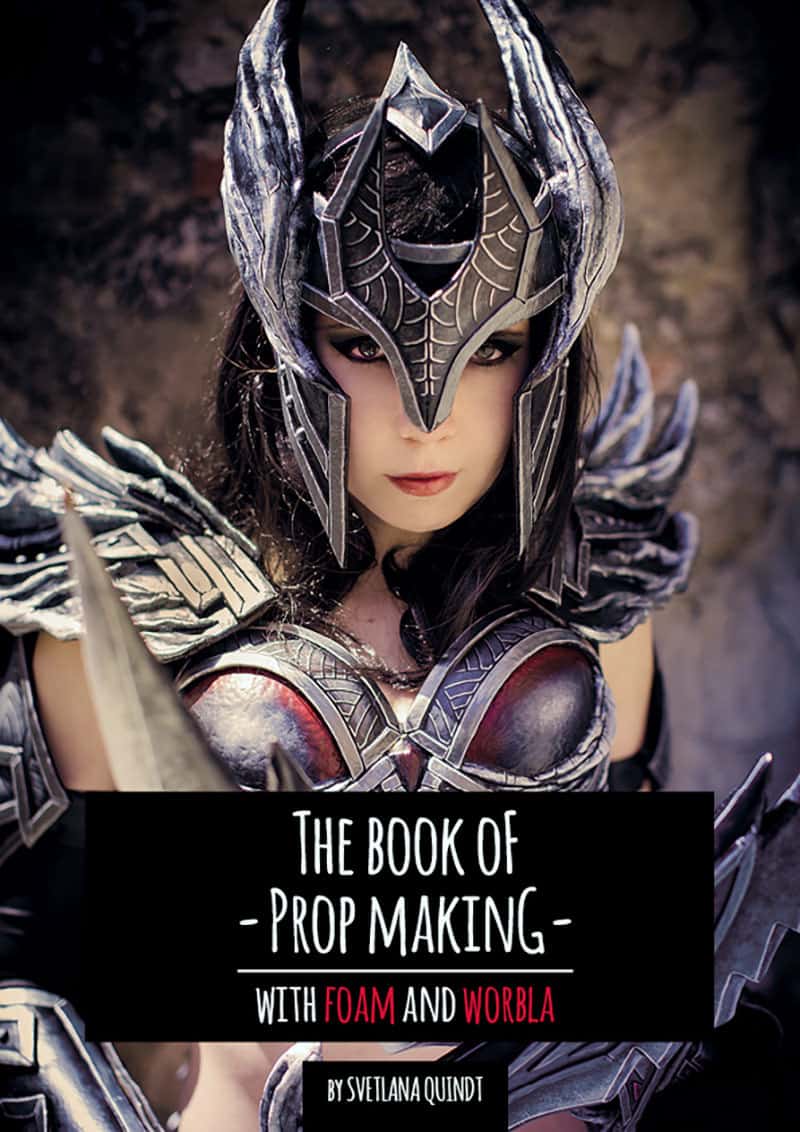
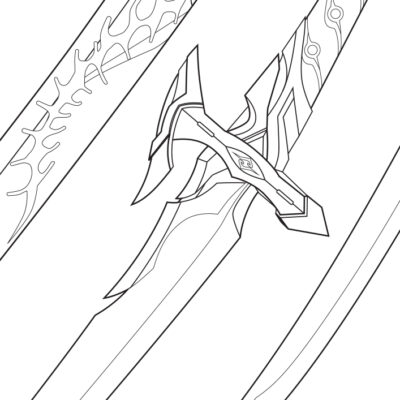
But: I further book – The Book of Prop Making – was the perfect reason to give my Crusader finally a weapon. Nothing tiny, nothing comfortable, nothing suitcase ready. I wanted to go big! After a long discussion with my followers on Facebook I honestly had NO idea if I should go with a 2-hand flail or an sword in combination with a shield. Both looked pretty badass and my final decision was just to do both! Since the final however was more interesting for my book, I picked up this baby at first and started with the first steps.
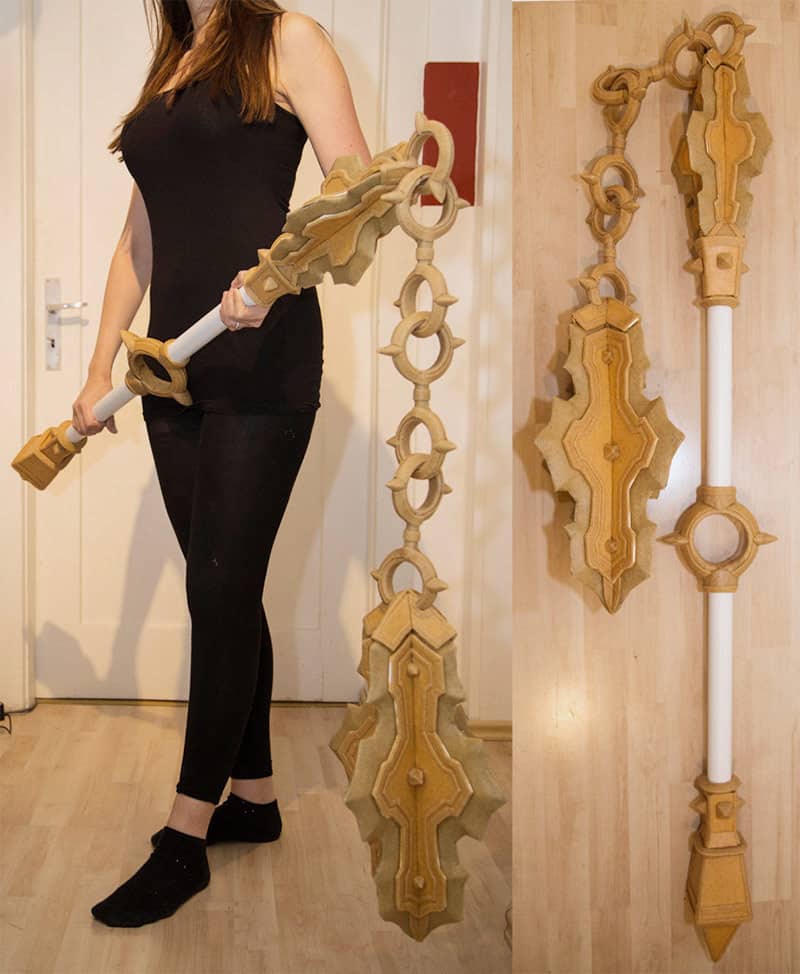
Again I won’t describe that much since the step by step progress was made for my new Prop Making Book, but I can tell that I’ve just started with a pattern I’ve created from a screenshot of the flail ingame. A paper dummy is just not a great help to get the shape and form you need, but it also gives you an idea of the final size of the prop you want to build. Despite of I scaled the meassurements of the printed dummy already to my own bodyshape, I noticed pretty fast that it was still too huge and reduced 20% of the orginal size. This doesn’t mean I wanted a smaller prop, but it just fitted much better to my shape and felt just better in my hands.
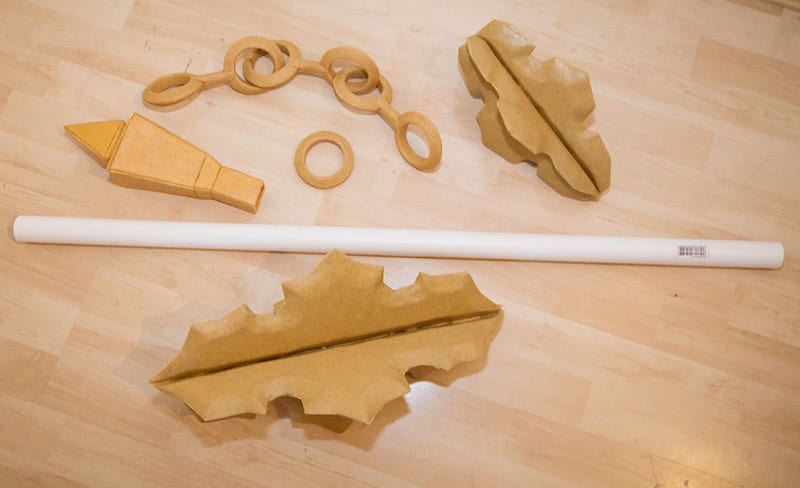
So with some EVA foam sheet and some rolls of Worbla I’ve started with my work. As you can see, the base of the flail was just a PVC pipe since it’s more lightweight than a wooden staff I usually used for my projects. And it was really important to keep the build as lightweight as possible because of it’s final size.
As you can see the whole construction was held together by chain completely made out of Worbla. In it’s sheet foam it maybe looks thin and breakable, but once you create such a thick strukture out of it it’s almost impossible to destoroy it without any use of heat. In fact it was no problem to swing the flail around and I’m pretty sure I could use this monster as a real weapon. The only problem was how soft the material still is. So while the chains rubbed under the massive weight of the cub against each other primer and paint can easly crack of. Since I would the prop only for a photo-shoot I didn’t cared that much about this problem, but I’ll try to find a better solution once it comes to a similar problem.
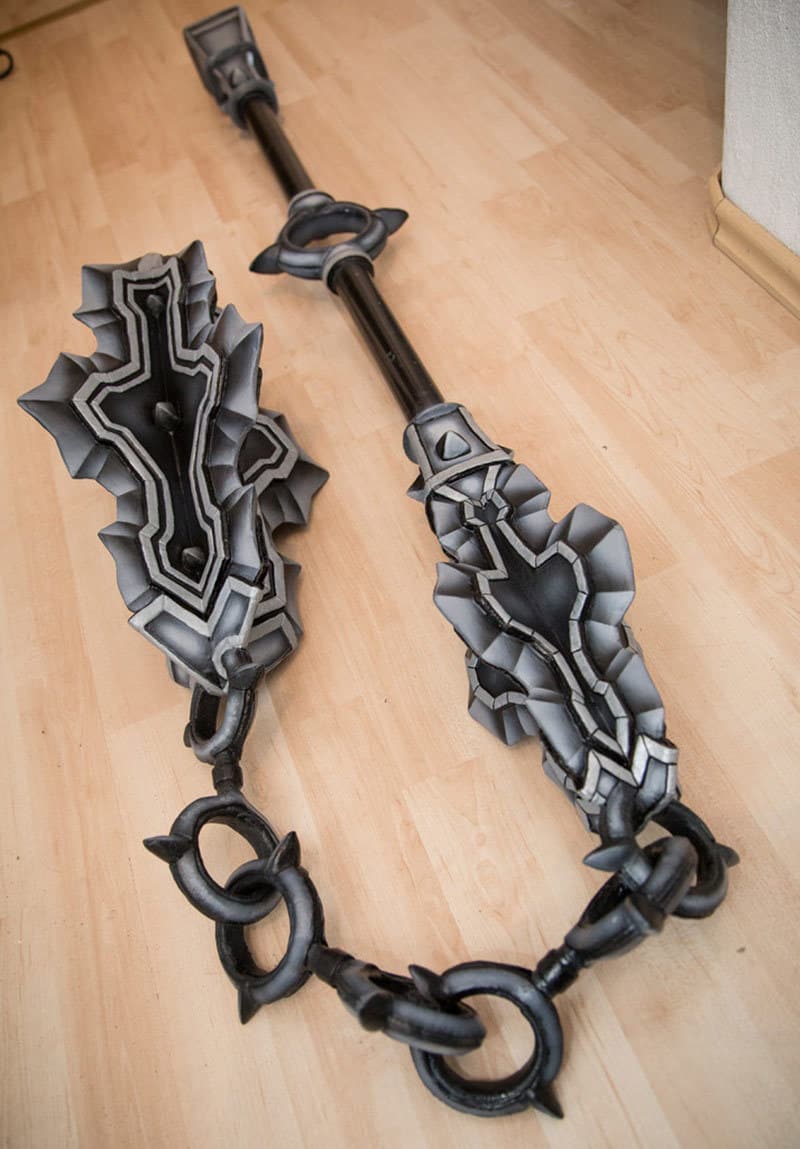
Since I had a pretty tight schedule during this project I had to rush a little bit (for three weeks I’ve planned five props, a new armor costume and a my third book!), which let Benni experiment with an airbrushing technique. The result was great and he saved a lot of time for the basic paint, but the flail itself was still just so huge that it cost him three days to finish the complete paint job.
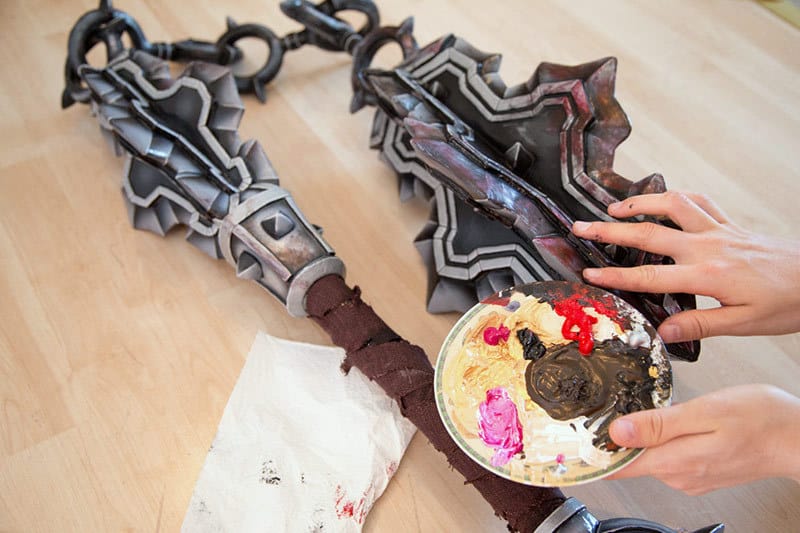
And at the end I had again some fun while Benni just cried by a look at my “finishing work”, ha ha.
Well, but I just loved the final result. Sadly my Crusader is still not done, which is the reason why I had to post without any armor with the flail, but I at at least tried to match it’s colors with my outfit. So after all the work you’ve just read about the whole costume is at around 80 % done. The whole buttom part is already in progress, but still need some touch ups. I also completely missing all armor parts for my arms and a bloodsoaked undersuit to be covered up. In addition I strongly thinkg about adding a shield, but honestly the flail is already so heavy that it’s just impossible for me to carry it on only one hand. Or better: It’s just pretty exhausting to carry such an inbalanced weapon with all it’s weight on one side. I clearly forgot to add some additional weights at the end of the prop.
So… Crusader almost done, fail done and my brand new Prop Making Book was done done! This were clearly some pretty good weeks and it was finally time to get some rest, ha ha!
Wow, this was a pretty long post, but it was clearly time to catch this story up. The Crusader was and is still a crazy adventure for me and I hope to show you the last steps of the costume soon. However I still have several other projects running which you hopefully enjoy to read about next time. Again thanks for reading and I hope this post and maybe my books inspires you for your own armor and prop constructions in the future!





Your work is incredible! I just found this via google image search while trying to recall the name of a foam I used for a Skyrim costume. I am humbled by your skills, but I am glad to learn of Worbla. I can already see how it will improve my next costuming attempts by a lot. Anyway, beautiful job on this!
Oh my fucking god!!! This is really really awesome O.O
Svetlana, you never cease to amaze me. You’re incredibly talented (and your soulmate Benni too). Thanks for sharing your talent with us and being so humble and open with all your followers. I really admire you and I aspire one day to create beautiful things like you (I already got your e-books to help with that!). I’m really thankful for your work bringing our favorite characters to life. Blessings for all of you. /hug