
Cosplay is an awesome hobby but sometimes newcomers are intimidated because they think all the materials are really expensive.
While Worbla is a great solution to create armor and props with, this time I would like to talk about the super affordable alternative EVA foam. It’s cheap, widely available and just as fun to work with!
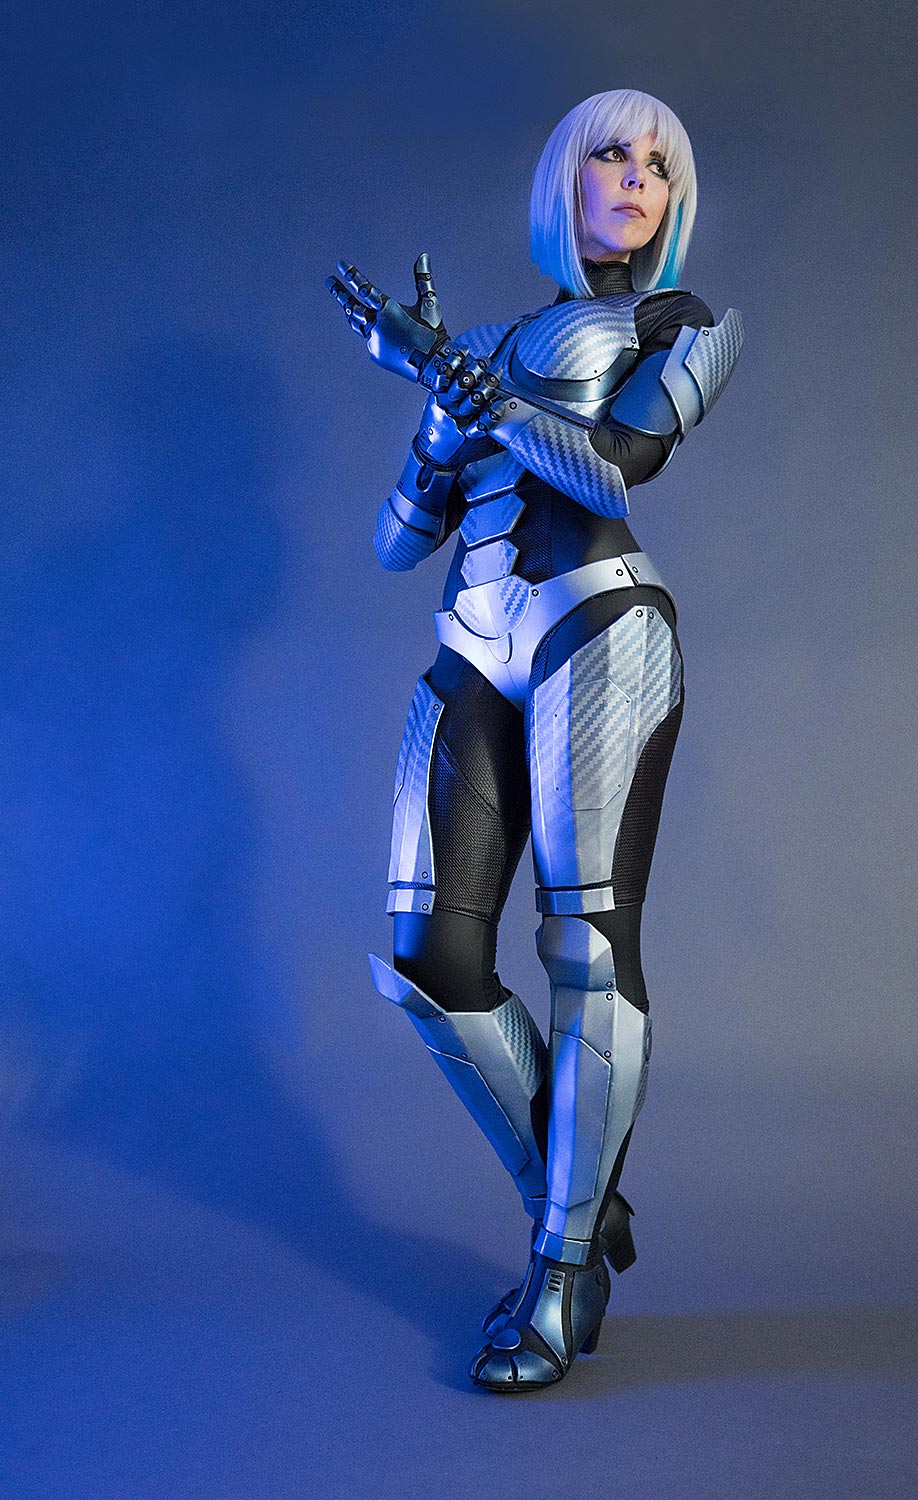
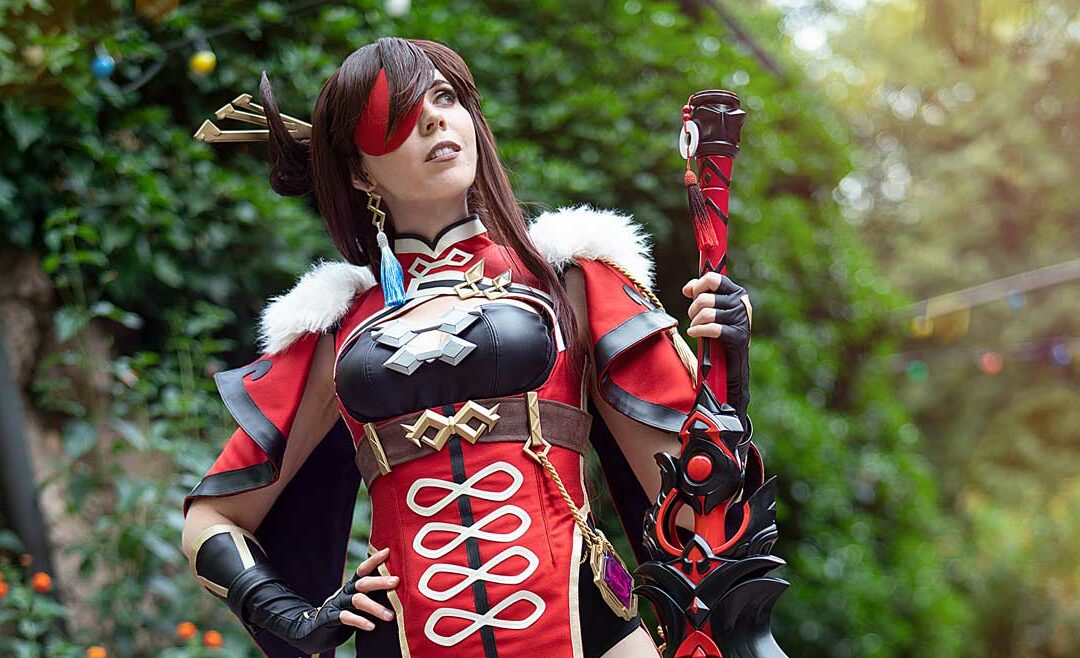
You might have noticed that many of my costumes in the past where made mostly with the brown thermoplastic Worbla. I got a little bit bored with it after a while though and switched to EVA foam, which gives me not only new challenges but also forces me to learn new techniques! So one of my latest projects was the Erazer Girl, a commissioned costume for the German computer manufacturer Medion. The whole armor was completely built out of simple EVA foam in different thicknesses and therefore I was able to keep the material costs pretty low.
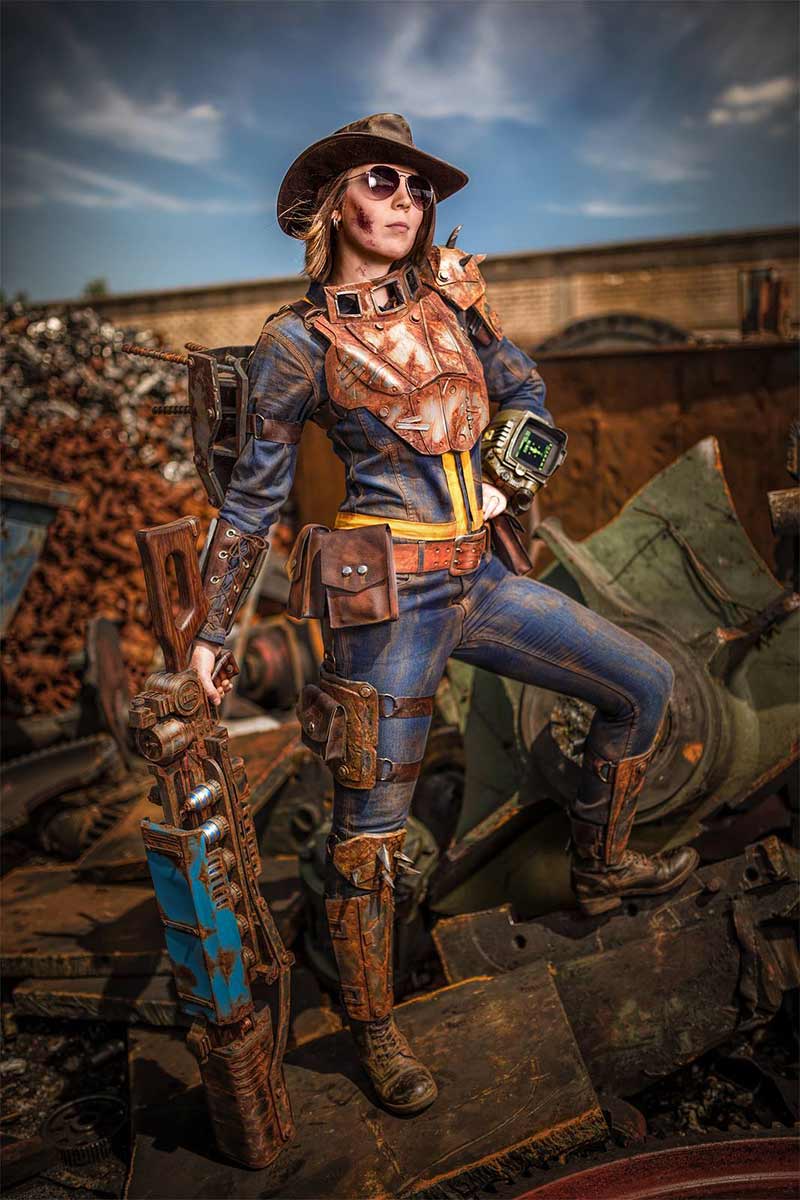
Another project was my Sole Survivor, which was my first full foam built and the first time I applied the rusting technique.
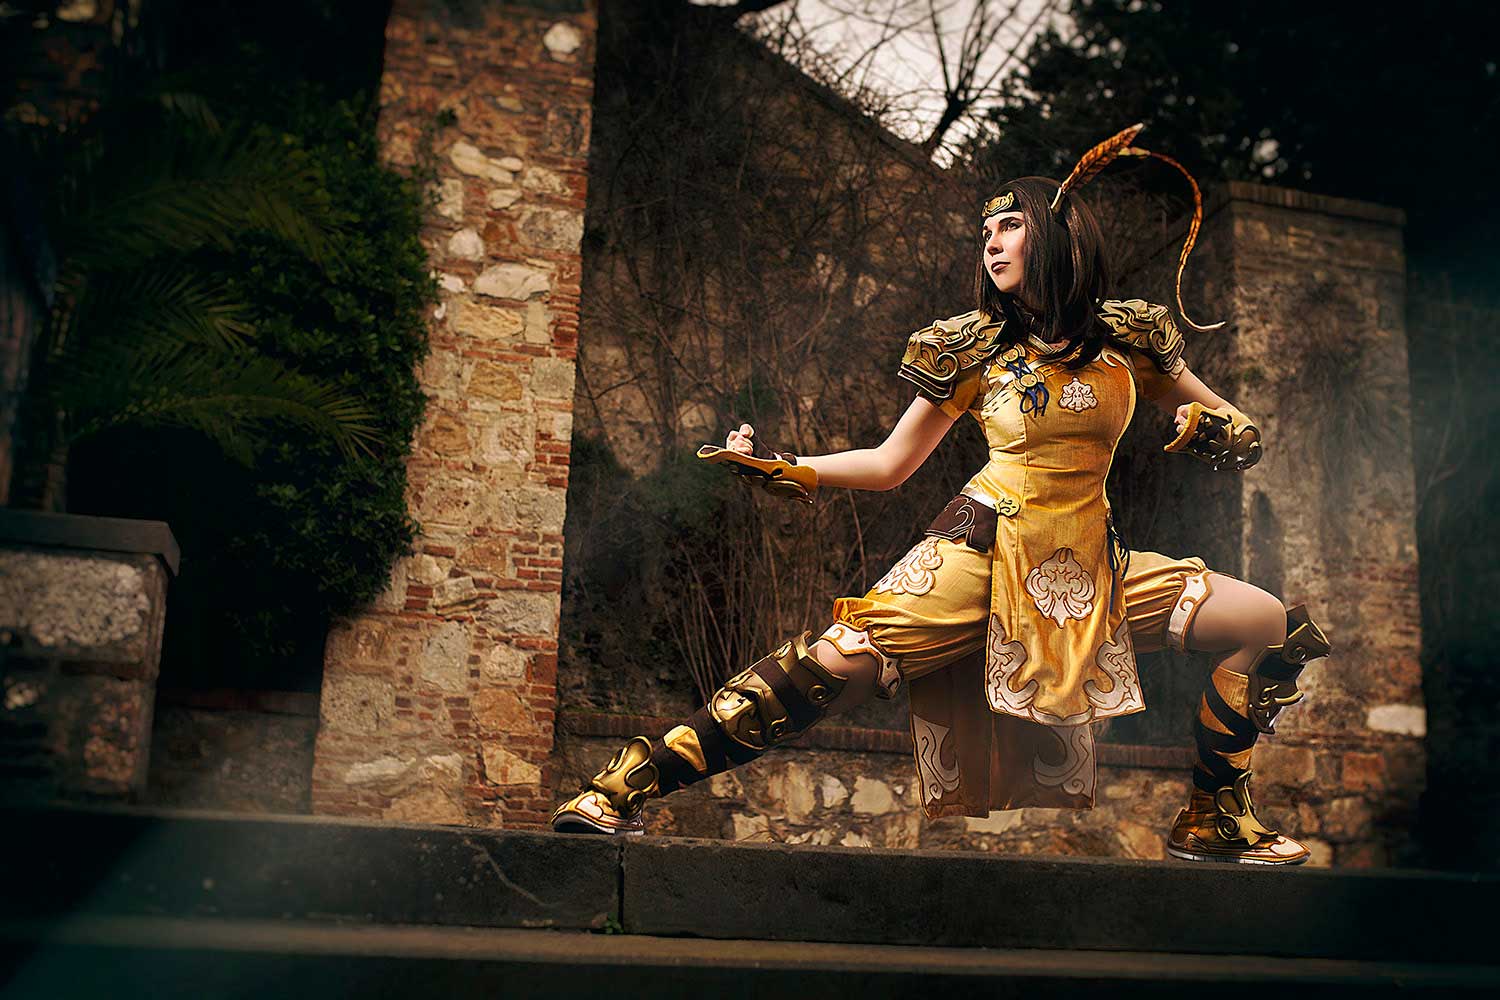
And finally, my Monk from Final Fantasy XIV, which also included EVA foam armor:
I really like how these costumes turned out! Plus: They cost me maybe $50 to $100 in total using mainly EVA foam! My other costumes in comparison were a lot pricer, less comfy to wear and more challenging to transport. So, if you’re searching for a good Worbla alternative to create your costume, let me introduce you to EVA foam!
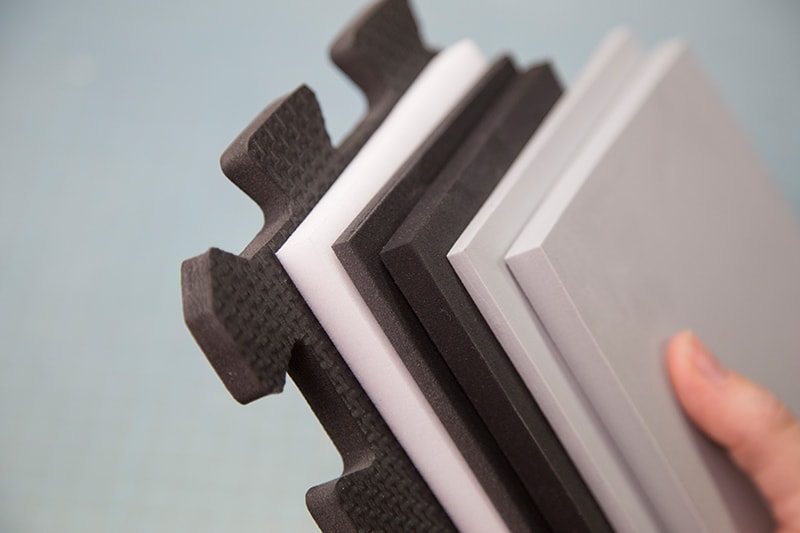
In general, there are a million different kinds of EVA foam in various thicknesses, colours, densities and chemical compositions. The most well known is probably cheap puzzle foam mats, which you can easily find on Amazon. They are around 10mm thick, come in a puzzle shape of 60 x 60 cm (24 x 24 inches) and have a rough texture on one side. They are the cheapest version (6 mats for 23$), but will cost you more time and effort to built something (since you might have to get rid of the texture again).
My personal favourite is high density EVA foam, which you can get get from cosplayshop.be, a crafting shop in Belgium – they also ship the US btw. This material comes in 10, 5, and 2mm sheets, is smooth on both sides and is more durable compared to other EVA foams. It actually costs 60€/65$ for a sheet of 2m x 1m, which is enough for a whole armor costume!. That’s surely more price than the cheap floor mats, but the material already comes smooth on both sides and you have a minimum of waste material since you’ll get a single, very large sheet of foam.
Depending on what you want to build, it also helps a lot to find a foam which actually shrinks by heating it up instead of simply melting. You can see why in the following picture. By cutting lines with a sharp blade and heating it up afterwards, the lines will widen. This is extra helpful for adding details on armor and props. Just order a sample and try this out, then you’re good to go for your upcoming material order! (P.S. If you have foam that melts, the cuts will disappear again when you heat it up!)
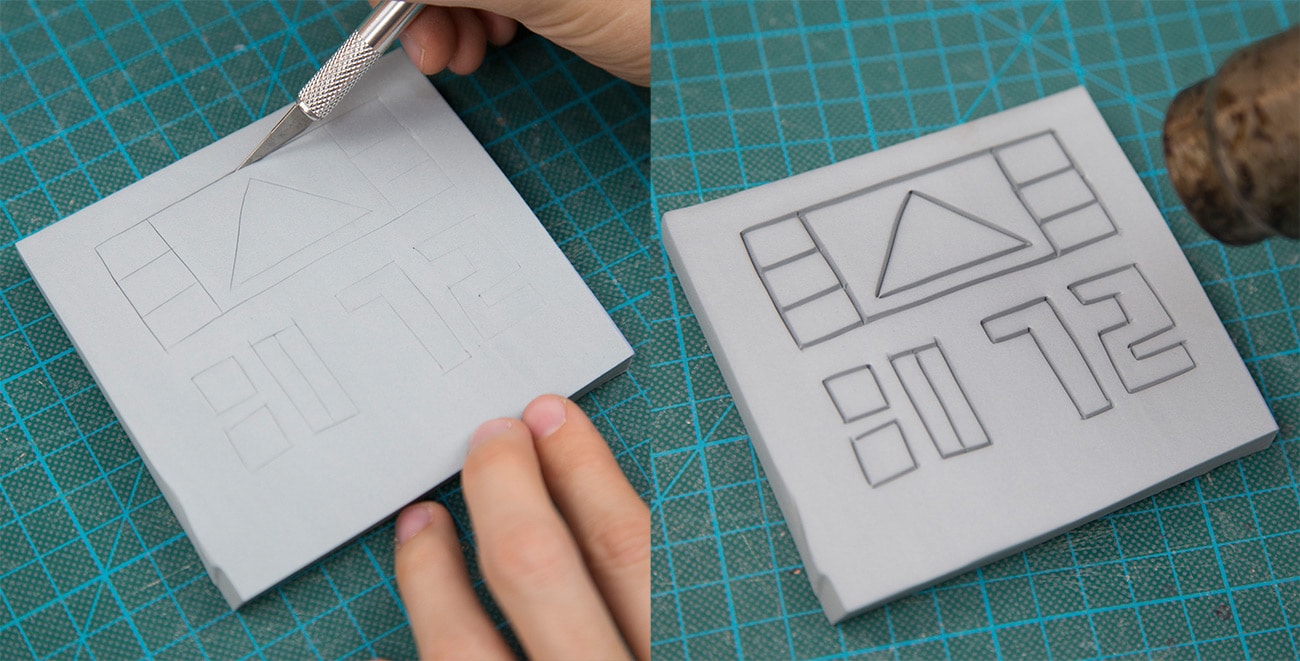
Aside of high density EVA foam, you’ll also often find black mats, which are softer. They are called L200 in the US, Pro Foam S from Craftperium (a crafting shop in Germany) or EVA-PE45kg from cosplayshop.be, all pretty much the same products. This foam is cheaper and melts together under heat, though it’s easier to heat shape and is more lightweight. Just the perfect materials for affordable armor costumes! It’s also the black foam you’ll see in the following pictures.
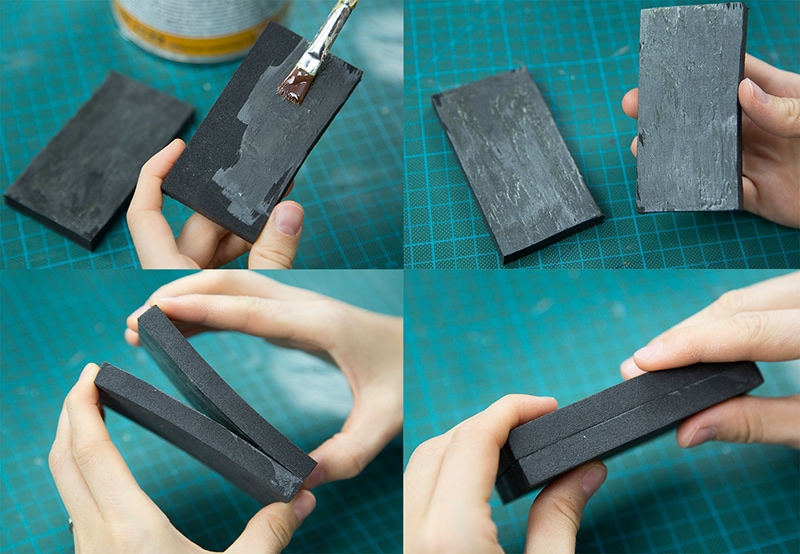
As you can guess, you will also need some glue to connect your foam pieces. Unlike Worbla doesn’t just stick when you heat it up, but needs a strong adhesive to stay in shape. A common solution is contact cement, contact glue, Kraftkleber in Germany or Barge (in the US). I’m personally using contact glue from cosplayshop.be.
Contact cement is basically a very strong adhesive which you have to apply in thin layers to both sides, let it dry properly and then press both parts together afterwards. Depending on the glue, drying might take a while longer. Mine dries actually instantly and allows me to work pretty fast. The bond created here might destroy your foam if you try to rip it apart, so work carefully and think about your next steps.
Additionally you’ll need some tools to work with foam but nothing fancy: A box cutter and an exacto knife, a dremel and a heat gun. That’s pretty much all! And yes, even if you prefer to build your costumes and props as simple and cheap as possible, these are tools you have to get. They are pretty much the basic and I guarantee you, you’ll need them for all your upcoming projects as well. I’m actually also using an flex shaft extension, which allows me to work more precise.
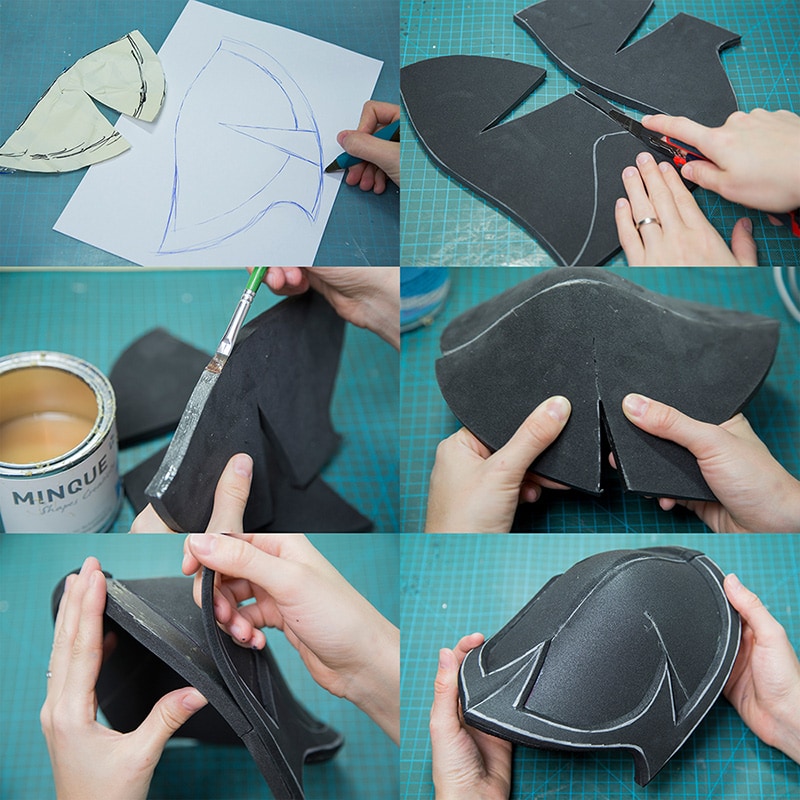
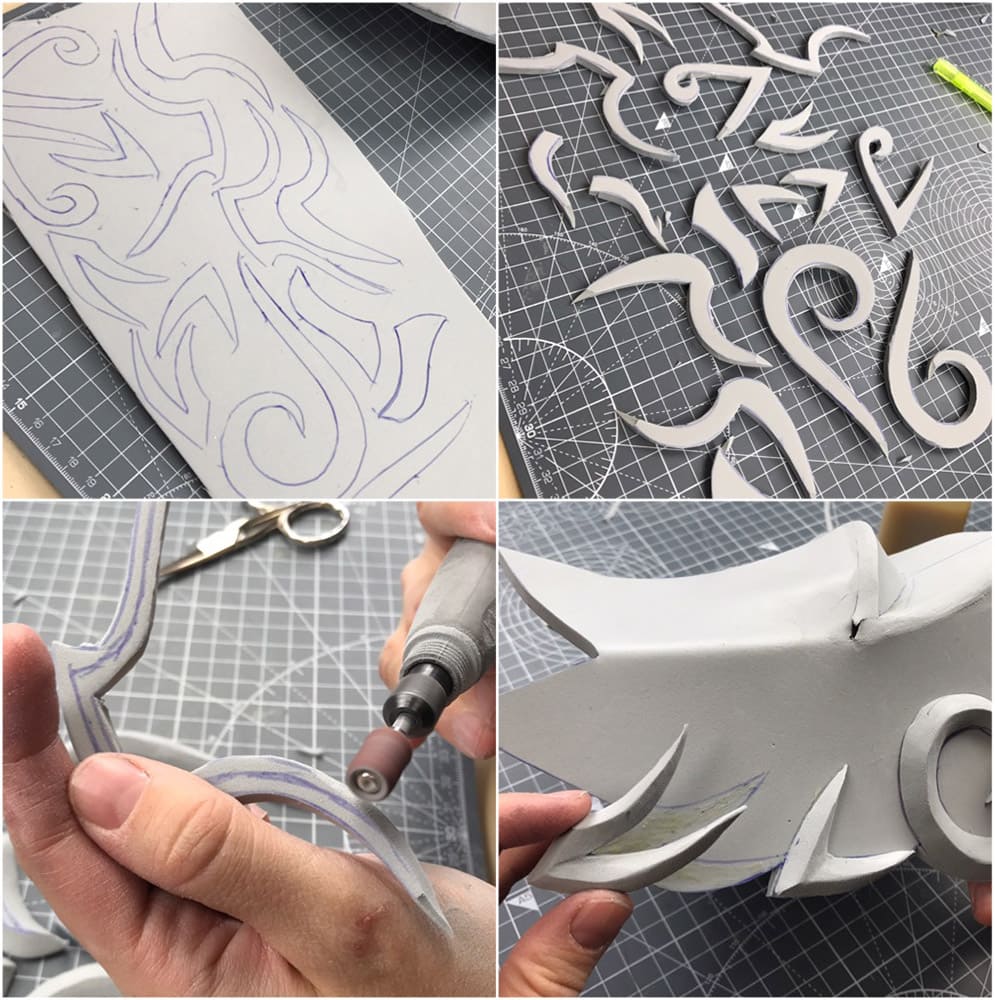
So, wondering now to create an armor piece in general? Well, as always you’ll need a pattern first. I made one for a shoulder armor and adjusted the shape a bit. Afterwards I transferred the template on 10mm black EVA foam, cut it out with my box cutter and covered the edges with contact cement. Once the adhesive was dry enough, I simply pressed both edges together. For a little bit more depth I added an additional layer with a beveled edge and my shoulder was done! Super simple, right???
That’s how I also made the details for the armor of my Monk costume.
Here is also a video of the making of:

By loading the video, you agree to YouTube's privacy policy.
Learn more
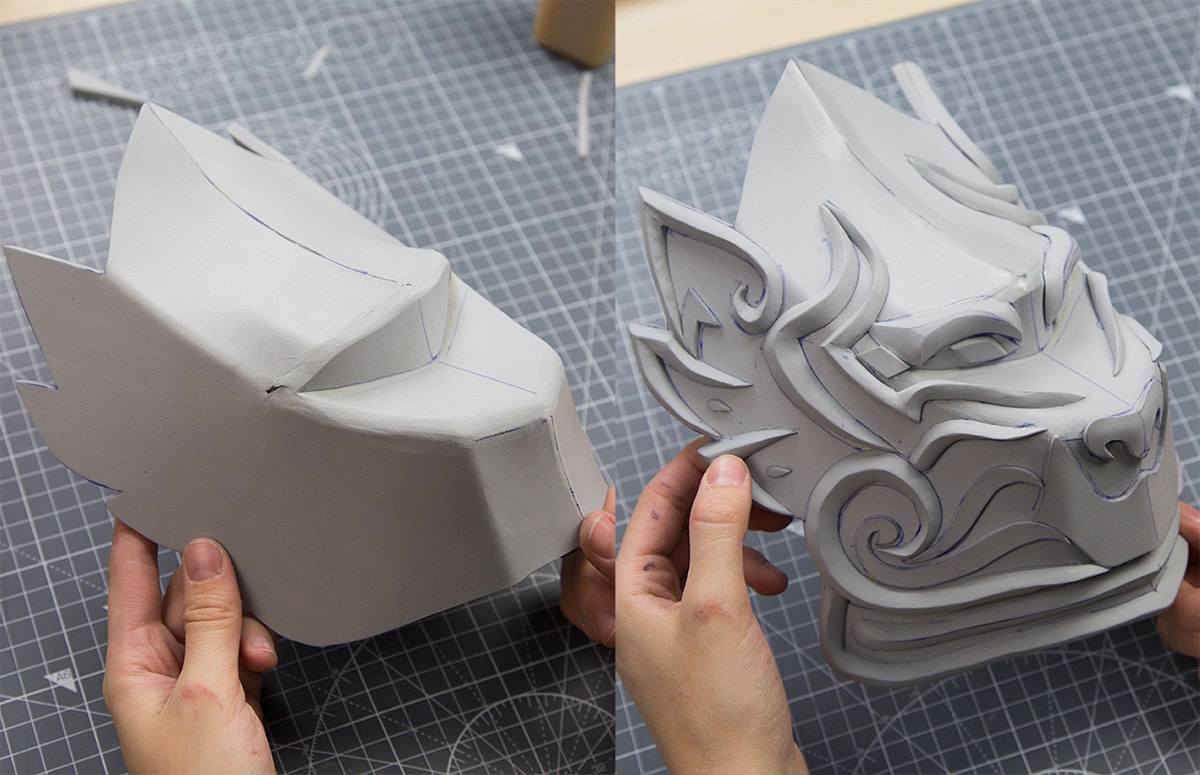
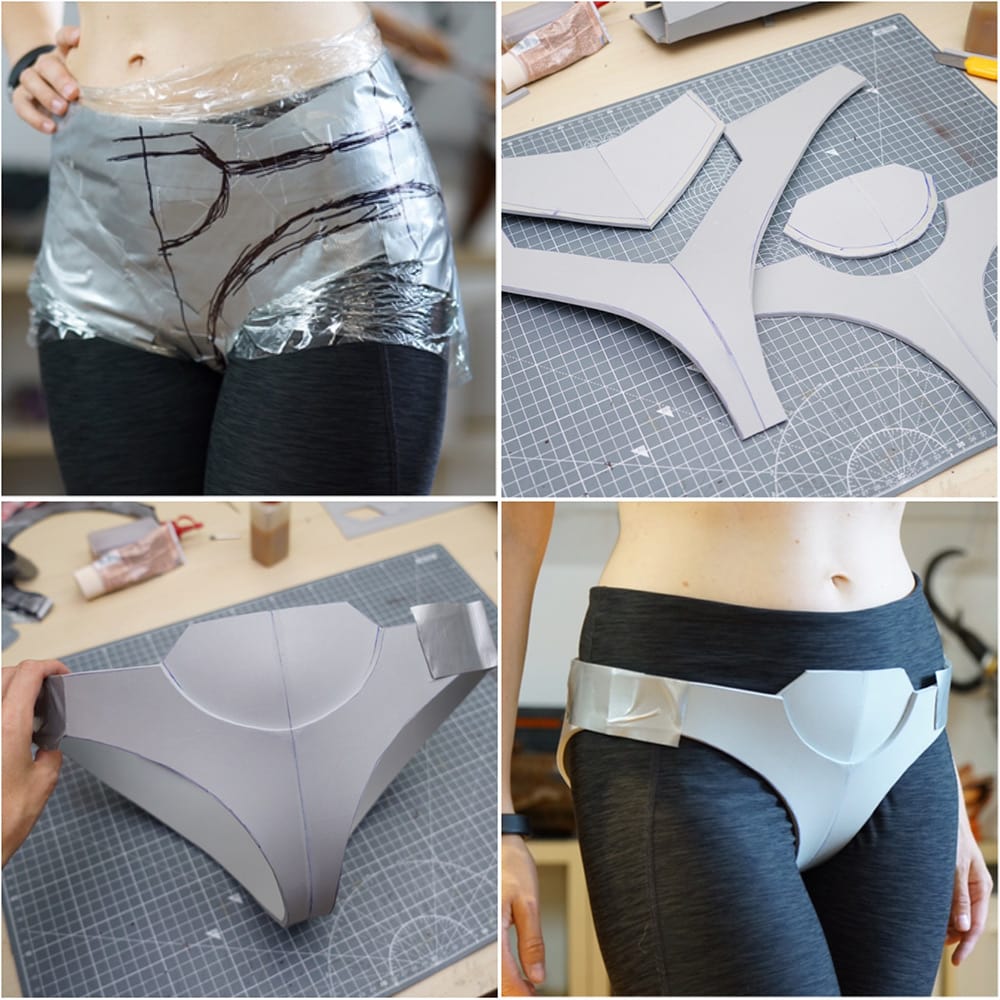
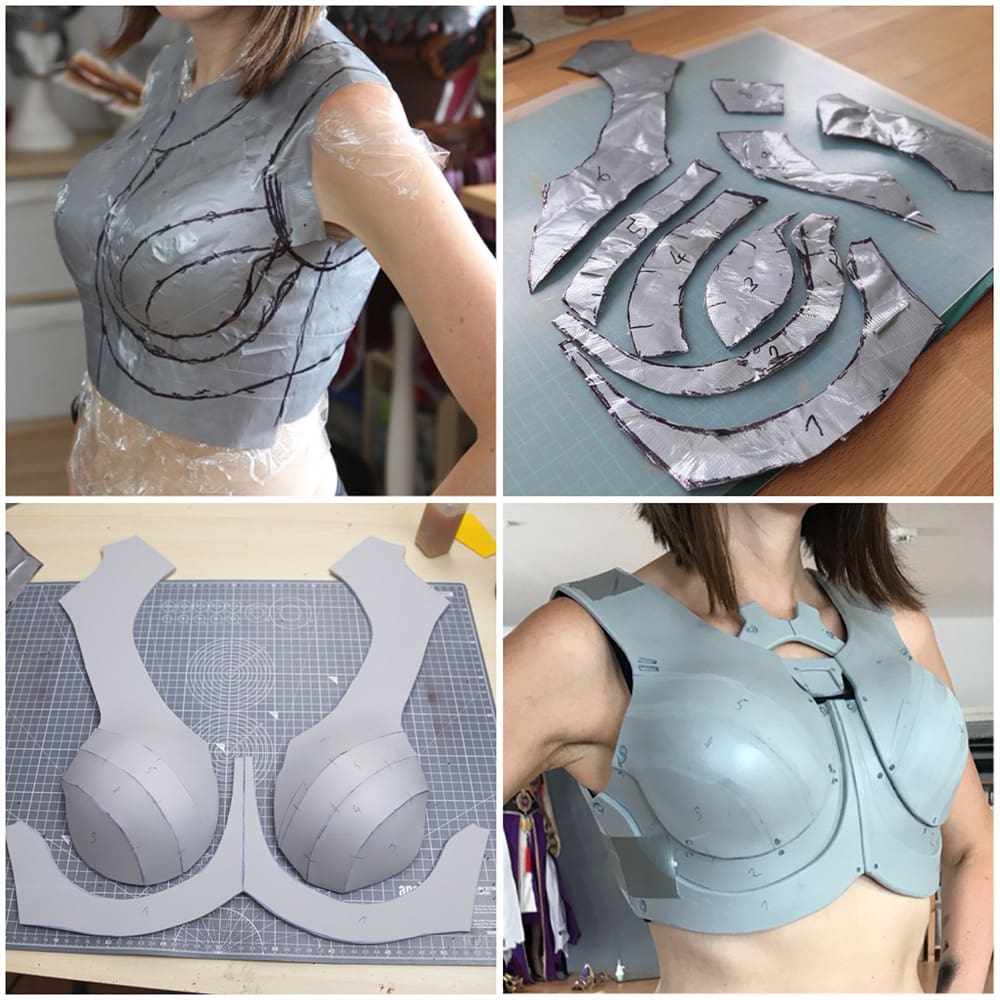
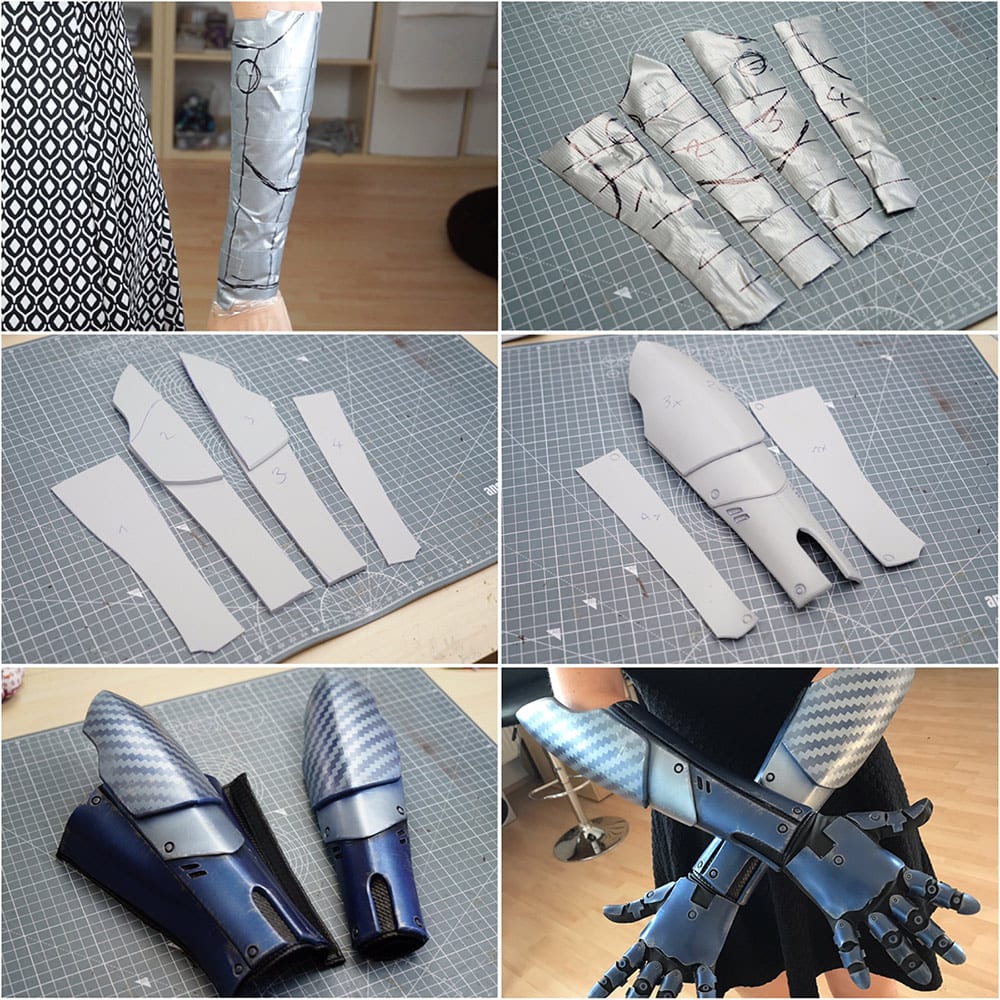
A better example might be the progress of my Erazer Girl. As you see, I always just wrap myself in plastic wrap and duct tape, draw the shapes I need on, cut them out, glue them together and bring them into shape. It’s a pretty simple technique, which you can apply for pretty much every armor piece you want to create.
Here is also a detailed making of video of the costume if you like to see more:
By loading the video, you agree to YouTube's privacy policy.
Learn more
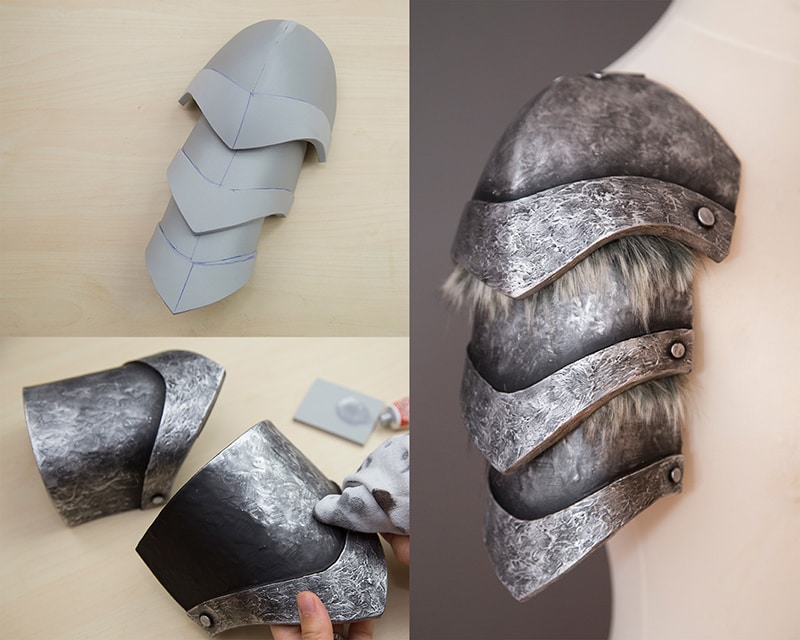
Here is another shoulder piece – this time with a fancy paint job. I simply applied a bumpy texture with some latex and texture paste, painted it black and rubbed it carefully with the wax paint Rub’n’Buff. The result looked just like metal, despite of being simply foam! You’ll find a more detailed tutorial in my latest Advanced Painting book!
You’ll also find some helpful tips and trips regarding to priming. My current favourite is PlastiDip, which is a spray on rubber coming from the car industry. It’s actually toxic and flammable, so you’ll need good ventilation or have to spray outside. I actually built myself a handy spray booth out of an IKEA closet. Additionally you need some practice to get a clean application (Benni always messes this up!) and using this stuff for a whole armor set might be a bit pricy. A can only costs around 8$, but you’ll need around three layers so they do not last very long.
A cheap alternative is latex milk. It’s a natural product, can be brushed on and is completely non toxic. If you apply it with a brush, you might create little flakes in your priming coat so be careful. If you like to have a super smooth base for your paint job, latex probably isn’t the right solution for you unless you spray it on with a critter gun.
Something I really like is actually Flexbond, which seems to be a mix of latex and white glue. It’s works basically like simple white glue, though it dries out flexible. This means your paint won’t chip of anymore and you don’t need to worry about cracks in your armor. Clearly a good alternative if you don’t like latex or Plasti Dip. You’ll get Flexbond in Europe from cosplayshop.be and in the US and Canada from cosplaysupplies.com.
I actually uploaded a video comparing different primers for EVA foam:
By loading the video, you agree to YouTube's privacy policy.
Learn more
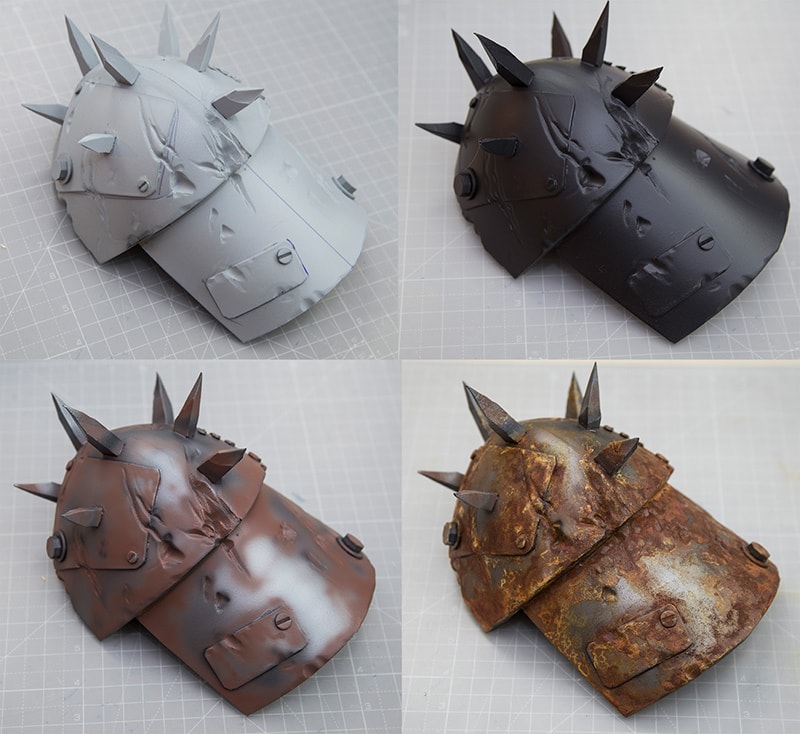
Oh, and this is an armor piece I made out of high density EVA foam and primed with Plasti Dip. Wondering about the cool rusty paint job? Check out my Advanced Painting Book for a detailed tutorial!
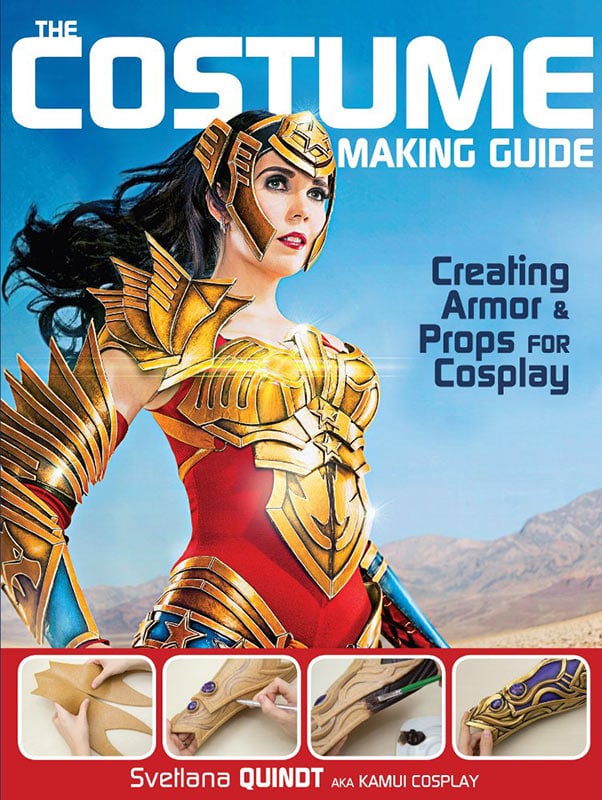
If you want to get more into costume and prop making, check out my brand new Costume Making Guide, which introduces you to cosplay in general and shows you how to work with EVA foam AND Worbla. It teaches you all kinds of different techniques to shape, prime, and paint your costumes and props! It’s the first ‘official’ book I released with an US publisher, so I’m quite proud of it! Check it out on Amazon!
Well, back to the topic…
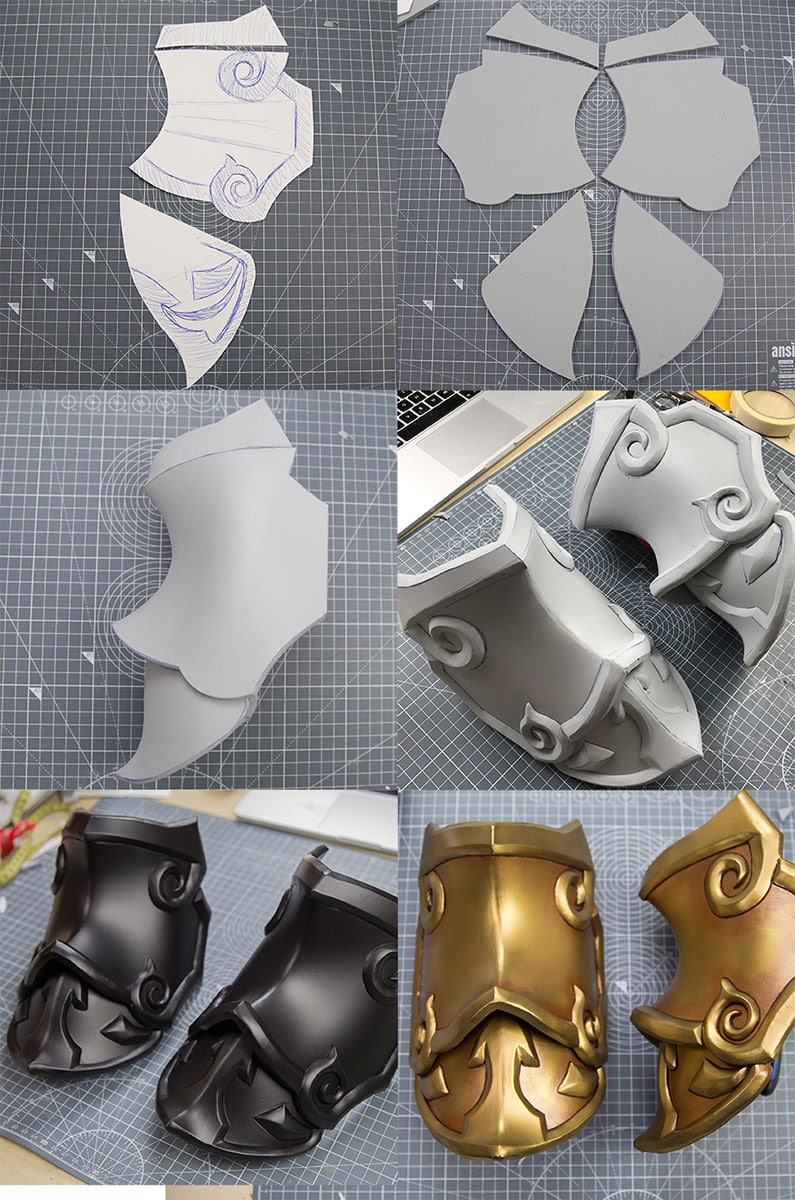
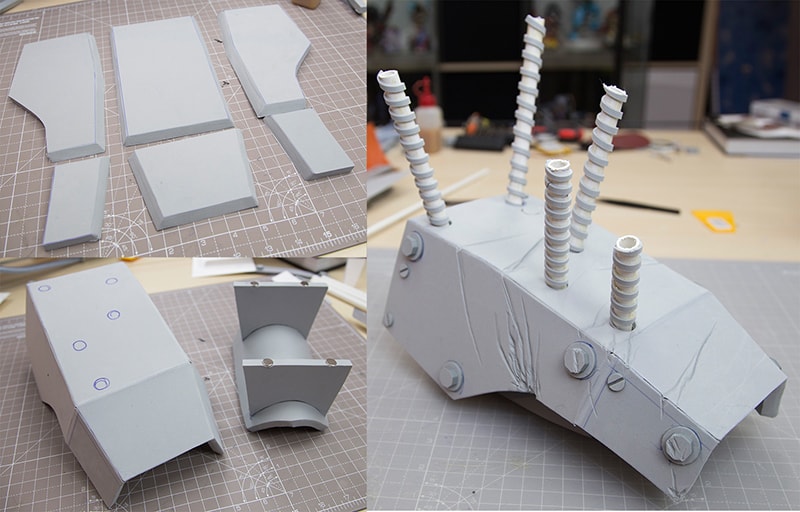
Another shoulder armor (everybody needs shoulders protection!). The shape is completely different, though the pattern is still super simple. I used my dremel to sand down the edges into the right angle and connected all pieces with contact cement. The “metal rods” were just PVC pipes wrapped with 2mm stripes of EVA foam. For an used and realistic look, I also added some battle damage with my dremel on top.
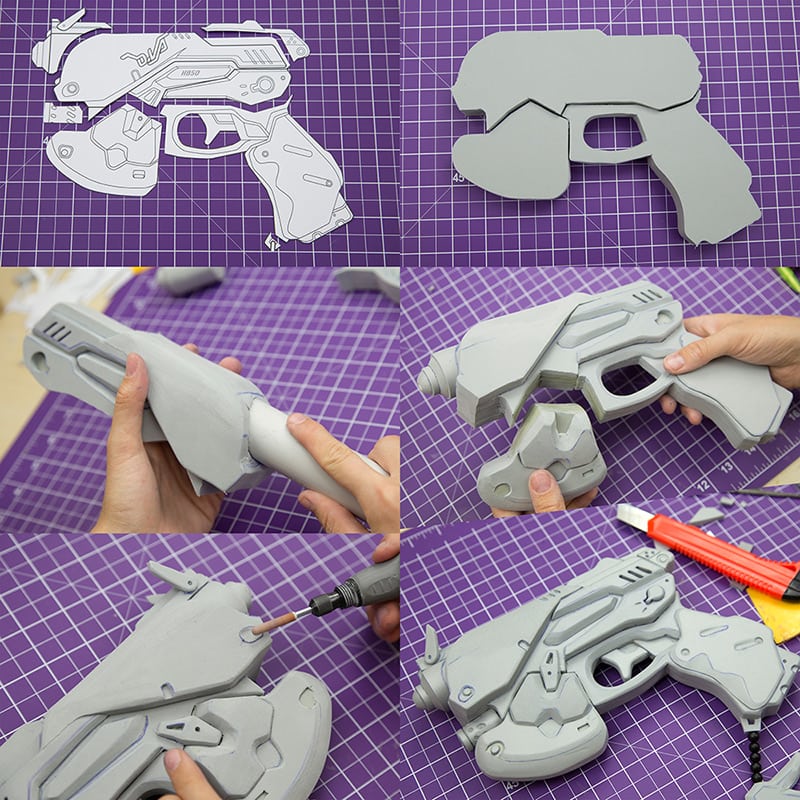
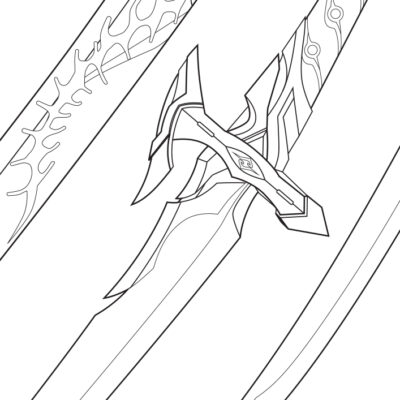
And here is a little step by step guide of my D.Va gun from Overwatch. You can also download the blueprint here if you want to build it yourself! :)
By loading the video, you agree to YouTube's privacy policy.
Learn more
Do you want to learn more about EVA foam guns? I already wrote a book on this topic: Advanced Prop Making – Guns and Rifles.
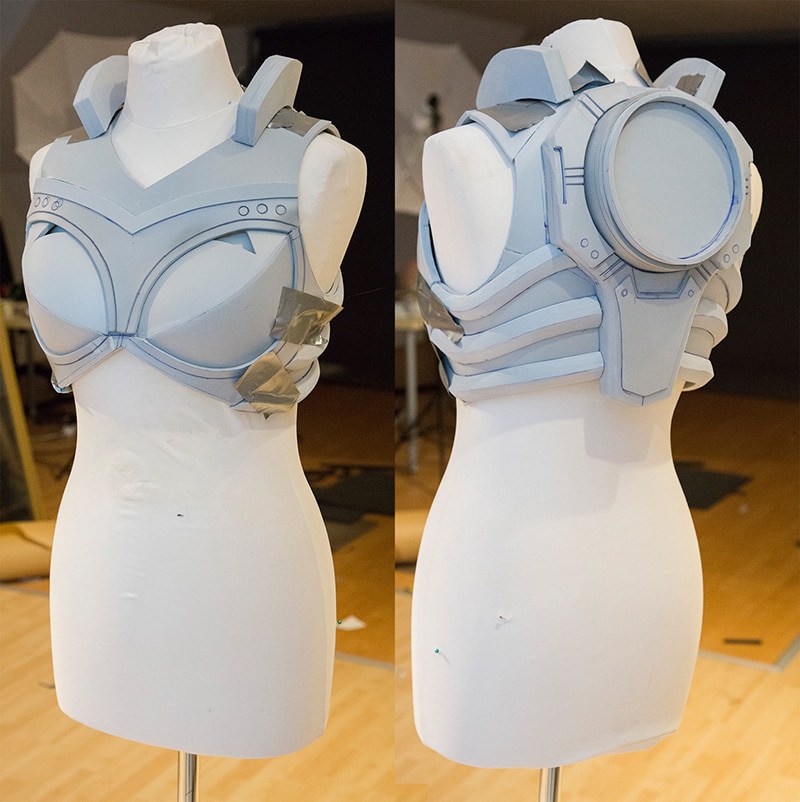
And last but not least, here is an EVA foam breastplate from my still unfinished Nova costume from Heroes of the Storm.
As you can see, it’s quite simple, but takes some patience and time. Planning a costume or prop ahead is always helpful as well. That’s why I always prepare patterns and Benni draws blueprints for me. EVA foam is a great material, though you don’t just snip with your fingers and your costume is done. Same goes for Worbla though. Both materials have their advantages and disadvantages, but I hope this posts shows you that some skill and time is enough to create something awesome even with a tight budget.
So, no need to worry! Instead get up and start crafting! :)


Anyway we can see your spray booth made from IKEA? Would LOVE to see how you built it since I am needing to build something myself.
Also what body suits are you wearing?
Is the foam + Plasti-Dip/Flexbond method noticeably bendier than Worbla-sandwiched foam? I’m planning to make the Helm’s Deep elf armor from LOTR, mostly from foam to save money, but wondered if Worbla would better suit the pauldrons and hip armor. The pauldrons, because they stand away from the body and I want them to be sturdy, and the hip armor because it consists of a lot of long, thin, curved lames (strips). Is that a valid concern? I’ve never worked with either foam or Worbla so thought I’d get some advice. Thanks for these tutorials! I used to only daydream about wearing this armor, but when I read your book (The Costume Making Guide) I realized I could make it myself!
Yes, EVA foam is soft and flexible, while Worbla is stiff, hard and heavy. Worbla is also more beginner friendly, but it takes you more effort to transport it and attach it to your body. EVA foam holds fine with velcro or even magnets, but it’s hard to build something really thin and keep it look good. I would really recommend you just to order some samples and see which material you like more. :)
Hello Guys!
Great videos, and adding the real rust is a super touch!! I’m interested in the machine you use to laser cut your foam/wood pieces. I’d love to start building costumes and props and this machine seems like a huge help. Could you share what kind of machine it is and a ballpark cost? Thanks!
I was just getting ready to ask this question. Really interested in a laser printer that can do this sort of thing.
It’s a Full Spectrum laser, which we had to import from the US a few years ago. The taxes and shipping were insane, but back then it was really hard to get something similar in Europe. Now it should be clearly easier and as far as I know there are similar machines available from retailers in the UK for example.
how can i get d.v.a blueprints and where do you get eva foam
Just google Overwatch dva Eva foam templates and Eva foam can be purchased ranging from walmart in varying sections depending on your walmart to hardware stores such as lowes or menards usually in carpeting
Hallo Ihr Zwei Lieben :3
habt ihr auch ein Tutorial für Stiefel mit den Eva-Platten ?
Wow this is amazing! $100-$150 for the entire costume is insane! The final product looks Hollywood level. Hope to learn more for your articles to come! I am also starting a blog for tips but I am not anywhere close to this level….yet! lol check it out sometime. https://www.magicangeleyes.com/blog/
Can’t seem to join the blog…looking for any costume advice / templates for foam Armor for example (Viking / medieval related ideas)
Hello Benni and Svetlana.
Thanks for sharing your wisdom with the cosplay community. It is very inspiring that people with experience will share knowledge with those who are new to cosplay and crafting. Keep spreading the word!
-Dante
This is amazing, thank you so much! Does wood glue/pva glue work well as a primer, too?
Super helpful, especially the links! But could you maybe add how you attach the pieces to your body? With Worbla I simply use your method to attach D-rings with some more Worbla, but that doesn’t work here. Do you glue them on?
Thank you very much! Looking forward to add the Lighting 2 book to my collection! ^_^
The female armor u have here. I need something like it but for male. Any blueprints
Take a look at this: https://www.kamuicosplay.com/product/malearmorpattern/
EVA Schaum wirkt zwar ganz gut um solche Sachen zu machen, aber ist es auch so formbar wie Worbla? Also kann man es so leicht biegen, z.B: ein langes langes Rechteck, das der Länge nach einfach gebogen wird (und dann wie ein U aussieht) ohne es woanders zu befestigen?
Hey Claus!
EVA Schaum kannst du auch biegen wenn du ihn vorher erhitzt. Das Material ist jedoch ein wenig weicher, weshalb es auch leichter wieder in die ursprüngliche Form zu biegen ist. Eine zusätzliche Befestigung kann also nie schaden! :)
This is so useful, thank you! A little heads up though that your “Dremel” link leads to the Barge contact cement instead, that aside though, keep up the great work!
Thank you so much for sharing this!! As a broke student cosplayer, this really helps! Also have your e-books; they’re wonderful! :) Your talent it mind-blowing <3
Your work is amazing! And you make it sound so simple…..which means I am prolly gonna have to give this foam thing a go this coming year. Thanks for the inspiration and keep on.
Can your patterns be used for leather also?
Patterns are patterns and can be used for any material you wish :)